Content
- 1 How to grow phalaenopsis from seeds at home?
- 2 Preparation of the culture medium
- 3 Sterilization
- 4 How to plant?
- 5 Seedling care
- 6 Seeds from China: Potential Problems
- 7 Useful video
- 8 Conclusion
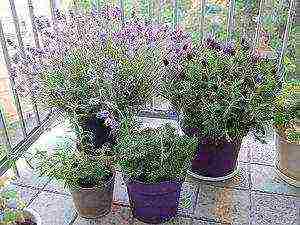
- 9 Fragile flowers
- 10 Home laboratory for the production of orchids
- 11 Decent care for rare flowers
- 12 General information
- 13 What can grow and what it looks like
- 14 Planting orchid seeds (video)
- 15 Growing rules at home
- 16 Consumer reviews
- 17 Tips & Tricks
- 18 How to sow orchid seeds from China (video)
- 19 Reviews and comments
 Orchid propagation by seeds Is not easy for beginners.
It requires special knowledge, certain skills and a lot of patience.
If you have the desire and perseverance, then, in the end, the reward will be the emergence of sprouts of this exotic plant, and after a few years, their extraordinary flowering.
How to grow phalaenopsis from seeds at home?
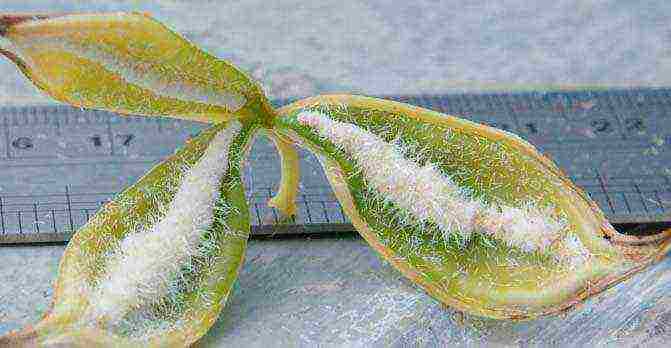
Phalaenopsis seeds extremely small and more like dust.
Under natural conditions, they have a very low germination rate, therefore, the plant forms up to a million seeds per season.
All of them are practically deprived of spare nutrients.
For the embryo to begin to develop, it is necessary fungus infestationforming mycorrhiza.
He grows inside the embryo and provides the seedling with water and essential minerals.

Phalaenopsis seeds are extremely small and more like dust.
For a long time, this was an obstacle to artificial cultivation orchids from seeds.
The problem was resolved only after the development of the composition of the mineral nutrient medium with sucrose by the American biologist L. Knudson, on which it was for the first time possible germinate orchid seeds.
This method became a revolution in breeding phalaenopsis and the creation of numerous hybrid forms that are now widely available in stores.
Possible difficulties
Reproduction of phalaenopsis at home a rather complicated and time-consuming process:
- Seeds are highly susceptible to infection by microbial diseases;
- For storage, and then planting, sterile conditions are necessary, which are quite difficult to achieve in an apartment;
- The formation of seedlings in an artificial environment lasts at least 9 months.
Attention! Strict adherence to the rules of sterilization and sowing technology is the basis for the successful cultivation of orchids from seeds at home.
In order to sow orchid seeds, first carry out preparatory work.
Preparation of utensils, related tools and reagents
Before starting work, you should prepare dishes and related equipment: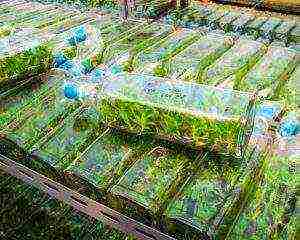
- Test tubes or 100-gram glass flasks, which can be replaced with 100-gram jars with sealed lids;
- Cotton gauze plugs;
- Test tube rack if you decide to use test tubes;
- Litmus test;
- Hydrogen peroxide, 2%;
- Sterile syringe or microbiological pipette.
If for work you have chosen on jars with screw caps, then in them you should make a hole, in which you need to insert a small piece of glass tube.
A piece of cotton is placed in it, then air can pass inside the jar, and cotton wool will trap dust and bacteria.
Preparation of the culture medium
For cultivation of phalaenopsis from seeds use agar Knudson medium or modified Cherevchenko medium.
They can buy in the store or cook it yourself if the necessary components are available.
From the ready-mix
In addition to the necessary salts and sugar, the recipe for ready-made mixtures includes agar-agar - a polysaccharide that obtained from seaweed.
It is better to prepare such mixtures in distilled water, strictly following the instructions.
After that you can pour into dishes and sterilize.
Independent
This requires purchase componentsincluded in the recipe for one of the nutrient media:
Knudson culture medium (g / l):
- Calcium nitrate - 1.0;
- Ammonium sulfate - 0.50;
- Potassium monophosphate - 0.25;
- Magnesium sulfate - 0.25;
- Iron sulfate - 0.025;
- Manganese sulfate - 0.0075;
- Sucrose 20.0;
- Agar - 15.0.
Modified culture medium Cherevchenko, (g / l):
- Calcium nitrate - 1.0;
- Potassium monophosphate - 0.25;
- Magnesium sulfate - 0.25;
- Ammonium sulfate - 0.50;
- Iron chelate - 0.05;
- Sodium humate - 0.05;
- Activated carbon - 1.0;
- Sucrose - 20.0;
- Agar - 10.0.
Prepare nutritional mixtures following the sequence of actions:
- Environment components alternate in a small amount of distilled (boiled and settled) water. Mix everything thoroughly, bring the volume to 1 liter;
- PH is measured with litmus paper (acidity) of the resulting solution. It should be at the level of 4.9-5.9 (maximum allowable pH 6.5);
- If the solution turned out to be very acidic (below 4.9), into it add a few drops of alkali (NaOH or KOH) or a pinch of baking soda;
- When the pH of the solution is above 6.5 add a few drops of citric, acetic or hydrochloric acid;

Adding acids to the solution.
- PH control of the medium carried out after each acidity adjustment;
- In a warm nutrient medium, litmus test shows underestimated pH values;
- Into the finished solution add the required amount of agar, left to stand to swell, then heated in a water bath until completely dissolved.
The culture medium should be dispensed into a prepared container with a layer of about 2-3 cm and close with a tightly rolled cotton plug with a gauze cover or a lid with a glass tube. Now she ready for sterilization.
Sterilization
For sterilization of dishes, culture medium and household utensils, the following is most suitable:
- Double boiler;
- Oven with temperature regulator.
The pipette is tightly wrapped in paper. The closed containers with the spilled medium are installed in an upright position.
If it's a pressure cooker, to the bottom lay a special lattice.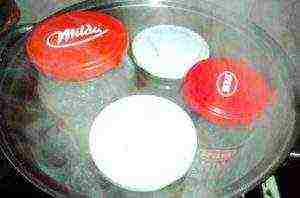
Sterilization time at 120 ℃ - 45 min.
Taking into account the warming up of the double boiler or oven, it increase by another 15-20 minutes.
Thus, the total duration sterilization must be at least 60 minutes.
After that, the nutrient medium cooled to room temperature.
Important! Chilled formula should not be solid or very liquid. In its consistency, it should resemble jelly.
If the density of the culture medium does not meet the recommendations, adjust the pH value and re-sterilize the medium.
How to plant?
In order to avoid infection, all manipulations are carried out extremely quickly over the steam.
To do this, put a wide pot of boiling water on the fire. It is better to fix the grate above it, on which you can put the dishes.
Just before sowing the surface of the seeds is sterilized:
- They are transferred to an empty sterile tube or jar., closed with a stopper, add a small amount of 2% hydrogen peroxide with a pipette, close with a stopper, incubate for 5-10 minutes;
Seed selection.
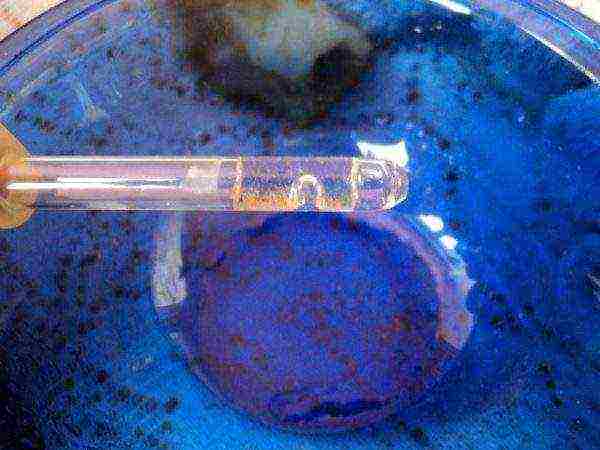
- With a sterile pipette or syringe take seeds together with the liquid and try to evenly distribute over the surface of the nutrient medium;
- Shake the flask gently for even distribution of seeds.
Within 7 days on the surface of the agar medium colonies of microorganisms can form.
If this did not happen, then the planting with seeds was successful.
Seedling care
Vessels with seeds are placed in diffused light at a temperature of 20-23 ℃. Daylight hours should last at least 12 hours.
Depending on the type of orchid, the time germination can range from 4-5 weeks to 7-9 months:
- From seed first small green balls with rhizoids are formed - threadlike outgrowths, due to which phalaenopsis sticks to the surface and absorbs water with dissolved minerals;
- Over time, the seedling the first leaves are formed, and then -real roots.
After 10-12 months, young plants are transplanted into sterilized (steamed) soil, which includes crushed coniferous bark, sphagnum moss, fern rhizomes in a ratio of 1: 1: 1.
Crushed activated carbon is added to the mixture (10 tablets per liter of soil):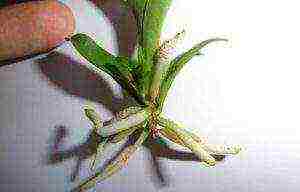
- Plastic cups fill with drainage material, then the prepared substrate;
- Sprouts carefully, in a circular motion, removed from the container and washed the roots... In another way, a little water is poured into the container, then it is poured along with the seedlings into a wide vessel. Add 0.5% Fundazole solution (2 ml), incubate for 10 minutes, then carefully extract seedlings with a brush;
- The planted plants are not watered. They must be regularly sprayed with soft water at room temperature. The substrate must always remain moist;
- Six months later a young plant is transplanted in standard orchid soil.
If you overcome all difficulties, growing phalaenopsis from seed, then this exotic plant will delight you at home for many years.
Seeds from China: Potential Problems
Usually, orchid seeds obtained through an online store from China.
In this case, a number of difficulties may arise:
- Absence instructions with the translation into Russian;
- Expiry date of seeds is not specified (seeds remain viable throughout the year);
- Orchid variety not specified;
- Poor seed germination.

Orchid seeds obtained from China.
Advice! It is better to put the orchid on a window on the east or west side of the apartment so as not to burn the leaves from direct sunlight. If it grows in the back of the room, the plant will need additional lighting.
Useful video
In the video, grower tips on how to grow phalaenopsis from seeds:
Video recipe for preparing a nutrient medium for sowing phalaenopsis orchid seeds:
Video tips for caring for seedlings:
Watch the video, Phalaenopsis orchid seeds from China:
Conclusion
Compared to other indoor plants growing phalaenopsis from seeds is much more difficult.
However, this experience will give new impressions, and self-grown flower will bring a lot of joy.

Phalaenopsis (lat. Phalaenopsis) growing from seeds is not easy enough. But still, there is a certain method, following which you can achieve success. As for the maturation of phalaenopsis seeds, in most cases, in order to obtain mature bolls, other peduncles should not be allowed to develop on the plant. Phalaenopsis boxes ripen for about 120 days, so it can be assumed that you are faced with the problem of a large number of peduncles on a plant.
There are many different techniques for growing phalaenopsis from seed, but they all boil down to two main steps. This is the preparation, sterilization and filling of the nutrient medium, as well as disinfection and sowing of seeds. There are several recommended recipes for phalaenopsis culture media.
An environment consisting of:
- 500 ml of distilled water,
- 5 g sugar
- 5 g honey
- 100 g starch
- 30 g banana puree,
- fertilizers for orchids (the dose is indicated on the package)
- 1 tablet of activated charcoal, powdered.
It is convenient to use cans from solutions for droppers, which are closed with a rubber lid.To do this, use a funnel with a long spout to avoid getting the medium on the walls of the can. The specified amount of medium is sufficient for 5 cans. After mixing the medium, it is necessary to equalize the pH level in it to 4.8-5.2 using indicator paper. To increase the pH value, you can add a soda solution to the medium drop by drop, and lemon juice to lower it. Then the mixture must be heated on the stove, stirring constantly, and brought to the state of liquid sour cream. Pour the medium hot. Pour 100 ml of the medium at the bottom of each jar, then close them with corks and wrap with tape in height. The medium in jars should be sterilized in a water bath. Bring water in a saucepan to a boil and stand for 30 minutes, then leave for a day and repeat the operation.
Before sowing seeds, they must be disinfected by soaking in an antiseptic solution (10% chlorox or 3% hydrogen peroxide). Then draw the mixture with seeds into a sterile syringe with a long needle and, piercing the rubber cover with tape (which must be wiped with a disinfectant mixture before that), insert a needle into the jar and perform seeding, squeezing out a few drops of the mixture from the syringe. By rotating the jar, the mixture must be evenly distributed throughout the medium. When the seeding is complete, remove the needle, and disinfect the puncture site again and seal it with tape.
Undoubtedly, the cultivation of orchids from seeds will serve as a test for the breeder of these wonderful creatures. It's like taking a skill improvement test: if you grow a strong and healthy flower, it means you are a master of the highest level. It would seem, what could be easier than planting a seed in the ground? The fact is that the land is not used at all.

Fragile flowers
To make the orchid feel at home, it is necessary to recreate a rainforest climate with high humidity and moderate heat. This is difficult, therefore the most undemanding orchids grow in the apartments of Russians. But even hardy phalaenopsis cannot be propagated at home by every grower. First you need to dig up knowledge, practice will begin later.
Advice
Many flower lovers order planting material from China. The photographs should be studied: the real seeds are like a puff of feathers, individually they can only be distinguished using a magnifying glass. If something large flaunts in the image, then at best a lilac iris will grow out of it.
A tiny seed is deprived of a supply of nutrients for the development of the embryo, as nature ordered. She compensated for the low survival rate with several million seeds that ripen in one orchid. A gust of wind blows a dusty cloud through the jungle: some fall to the ground and die, others fall on the vines and get a chance to survive. According to the type of nutrition, plants are classified by botanists as saprophytes - organisms that feed on organic substances that accumulate in the soil.
Home laboratory for the production of orchids
For orchid embryos to start growing, the seeds are placed in an environment with sufficient polysaccharides. For the base, growers always choose a colloidal agar-agar solution that is able to maintain sterility.
To a 1.5% solution add:
- fructose, sucrose, glucose (about 2% of the total weight);
- salts with cations of manganese, iron, potassium, magnesium;
- salts, the anions of which are phosphates, sulfates, nitrates.
Since the embryo does not have a protective layer, the main condition for growing is sterility. Specialty shops sell flasks with ground-in lids - they make excellent seed incubators. You can sterilize the dishes using a pressure cooker, or an autoclave or oven is best. Usually half an hour at 135-140 ° C is enough.
Now you need to sterilize the seeds. A proven 10% calcium hypochlorite solution is commonly used.The planting material is soaked for an hour, shaking occasionally. A grate is placed on a wide saucepan with boiling water, and seeds are prepared on the table next to it.
In order for an orchid to bloom in five years, you need to perform the following manipulations very quickly and without shaking your hands.
- Pick up some seeds with a soft plastic brush.
- Tilt the nutrient solution flask.
- Bringing the brush through the steam, smear it over the jelly-like solution.
- Cap the flask immediately with a stopper.
- Place the flask in a warm, bright place.
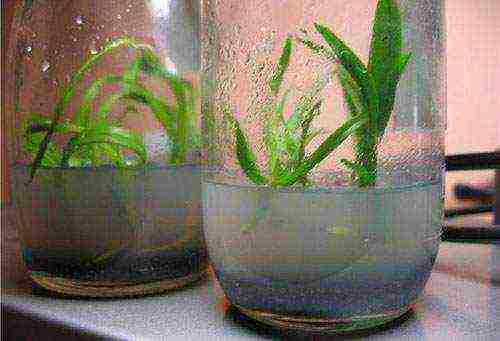
In a couple of weeks, green spots of sprouts will appear on the surface of the transparent nutrient medium. The seedlings will begin to grow, forming roots and leaves. To contemplate this fascinating action at home for several months is a great pleasure.
But now the small orchids have finally taken shape, it's time to plant them for permanent residence. Flower roots respond positively to additional lighting, so a transparent pot is the best option. A mixture of pieces of tree fern, moss and bark is placed on the bottom.
Advice
Gardeners scald pieces of wood with boiling water. Experts advise not to do this - it is time for young orchids to get used to the aggressive environment of the surrounding world, the time comes to acquire immunity.
Distilled water is carefully poured into a vessel with seedlings along the wall and the flask is started to rotate around its axis. Thus, the roots are freed from the adhering substrate. Rubber plugs are put on the ends of the long tweezers and, taking care not to damage the seedlings, place them on the potting mixture. It remains to wait a few years to fully enjoy the flowering.
Decent care for rare flowers
For orchids, daylight hours should last half a day, they are connoisseurs of soft diffused lighting. If the day begins to shorten, fluorescent lamps should be connected. The leaves of the plant are a kind of indicator for measuring the amount of sunlight. If they are green with a soft gloss, the lighting is perfect. Light green, elongated - poor lighting, flowering will not come.
Most of these flowers feel comfortable at home at a temperature of 22-24 ° C. When it rises, you should not worry, you will have to water and spray the plant more often. But a decrease to 14 ° C is already critical, urgent measures must be taken. Watering is strictly prohibited due to the risk of root rot.
It is necessary to water delicate flowers in moderation, it is better to underfill water than to arrange a swamp. After the procedure, it is better to leave the pot to drain in the sink. A couple of times a day, the orchid needs to be moistened with a spray bottle, without affecting the peduncle with buds. Water for irrigation and soft shower should be settled, without a large amount of mineral salts.
Advice
If it turned out to bathe the plant in the late afternoon, then with a dry cloth you need to remove excess moisture from the leaves.
Orchids are indifferent to fertilizers. If the substrate is not two years old, then the amount of minerals will be enough. But if a decision is made to feed, then fertilizers should be exclusively for representatives of the Orchid family. It is worth making feeding no more than 1-2 times a month.
They fall in love with an orchid at first sight. The plant is quite dangerous - many lovers of various flowers no longer collect them in a collection, but are exclusively engaged in orchids. Their kitchens are like laboratories. They will grow from seeds even the most delicate hybrid.
Growing orchids at home has now become much easier. Flower shops sell seeds, substrates, graceful pots, mineral fertilizers. You don't need to invent anything - everything is already available, you only need enthusiasm and a little patience. And then the prospect will open one day to wake up in the middle of a luxurious garden.
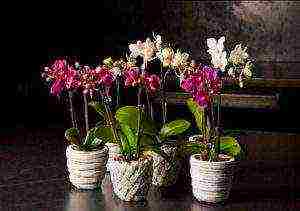
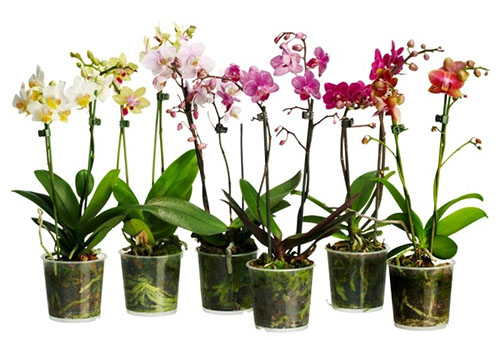
 Flowers of a room orchid can leave few people indifferent. Plants are distinguished by variety, brightness, beauty and surprisingly interesting colors. Many growers can buy a ready-made flower in a flower shop, and then multiply it. However, not everyone knows that it is possible to perform seed propagation of a room orchid. If you wish, you can sow seeds and watch its growth and development.
General information
Any orchid seeds can be ordered in China. This option will be cheaper and much easier than looking for seed from domestic sellers. There are special recommendations that help to realize the desire to grow an orchid from seeds and it is quite easy to master the cultivation of indoor flowers in this way:
Trust but verify
This rule must be observed at the stage of purchasing seed through online stores, including suppliers from China. Some unscrupulous sellers have no idea what real room orchid seeds look like. It should be remembered that these the seeds are dusty and several thousand times smaller than a grain of wheat. This type of seed can only be obtained in a special laboratory.

Orchid seeds are extremely vulnerable
The seed material of the plant is not protected by the endosperm, therefore it is easily vulnerable. To protect seeds from pathogenic microorganisms, strict adherence to sterility is required, which is simply impossible at home. Even a tool and material sterilized under high temperature conditions will not guarantee healthy seeds at home.
Also read: Characteristics of the best types of calathea
Features of soil for seeds
The soil for sowing the seeds of such a capricious flower should also be based on a competent combination of agar-agar, organic matter and inorganics. The ideal option for growing a plant from seed is to purchase a ready-made nutrient medium that you want to sterilize at home. Planting soil for seeds has a characteristic jelly-like consistency.
Sowing orchid seed is very troublesome. After sowing, it is required to tightly close the sowing container and wait until shoots appear for at least nine months. After this time, sprouts appear, which are transplanted after a couple of years to a permanent place in a separate flower pot.

What can grow and what it looks like
Reproduction of indoor orchids by seeds in standard home conditions is almost impossible. Despite this, the process of pollination of flowers can be done independently. There are frequent cases of the formation of ovaries, fruit bolls with several million seeds in each. However, it is simply unrealistic to germinate the seed material of orchids on your own for several reasons:
- seeds are as large as dust, and for germination they must enter into a symbiotic relationship with mycorrhizal types of fungi;
- Unlike other plants for orchid seeds, carbohydrates, which are able to ensure cell division, are not essential nutrients.
The creation of a favorable environment for the germination of seed material and its cultivation is possible exclusively in laboratory conditions.
Planting orchid seeds (video)
Growing rules at home
Growing an orchid from seeds is carried out in accordance with certain requirements:
- The seeds are located inside the seed capsule, which begins to form on the plant three or four months after the flower pollination process.
- The use of sphagnum moss and leafy soil is allowed as a soil. As practice shows, growing indoor orchid seeds at home is often accompanied by the use of Knudson's nutrient medium.
- At all stages of growing, greenhouse conditions should be strictly observed, including temperatures ranging from +23 ° C to +35 ° C and increased humidity.
It should be remembered that watering is optional, but spraying is essential.
We also invite you to learn about the features of the Wanda orchid.
Consumer reviews
Orchid seeds from China from the AliExpress marketplace site known to many are sold in incredible quantities every year. It is not at all difficult to buy material wholesale and retail from Chinese suppliers. However, it should be remembered that nothing worthwhile comes out of such an undertaking. As a rule, the seed material either does not germinate at all, or instead of orchids, it is possible to get ordinary lawn grass.
Many consumers leave extremely enthusiastic reviews on the sites of Chinese online stores that sell indoor orchid seed. As a rule, reviews are associated with the colorful packaging and fast delivery of the order. There are practically no reviews and photographs that make it possible to understand that the seeds germinate and allowed to grow a healthy and flowering plant.
Tips & Tricks
The first growers who tried to germinate indoor orchid seeds often faced serious problems. Such complexities have seemed insurmountable for more than 50 years. At present, the propagation of these plants using high-quality seed material is quite often carried out not only by breeders, but also by experienced amateur flower growers.
How to sow orchid seeds from China (video)
rong>
Growing an orchid from seed at home is much more difficult than most other indoor plants. It takes a lot of effort and effort. However, as a result, it is possible to get something more than a regular store flower. Attention, only TODAY!
Did you find a mistake in the text? Please select it and press Ctrl + Enter. Thank you! Rating: ( estimates, average: out of 5)
Reviews and comments