Content
- 1 How to choose the right seeds for seedlings
- 2 Growing from seeds
- 3 Seedling care
- 4 Caring for asters in the garden
- 5 Description and features of culture
- 6 Instructions for seedless aster cultivation
- 7 Instructions for seedling growing asters
- 8 Caring for asters
- 9 How to grow seedlings of annual asters from seeds at home
- 9.1 Seedlings of asters - tips and tricks for growing
- 9.2 How do annual asters breed?
- 9.3 When are asters planted for seedlings?
- 9.4 What soil is used for planting annual asters for seedlings?
- 9.5 How to plant seeds of annual asters for seedlings?
- 9.6 Picking seedlings and planting seedlings in the ground
- 9.7 The most popular varieties of annual asters
 Often flower beds are decorated with colorful plants such as aster. They bloom in the fall, are unpretentious and usually do not have difficulties with them. The flower is sown with seeds directly into the ground or its seedlings are planted, then they begin to bloom earlier.
Growing a plant at home requires the necessary knowledge, otherwise young seedlings can get sick and die. Therefore, the process should be considered in more detail: from sowing seeds to planting them in open ground.
How to choose the right seeds for seedlings
 To be sure that the seeds will sprout, you should read the year of production and the expiration date on the bag. The best thing buy fresh seeds, as asters quickly lose their germination.
If the seed is in a bright package with a beautiful pattern, it is best not to buy it. Seeds in nondescript bags most often turn out to be better and fresher, since the colorfulness of the pattern and excessive brightness are a kind of advertising in order to sell a low-quality planting product.
To create beautiful flower beds, you should choose a mixture of asters. They usually contain up to 10 different colors. For a special design of landscape design, flowers should be purchased in separate bags.
The timing of sowing seeds. When to plant a flower for seedlings? So that their flowering does not fall on autumn frosts, it is important to correctly determine the sowing time. The best thing sow them in February-March.
It is these months that are optimal for flowering in September. In regions where snow falls a little later or does not happen at all, sowing is carried out in April or May.
Growing from seeds
 When to plant this flower, we have already figured out. How to grow good seedlings?
In order for the plant to be strong, the seeds should initially be sown plant in nutritious soil... You can do it yourself.
To do this, mix in equal proportions:
- humus;
- sand;
- garden land.
Then this mixture is steamed in the oven, after which wood ash is added to it. It is very useful to add perlite to the finished soil, which helps to improve soil aeration and allows the seedling root system to develop better.
A wooden or plastic box used for seedlings is filled with harvested soil, slightly compacted and generously watered with potassium permanganate.
Before sowing seeds, they should be treat with any fungicide, which is an effective remedy against fungal diseases that often affect seedlings.Sowing seeds is carried out as follows: grooves up to 2 cm deep are made in the soil, into which they are planted and sprinkled on top with soil no more than two mm.
Many flower growers recommend sprinkling the seeds with calcined sand, which allows them not to get wet when watering. There should be a distance of 2–5 cm between the grooves.
To prevent moisture from evaporating so quickly, crops should cover with a piece of glass... Seedlings begin to appear on the 5-10th day, and the glass is then removed.
Seedlings should be move to the windowsill, where there is good lighting, but the temperature should not exceed 15 degrees. This is important when asters are grown at home, otherwise they will start to stretch.
As the soil dries up, it moisten with warm water from a spray bottle. In this case, care must be taken not to flood the plant, otherwise a disease such as a black leg may occur.
At the first signs of such a lesion, it is necessary immediately remove diseased sprouts with a small earthen lump. After that, the hole should be covered with earth and this place is spilled with a fungicide solution.
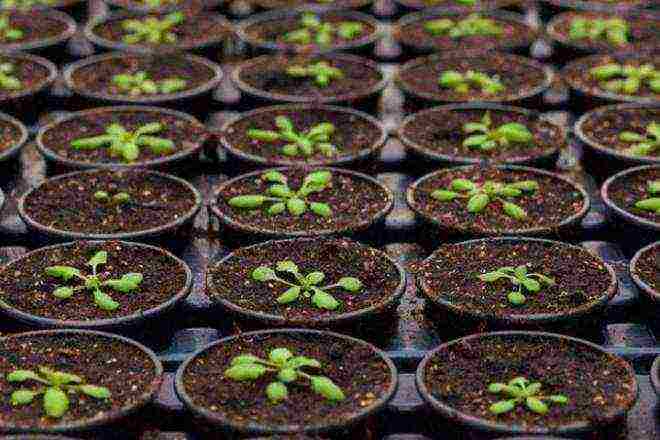
Seedling picking
 This procedure is carried out after 2-3 true leaves appear in the seedlings. The soil composition should be the same, only add a spoon complex mineral fertilizer... To distribute it evenly, the soil should be thoroughly mixed.
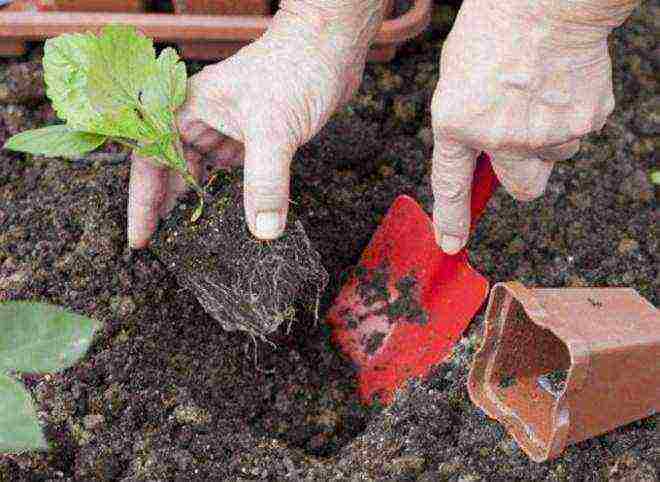
The pot is filled with soil and lightly tamped so that after watering it does not settle. In the center of the pot, using a stick, a recess is made in which the roots of the seedling will be placed.
If the plant has a highly branched root system, then do a pinch... When transplanting, the seedling is buried in the soil no more than one cm from the cotyledon leaves. The earth around it is compacted in such a way that when watering it is not washed out with water.
Seedling care
 Asters should be watered abundantly, but infrequently. To avoid stagnation of excess water, the seedling containers should contain drainage done... It is also not recommended to fill the flower with water, otherwise it may be struck by a disease such as a black leg, and it will die.
Top dressing of seedlings... If high-quality soil is prepared before sowing, then the seedlings do not need additional fertilizing. Poor soil a week after transplanting seedlings is watered with biofertilizer or ash infusion.
Do not get carried away with nitrogen fertilizers, otherwise only green bushes will grow, and the aster will begin to bloom late and not too abundantly.
Seed hardening... When 6-7 leaves appear, you can start hardening the seedlings so that in the future they can easily endure temperature changes and be frost-resistant.
For this purpose, boxes with seedlings are taken out into the street, for 3-5 hours. At first, the duration of stay in the open air should be about an hour, gradually increasing its duration.
Possible difficulties in growing seedlings
- The sprouts did not sprout or grow poorly. It is necessary to sow new seeds, before soaking them for a day in ash or aloe juice. The soil must be changed by disinfecting it with biofungicide or potassium permanganate.
- A disease such as fusarium has emerged. To prevent it, flowers should not be fertilized with manure. It is also not recommended to plant asters in a place where potatoes, physalis, tomatoes, as well as gladioli, tulips, and carnations were previously grown.
- Incomplete inflorescences have developed. This is possible if the plant is infected with a spider mite or aphid. Also, defective flowers may appear due to improper nutrition.
How and when to plant seedlings in open ground
 When the root part of the flower stem is 7 cm, the seedlings can be planted in the ground. The landing site is chosen in advance. These flowers are quite unpretentious to lighting and grow well. near fences, trees etc.
Too acidic soil is not pleasant to asters, therefore in the spring or autumn in the ground make lime... It is forbidden to add fresh manure to the ground when planting seedlings - this leads to their death.
It is best to plant flowers in loose soil, and in order for them to take root better, this should be done along with pieces of root soil. Plants should be located at a distance of 20 cm from each other.
The workpieces are planted in small depressions, and from above they are compacted with earth. If for some reason the seedlings are stretched out, they are buried a few centimeters. After planting the plant thoroughly watered, and so that after the earth dries up, a crust does not form, the soil is mulched with peat.
Caring for asters in the garden
These flowers are loved by many landscape designers or flower growers due to the fact that they do not require special care. But with enough attention, they are able to please with the richness of colors and abundant flowering. Thus, leaving includes the following points:
-
 Periodic watering - this contributes to the correct development and timely flowering of the plant.
 - Loosening the soil is a very useful procedure, thanks to which the roots of flowers receive oxygen in the required amount.
- Fertilization - potassium-phosphorus fertilizing contributes to the colorfulness of flowers and the profusion of flowering.
- You can water asters with solutions of liquid organic mixtures.
Thus, in order to grow a flower from seed, it is necessary adhere to certain rules... Failure to comply with them contributes to the emergence of various problems.
If everything is done correctly, then in the future the plants will delight their owner with abundant and colorful flowering.
With the seedling method, perennial aster seedlings are grown in the same way as an annual one. Growing these flowers at home is not difficult, but you need to know and take into account some of the nuances. Let's look at it in order.
STEP 1
Collecting aster seeds
Of course, you can buy the seeds of any aster today in a store or on the Internet. However, if there is such an opportunity, we advise you to collect them yourself in the fall from the healthiest, strongest plants - so you will be sure of the quality and freshness of the planting material, which is important.
Aster seeds are stored for no more than two years, since their germination ability is quickly lost.
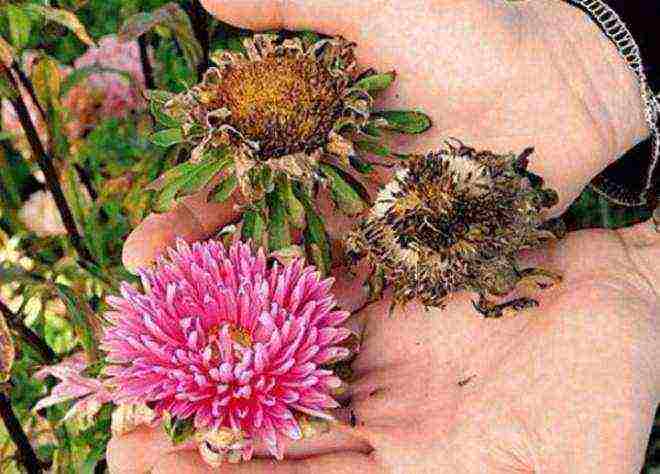
How to harvest aster seeds correctly? Depending on its type and variety, the seed collection period begins approximately 40-60 days after the beginning of flowering. Therefore, it is easiest to collect seeds from early-flowering asters, while late-flowering ones can “hold out” with flowering until the very frost and not have time to form full-fledged, ripe seeds.
In the first case, the first few formed inflorescences are simply left "for seeds" and already dry baskets are collected in sunny weather. In the second, the heads of the asters are cut off until the cold snap and stored at home, or (which is much better) one of the bushes is transplanted into a large pot and "brought to maturity" already at home with suitable lighting and temperature. The flowers are cut after the inflorescences have wilted, and, wrapped in paper, stored in a dry, warm place.
STEP 2
Soil preparation
Spring sowing of aster seeds can be carried out already in March, so take care in advance that by this time you have prepared the soil so as not to do this at the last moment.
As a suitable container, you can use shallow (8-10 cm) wooden or plastic boxes, pots, containers. Previously, they should be disinfected with any antiseptic (Ecobio, Biosept, Biotex) and dried.
Asters love light, fertile, non-acidic soil that allows water and air to pass through well. For sowing seeds, a mixture of garden soil, sand and humus in equal proportions is suitable. It must be steamed, and then add wood ash and perlite (in a bucket of soil, a glass of both).
Prepared containers are filled with this soil mixture, and just before planting the seeds, it is spilled with a solution of potassium permanganate.
STEP 3
Sowing aster seeds for seedlings
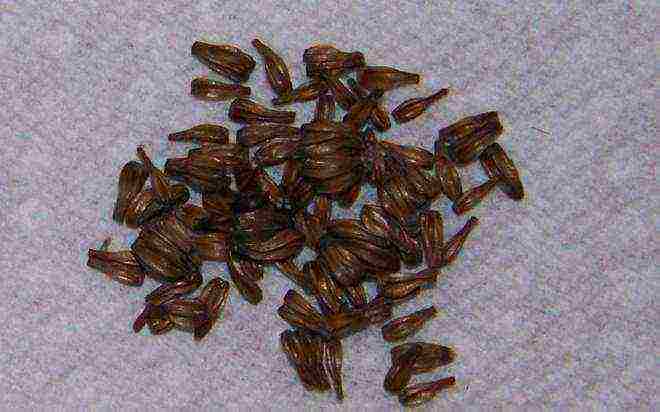
What do perennial and annual aster seeds look like? They are quite large, so there should be no problems with landing.
To protect against diseases, etch them in advance in any fungicide (Maxim, Baktofit, Klad, Fitolavin, etc.) according to the instructions.
In damp soil, make small grooves up to 2 cm deep at a distance of 3-5 cm from each other, where spread the seeds evenly. Sprinkle on top with a very thin layer of soil. Some gardeners recommend sprinkling the seeds not with soil, but with calcined sand to protect them from possible waterlogging during watering.
After that, cover the crops with transparent glass or plastic wrap and place in a bright place with a temperature of no more than 20 ° C. Remove the film after the emergence of shoots - this usually happens on the 5-10th day.
Move the seedlings to a cool room (up to 15 ° C) and regularly, as the soil dries, moisten with a spray bottle. Make sure that there is no waterlogging - aster seedlings are very sensitive to black leg disease.
STEP 4
Picking
Aster seedlings dive when 3-4 true leaves are formed on them. It is important not to allow the moment when the seedlings are too stretched upward.
Fill the pots for transplanting with the same mixture as when planting seeds (you can add a little ash or complex mineral fertilizer), and tamp. Make a depression in the center of each pot.
Transplant the shoots one at a time in each pot, so that there is about 1 cm left between the soil surface and the lower leaves. After all the plants have been transplanted, water them with water at room temperature without touching the leaves.
Place the containers in a warm (about 20 ° C) well-lit place without direct sunlight. Water moderately as the soil dries. A couple of weeks after picking asters, you can feed with a solution of ammonium nitrate (1 g per 1 liter of water).
As soon as new leaves appear, young plants can be "hardened" - regularly taken out into the fresh air in a shaded place or ventilated. Increase the hardening time gradually.
STEP 5
Transplanting seedlings into the ground
You can transplant aster shoots into open ground after the soil warms up well. By this time, they should have reached a height of 5-7 cm and have 5-6 well-developed leaves.
Before the procedure, the land on the site should be well loosened. Asters love soil light, non-acidic, sunny places. It is not recommended to plant asters in places where nightshades (tomatoes, physalis, potatoes), as well as tulips or gladioli grew last season.
For planting, morning or evening hours without an active sun or cloudy weather are preferable.
Young asters with lumps of root soil are carefully transferred into prepared holes - the distance between them is made depending on the size and type of the future adult plant (from 20 to 50 cm). The soil around the shoots is lightly tamped and watered at the root. The land around the seedlings can be mulched with peat or sawdust.
In no case feed young asters with fresh manure - this will most likely lead to fusarium disease and plant death.
In the future, your task will be to properly organize the care of asters in the open field. It is simple - regular watering without water getting on the leaves and loosening the soil.
A week or two after planting aster seedlings, it needs to be fed with complex mineral fertilizer (without nitrogen). It can also be introduced at the budding stage.
If winter is expected to be snowless or frosty, perennial asters should be covered with spruce branches.
A seedless way to grow asters from seeds
When are aster seeds sown? Most often it is in the spring - we described this option above. However, many gardeners today also practice open sowing of aster seeds in autumn soil. This method is also called reckless.
Sowing aster seeds before winter is best in October - early November, depending on the weather, in slightly frozen ground.
To begin with, a bed is formed with well-dug soil, where you can additionally add humus or peat (up to 3 kg per 1 square meter), as well as superphosphate (1 tablespoon). On the bed, with an interval of 15 cm, parallel grooves are made with a depth of about 2 cm.In them, at a distance of about 2 cm from each other, dry aster seeds are laid out, which must be sprinkled with soil on top with a layer of up to 2.5 cm.
This sown bed is securely covered with plastic wrap until spring. Approximately in mid-April, with the end of frost and the emergence of seedlings, the film is removed - young plants are in favorable conditions, when the temperature regime is already suitable, and there is a sufficient amount of moisture from the melted snow.
Florists like this sowing of asters in the fall because the resulting plants are usually stronger and stronger than seedlings. They get sick less and bloom earlier.
Growing aster seedlings at home and further caring for asters in the open field is a completely feasible task even for a novice gardener. We hope our algorithm of actions described in the article will help you with this.
Aster can be safely called one of the most popular garden crops among flower lovers. It decorates flower beds and summer cottages until the first cold weather, when all other perennials have already faded. In addition, aster is a rather unpretentious and easy-to-care plant, so growing it from seeds is a very interesting activity.
Incredible bright shades of aster colors
Description and features of culture
It is difficult to find a garden plant that is more species-rich than the aster. Today, about 4 thousand varieties of this culture are known: they are distinguished by the flowering time (early, middle, late), by the height of the bush, the structure of the inflorescences and other characteristics. In our gardens, the most common are perennial New Belgian and New England varieties, as well as annual callestifus, which are also called Chinese asters.
Aster "Ostrich feather"
Callistephus chinese
Frost-resistant aster "American beauty"
In height, the bushes of the plant can reach from 25 to 160 cm, the stems are branched or simple, the root is fibrous, powerful and well-branched. Basket-shaped inflorescences can be coronal, curly, semi-double, spherical or needle-like, and differ in a huge variety of shades - breeders have not yet bred only green and orange flowers.
Astra "Duchess"
Astra "Victoria"
Aster needle violet-blue
In general, among the huge assortment of aster varieties, the gardener can easily find what he likes, but for growing a crop it is very important to know its main features.
- Asters love fertile, well-drained and breathable soils with low or neutral acidity.
- It is preferable to choose open or slightly shaded areas, sheltered from drafts, with deep groundwater to avoid excessive moisture. Arid places, where direct sunlight constantly falls, is best avoided, otherwise the flowers will grind and lose their decorative effect.
Growing asters
- You should not plant a crop where tomatoes, potatoes, gladioli and tulips used to grow. Ideal predecessors for planting are marigolds, marigolds and perennial herbal plants. In addition, the plant can only be planted in the same place for six years, after which a four-year break is required.
Beautiful asters bloom subject to agricultural technology
- The site for planting asters should be prepared in the fall - it is good to dig up the soil and add a sand-peat mixture, or a mixture of compost with peat (at the rate of 2-4 kg per square meter). If you apply top dressing just before planting plants, they can be affected by fungal diseases.
We prepare the garden in the fall
- In the spring, the soil must be dug up again and fed with superphosphates (20-40 g per square meter), as well as potassium salt and ammonium sulfate (15-20 g each).
We fertilize the garden in spring
- Aster seeds are best harvested on their own, since their germination ability is quickly lost - fresh (last year's) material is suitable for sowing.
Collecting seeds
- It is very important to plant asters at a specific time: seedlings - in late March - early April, seeds - in late April-early May (sometimes in winter or late autumn). You should not be afraid of late frosts, as plants can withstand temperature drops down to -4 ° C. Late sowing of asters simply does not make sense - the plants will not have time to gain strength for flowering before their life cycle ends.
It is possible to grow asters from seeds both in seedling and seedling methods, that is, by sowing the material directly into the ground. The first method is more difficult and painstaking, but gives much more chances to grow healthy, strong flowers.
Instructions for seedless aster cultivation
The seedless method is more suitable for experienced gardeners who can recognize high-quality seed, since not all aster seeds have the ability to germinate in the open field. The procedure can be performed in late autumn (from 10 to 20 November), in the spring (April-May) or even in winter (December-January), right on the snow. The algorithm of actions in this case is as follows.
Step 1... It is not necessary to germinate seeds before sowing, as young shoots can freeze or die. If the seed has been treated with preparations for germination, it must be well dried.
Growing asters outdoors - seeds
Step 2. On a previously prepared area, rows are made up to 2 cm deep at a distance of 10-15 cm.
Cooking the garden
Step 3. The seeds are sown so that the intervals between them are at least 1-2 cm, watered from a small watering can (if sowing is carried out in cold weather, there is no need to water the planting), and sprinkled with soil or mulch (layer thickness 2-2.5 cm).
Step 4. Spring crops must be additionally covered with a film, which is removed after germination.
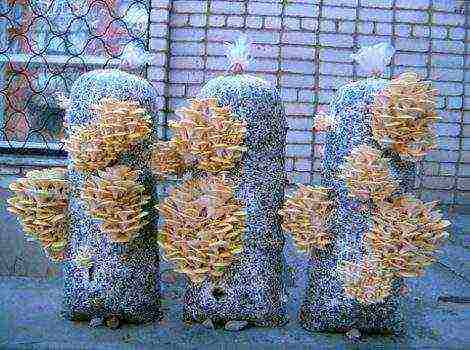
Photo of seedless sowing of asters. Bottles used instead of film
Step 5. As soon as the first real leaves appear on the shoots, it is better to thin out the planting so that a distance of 12 cm remains between the bushes.
If planting is carried out in winter, the seeds are sown directly into the grooves in the snow, and it is very important that the thickness of its layer is at least 10-15 cm. From above they are mulched with pre-ventilated peat or compost so that the crops are not washed away with water during the thaw period. As soon as the snow begins to melt, the seeds will be in the most favorable conditions - the optimal temperature regime without the risk of overheating, and the required amount of moisture.
Many gardeners claim that asters, which have been planted in a seedless way, grow strong, healthy, and also more resistant to disease.
Blooming asters in the garden
Instructions for seedling growing asters
The seedling method involves growing seedlings of asters, which are subsequently transplanted to a permanent place, and consists of several stages.
Seedling aster from seed
Stage one: preparing everything you need
To grow seedlings you will need:
- containers or boxes with a depth of at least 5 cm;
- glass or film;
- nutritional mixture;
- river sand, perlite and wood ash;
- potassium permanganate, from which a weak solution is prepared.
A nutritious soil mixture is prepared as follows: take equal parts of garden soil, sand and compost, mix and steam well. After that, add wood ash (a glass of ash is taken on a bucket of soil) and a handful of perlite. It is also recommended to bake some river sand separately in the oven in order to subsequently cover the seeds with it - this will protect them from waterlogging and black leg disease.
Nutrient potting mix - cooking
Stage two: sowing seeds
Sowing seeds for seedlings is the most important step, so it is very important to follow the correct sequence of actions.
Step 1. Rinse containers for growing with soap and water, treat with potassium permanganate solution and dry well.
Step 2. Pickle the seeds in any fungicide (for example, in the preparation "Maxim", at the rate of 4 ml per 2 liters of water, soak the seed for 30 minutes) to protect them from diseases.
Aster seeds can be soaked
Seed preparation
Step 3. Fill containers with nutrient mixture, tamp lightly and pour with potassium permanganate solution.
Place the seedling soil in a container
Sowing aster seeds in a box, soil is filled up inside and grooves prepared
Soil disinfection
Step 4. Make small grooves in the soil (up to 2 cm deep, 2-5 cm apart) and spread the seeds in them.
Spread the prepared seeds evenly over the wet soil.
Step 5. Sprinkle the seed with a thin layer of soil or calcined sand.
Sprinkle aster seeds on top with well-washed sand
Step 6. Cover the crops with glass or foil, and put them in a lighted place (the optimum temperature is 20-22 ° C).
Cover crops
Step 7. If everything was done correctly, the first shoots will appear after 5-10 days. After that, you need to remove the shelter and move the containers to a cool place (temperature up to 15 ° C).
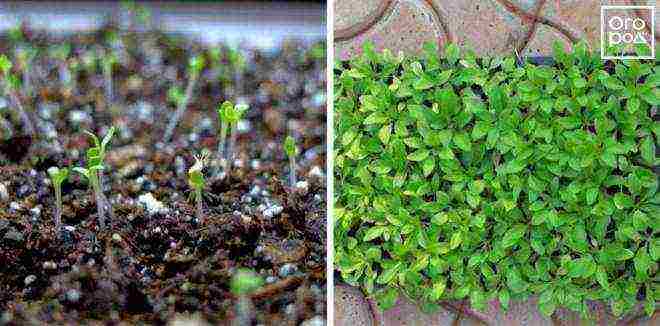
Seedling seedlings
Aster shoots (7 days after sowing the seeds)
Caring for crops at this stage consists in regularly moistening the soil - it is best to do this with a spray bottle so as not to flood the sprouts.
Stage three: dive the seedlings
Saplings dive immediately after 2-3 leaves appear on them. Aster sprouts tolerate transplantation well, but the procedure should be performed in a timely manner so that they do not have time to stretch too much.
How to dive asters
Step 1. Fill the pots or other containers with the same mixture that was used for sowing the seeds, but add a tablespoon of complex mineral fertilizer to it and mix well.
Step 2. Tamp the soil and make a small depression in the center of each container.
Step 3. Transplant the shoots into pots, deepening them so that about 1 cm remains between the lower leaves and the soil surface, and compact the soil again.
Place the seedling in the hole
Gently compact the soil around the seedling
Step 4. The sprouts are watered with water at room temperature, starting from the edges of the containers and gradually moving to the middle so that the leaves remain dry.
Pour gently from edge to center
Step 5. Seedlings are placed in a lighted place where direct sunlight does not fall. The recommended temperature regime is 20 ° C.
As the soil dries up, young asters are watered with warm water, trying not to overdo it. As soon as 4 leaves appear on the stems, you should start hardening the plants - take them to a shaded place in fresh air, gradually increasing the residence time. Transplant shoots into open ground immediately after the soil warms up well.
Stage four: replanting plants to a permanent place
Planting asters in the ground
Best of all, the transplant is tolerated by shoots 5-7 cm high, on which there are 5-6 well-developed leaves. The site should be well prepared in the fall, and before the procedure, the soil should be fed with nitroammophos (40-50 g per square meter) and mixed well so that the fertilizer is distributed in the upper layers of the soil. For transplanting, it is better to choose the evening hours so that the sun does not scorch the young leaves.
Step 1... Dig small holes on the site at a distance of 15-30 cm from each other (depending on the type of aster).
Step 2... Transplant the shoots together with a lump of earth, deepening them by 2-3 cm, and tamp the soil a little.
Planting seedlings of asters
Step 3. Water the seedlings at the root and mulch with peat, which will prevent the soil from petrifying.
Watering
In most cases, aster seedlings take root well, since the plant is distinguished by its ability to regenerate its root system after damage. The most important thing is properly organized planting care.
Transplant of asters
Caring for asters
Preventing a disease is easier than curing it. Therefore, it is better to choose a variety of asters for the garden that have a high resistance to diseases.
- Asters do not like excessive dampness and waterlogging of the soil, but in dry summers they need to be watered regularly. Watering is especially important at a time when buds begin to set on the stems.
- Another prerequisite is loosening and weeding. It is better to carry them out after rains or watering, the optimal loosening depth is 5 cm, and it is better not to touch the ground within a radius of three cm from the stem, so as not to damage the roots.
- If the soil on the site has been properly prepared, planting can do without feeding, but fertilization will benefit young flowers. Usually they are fed with mineral fertilizers two weeks after transplanting, and then during flowering, using any fertilizers without nitrogen components.
- Asters do not like organic fertilizers, in particular, fresh manure, so they should only be applied when the flowers are growing on poor soil.
- To prevent various diseases (especially fusarium, which asters are most susceptible to), it is recommended to feed the plantings with potassium salt, regularly inspect the plantings for signs of disease and follow the rules of agricultural technology.
Pruning asters
Asters, which live in favorable conditions and receive appropriate care, begin to bloom in July-August (depending on the variety), and delight their owner with bright, lush flowers right up to the very frost.
Asters - queens of autumn
Video - Asters. Growing seedlings
In this article, we will tell you in detail about how to grow seedlings of annual asters from seeds at home: basic and important planting conditions.
How to grow seedlings of annual asters from seeds at home
An unusually beautiful annual is an aster.
The cultivation of these flowers began to be dealt with in the first half of the 19th century.
And today it is a very popular type of plant among flower growers.
Aster is used as decoration on flower beds, flower beds, and is also grown for cutting.
In nature, there are a great many varieties of asters, up to several tens of thousands. All varieties differ depending on the shape of the flowering buds, the size of the bush, and color.
The color range of asters is also very diverse and can be presented as a white or reddish, yellow or violet shade, as well as complex types of color in individual varieties.
Every year, breeders offer more and more interesting varieties, distinguished by the splendor of the buds and the colorfulness of the colors.
Seedlings of asters - tips and tricks for growing
Let's take a closer look at how to grow annual aster seedlings and what important points need to be considered for this.
How do annual asters breed?
Reproduction of asters occurs only with the help of seeds.
While maintaining the usual storage conditions, their germination capacity lasts up to two years, in the third year this quality begins to deteriorate sharply along with the germination energy.
When are asters planted for seedlings?
As a rule, annual asters for seedlings can be planted in the third quarter of March or early April.
Approximate dates for sowing asters by region:
- In the Central regions of Russia, the third decade of March - the first decade of April,
- In the southern regions and the Black Earth region - late April - early May. Sowing deadline - June 10
By the time of flowering, asters are:
- early - flowering occurs 90 days after the appearance of the first shoots .;
- medium - flowering occurs 110 days after the appearance of the first shoots;
- late - flowering about 130 days after the first shoots appear
Therefore, in order to accurately calculate the sowing date, you need to take into account the growing season of a particular variety.
It is recommended to do this in accordance with the lunar calendar.
What soil is used for planting annual asters for seedlings?
In general, asters are characterized by unpretentiousness when choosing a land for planting. But the best choice is medium loamy soil.
It is important to remember that it is advisable to use a new earthen mixture, not left over from other flowers.
In addition, the soil should have a loose, loose composition, contain little humus, pass moisture well and be saturated with a sandy mixture.
The process of harvesting the soil layer is an arrangement of three compositions of turf, two compositions of peat soil, one composition of river sands with two tablespoons of wood ash, which are poured into one bucket and thoroughly mixed.
The seedling boxes are filled with this mixture, and on top of it we distribute the calcined river sand 1 cm in height.
In order to prevent the development of fusarium asters, you need to disinfect the soil before planting with a pink solution of potassium permanganate or fungicide.
Also treat the seeds before planting, soak them in the same manganese solution, and after 10-13 hours they can be sown.
How to plant seeds of annual asters for seedlings?
The prepared soil needs to be slightly moistened, grooved with a thin stick and sowed.
Aster seeds are relatively large, they are sown to a depth of about 1 cm every 2-3 cm each, sprinkled on top of them with the same sand with a layer of 5 mm.
Until emergence, the room temperature is maintained at 18–20 ° C.
Seedlings usually appear on the fifth day.
How to grow seedlings of an annual aster so that it has risen by the May holidays - often ventilate the room and water it only occasionally, maintain a stable temperature no more than 17 degrees.
The seedlings must be well lit for 14-16 hours, otherwise they will stretch out and become weak and unviable.
Excessive watering with poor ventilation or low temperature in the room can provoke such a disease dangerous for seedlings as black leg.
In early May, we feed seedlings with Nitrofoskaya or Agricola-7. To do this, dilute one teaspoon of each composition into two liters of water.
Picking seedlings and planting seedlings in the ground
It is desirable to dive the seedlings with the appearance of the first true leaves, while the seedlings should be deepened to the cotyledon leaves.
They are planted in pots or at a distance of 7 cm between plants in boxes with soil.
It is advisable to harden the seedlings grown in room conditions two weeks before planting in the ground on the balcony, starting from 1-2 hours, gradually bringing them to a round-the-clock stay in the open air
When the second half of May comes, you can transplant the seedlings into the ground, and then cover them with specially prepared bedspreads until the tenths of June.
Determining and preparing a landing site is not difficult.
In this case, it would be most likely to choose a dry and sun-warmed area.
It is necessary to fertilize the soil with humus (at least 4 kg) and river sand, add peat. Introduce one tablespoon of superphosphates and potassium sulfates, do not forget about urea.
You need to dig up the soil to a roughness of no more than 28 cm.
If it is not possible to fertilize the ground in advance for planting, you can use a ready-made version of a soil-flower mixture that has a neutral reaction. It can be either living earth or Saintpaulia, or a mixture of Cactus.
Low border flowers are planted with a distance of 15-20x15-20 cm, medium - 25x25 cm, high - 30x30 cm.
Asters are considered light-loving and hardy plants, they can even withstand temperatures of 3 degrees below zero.
They begin to bloom about 3.5 months after sowing, and continue to delight with their flowers for at least 45 days.
The most popular varieties of annual asters
Famous gardeners recommend the following varieties of annual asters for planting:
- Claw cartouser.
By far the most interesting variety.
Differs in pyramidal shape and durability of peduncles.
The flowers are dark blue in color and folded into long tubes.
Such an aster blooms in July and blooms by September.
- Purple tower
This is a very well-known variety, characterized in that the bush takes the form of a column.
One aster contains up to 15 terry formations of a hemispherical type of buds in the form of tightly compressed tongues.
Such a variety is planted if the air warms up to +18 degrees, in which case the seedlings can be expected for 8-15 days after sowing. The plant blooms starting in July, and keeps the buds all September.
- Bolero red buds
It has double flowers forming a hemispherical inflorescence.
Differs in branching, as well as a powerful stem, grows 65 cm upward, blooms from early August until September frosts.
- Golden claw
The plant is in the form of a pyramid with an oval inflorescence reaching a size of 15 cm. The reed flowers are a slightly concave tube of golden yellow colors.
Most often, this type of aster is used for planting in prefabricated flower beds in groups, and on beds - in rows. The plant reaches 70 cm in height. Blooms from July to mid-August.
You can read even more about new interesting varieties of annual asters in this
article
We hope now, knowing how to grow seedlings of annual asters from seeds, you will grow them at home on your own.
Beautiful garden to you !!!
Save the article to your favorite social network so as not to lose: