Content
- 0.1 Part 1 Arrangement of an aquarium for growing Artemia
- 0.2 Part 2 Removing Artemia from eggs
- 0.3 Part 3 Maintaining the right conditions in the aquarium
- 0.4 Part 4 Feeding Artemia
- 0.5 Part 5 Catching Artemia for fish feeding
- 1 Tips
- 2 Warnings
- 3 What do you need
- 4 Where to buy brine shrimp eggs
- 5 How to get rid of Artemia
- 6 How to collect farmed brine shrimp for feeding fish fry
- 7 How to speed up and increase the yield of brine shrimp
- 8 How to feed Artemia
- 9 Some biological details about brine shrimp
- 10 The value of brine shrimp for breeding and feeding fish
- 11 Artemia - what is it?
- 12 Reproduction
- 13 The benefits of the feed
- 14 Methods for increasing the germination of brine shrimp
- 15 Incubator organization
- 16 How to breed food for brine shrimp?
- 17 Catching brine shrimp for fish feed
- 18 Feeding features
- 19 Finally
5 parts: Setting up an aquarium for growing Artemia Breeding Artemia from eggs Maintaining suitable conditions in the aquarium Feeding ArtemiaCatching Artemia for feeding fish
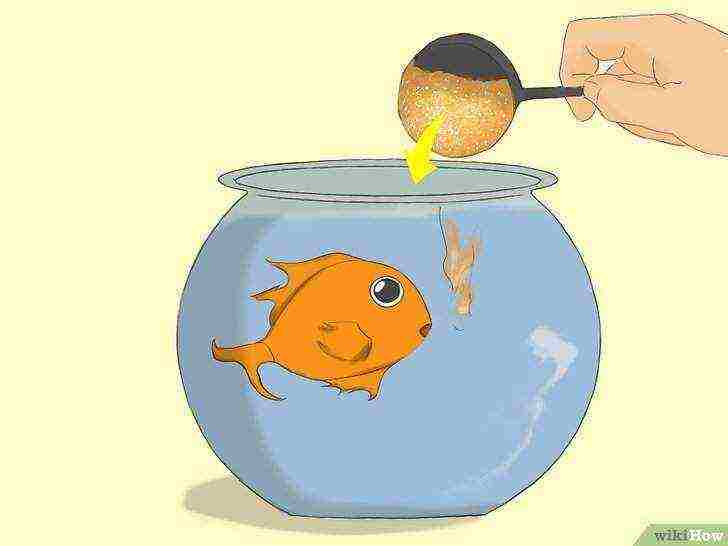
Artemia is a nutritious and easy-to-grow live food for tropical and marine aquarium fish. Despite the wide variety of ready-made dry fish food, it is brine shrimp that will provide your fish with the lipids, vitamins and amino acids they need. In addition, the process of growing Artemia is interesting even for children. Of course, adult brine shrimp can sometimes be purchased at pet stores, but sometimes it is more convenient to grow these crustaceans on your own at home. If you already have experience with saltwater aquariums, it will be a little easier for you to get started. Nevertheless, this article describes in detail everything that is necessary to grow Artemia and maintain optimal conditions for their existence.
Part 1 Arrangement of an aquarium for growing Artemia
-
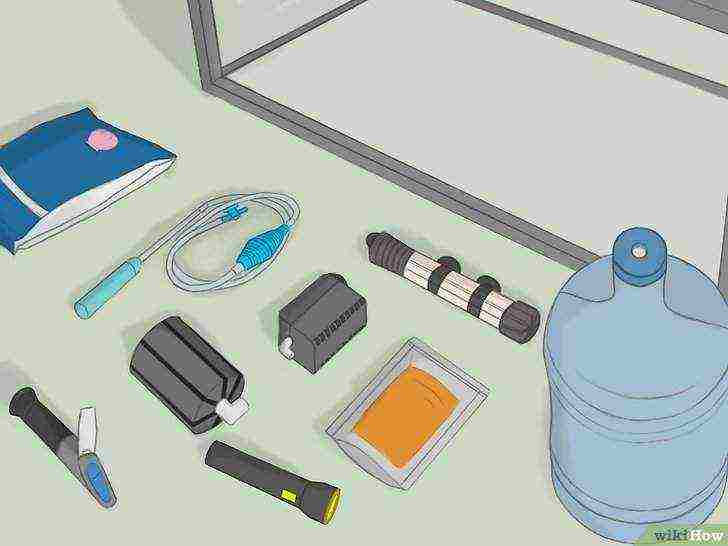 Get everything you need.
The materials you need can be found at your regular pet store or a specialized aquarium store. Also, all goods can be purchased online, if it is more convenient for you. To grow Artemia, you will need a lot of items, namely:
- 40 liter aquarium;
- aquarium sponge filter (with tube, sponge and air compressor tube mount);
- air compressor;
- aquarium water heater and thermometer;
- packaging with Artemia cysts (eggs);
- aquarium salt (when preparing a new aquarium, you will need about 300 g of salt for every 10 liters of water);
- 4 liter container with lid;
- 40 liters of reverse osmosis filtered water;
- a refractometer or hydrometer for determining the concentration of salt;
- aquarium siphon for cleaning gravel;
- torch.
-
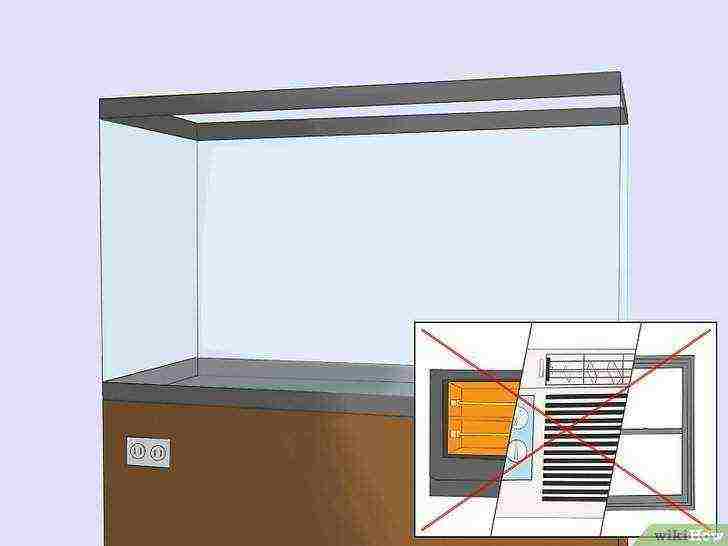 Choose the most suitable location for your aquarium.
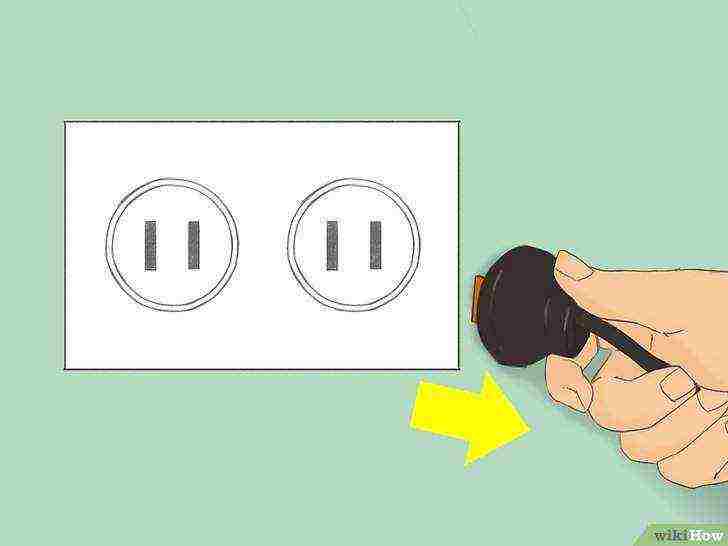
A seawater aquarium should not be placed near windows, doors, batteries and air conditioners, so that the water temperature does not undergo sharp fluctuations. In this case, the aquarium should be located near electrical outlets, since you will need to connect a water heater and a compressor to the network.
- Leave some space between the wall and the aquarium so that the compressor can be easily placed there.
- The surface for setting up the aquarium must be absolutely level.
-
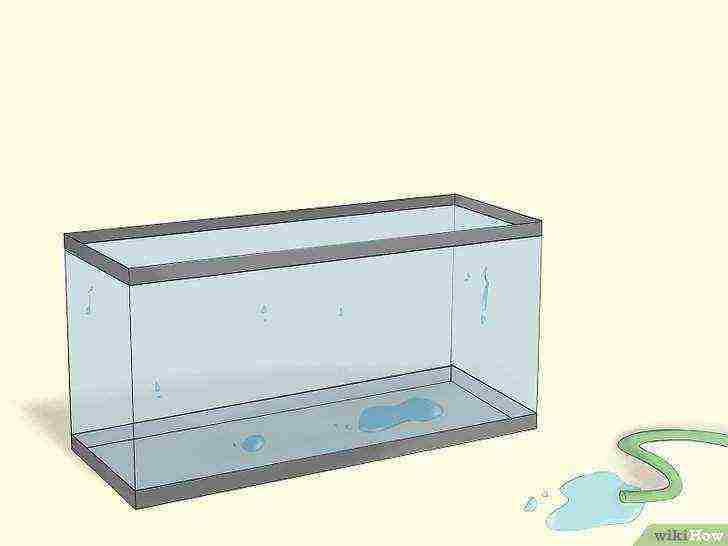
Rinse the new aquarium to keep dust out. Then wipe the outer walls of the aquarium dry and place it in the place prepared for it in advance.
-
 Fill the aquarium with a salt water solution.
Prepare a saline solution from aquarium sea salt and reverse osmosis water.
Fill a 40 liter aquarium with 35 liters of water so you have room to add salt. Then add the aquarium salt to the water according to the instructions on the container.
- The package with salt will definitely contain instructions for calculating the required amount of salt for a certain volume of water.
- Do not be afraid to add too little or too much salt, you can correct its concentration in the water just before adding brine shrimp cysts to the aquarium.
-
 Check the salt concentration with a refractometer or hydrometer.
The salt concentration in the aquarium should be between 30-35 parts per thousand.
To accurately measure salt concentration, refer to the instructions for your refractometer or hydrometer. Add more salt or filtered water to the aquarium as needed.
- Working with a refractometer or hydrometer involves putting some water into the instrument using a pipette or other handy tool.
- Test the water until you achieve the correct salt concentration.
- If you follow the instructions for adding sea salt to the water exactly, then there should be no problems with the solution.
-
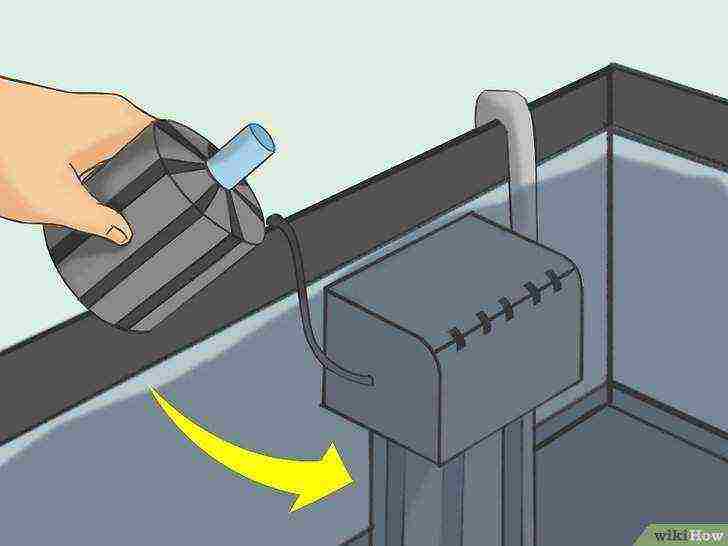
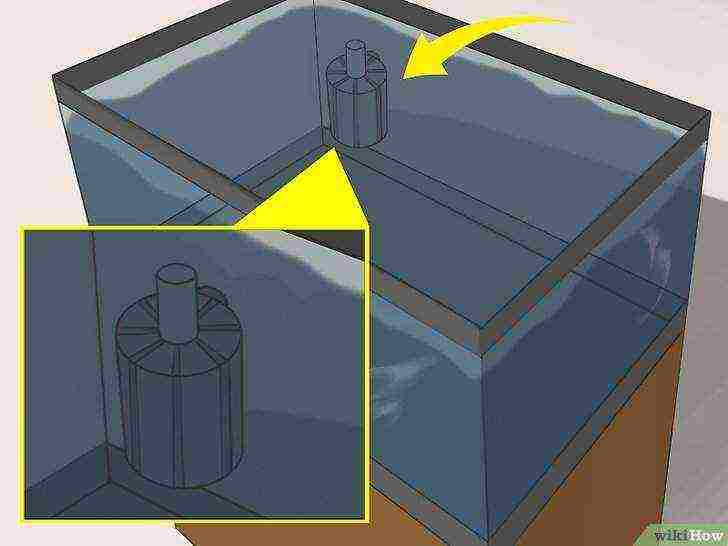 Install a slow sponge filter in the aquarium that is powered by the airflow of an air compressor.
Such a filter is best suited for an aquarium, since during filtration it will additionally enrich the water with oxygen and will not be able to accidentally suck in brine shrimp.
The filter itself should consist of a tube, a sponge and an air compressor tube mount. If the filter does not have a compressor tube mount, buy it separately.
- The sponge filter can be positioned at the bottom of the aquarium or attached to the wall (depending on the specific filter model purchased).
- There are a lot of cheap filters on the market today, but you shouldn't save too much on the filtration system.
- Poor filter performance can lead to the death of brine shrimp.
-
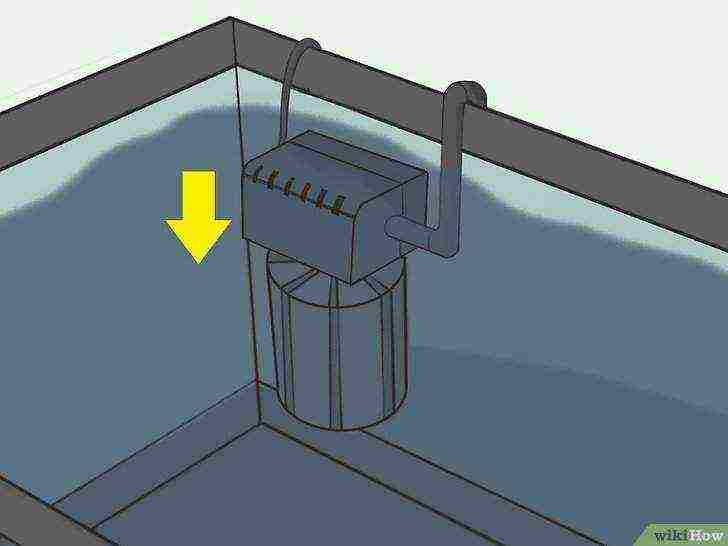 Connect the compressor to the sponge filter.
Connect the compressor and filter with an air tube.
Connect the compressor to the mains and the filter will start working. Place the running compressor on a secure surface behind or next to the aquarium.
-
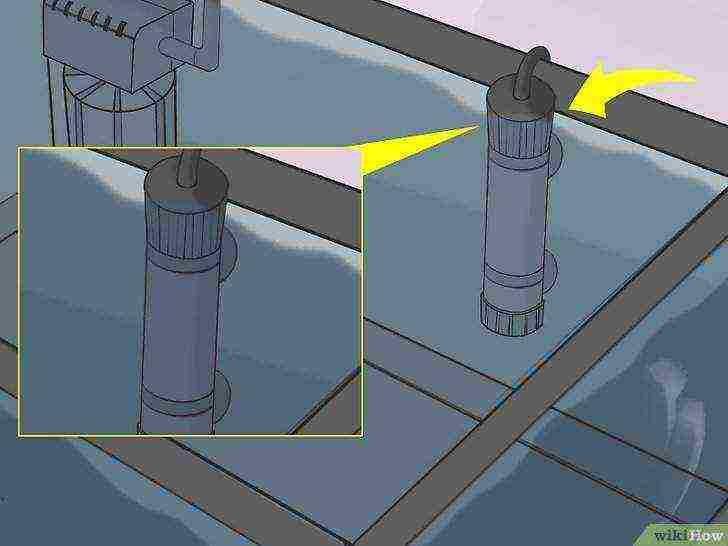
Install a water heater. Install a water heater in the aquarium according to the manufacturer's instructions. Having connected the water heater to the mains, it is necessary to start monitoring the temperature of the aquarium water.
-
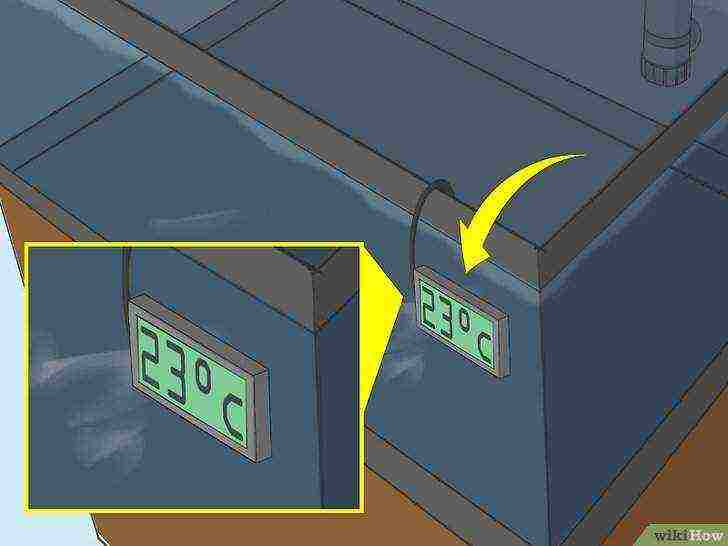 Install the thermometer according to the manufacturer's instructions.
Place the thermometer in a visible place at the opposite end of the aquarium from the location of the water heater.
Having installed a water heater and a thermometer, it is necessary to adjust the operation of the water heater so that the temperature in the aquarium is always kept at 20-25 ° C. Turn the thermostat of the device up or down accordingly.
-

Make sure that the temperature in the aquarium is around 20-25 ° C around the clock. As soon as the temperature in the aquarium is stable within the recommended range, it will create suitable conditions for keeping brine shrimp. Check the water temperature at least twice a day. If the water heater is accidentally turned off or the water temperature changes abruptly, brine shrimp can die.
Part 2 Removing Artemia from eggs
-
 Buy Artemia cysts (eggs).
Bundles of dried Artemia cysts can be purchased at a pet store or a specialized aquarium store.
For a start, one bag of eggs will be enough for you, as brine shrimp reproduce very quickly.
-
 Submerge the cysts in water and they hatch in 15 to 20 hours.
If the correct temperature and salt concentration is maintained in the aquarium, brine shrimp will hatch on the very first day. After 12 hours, you will see young crustaceans swimming around the aquarium.
-
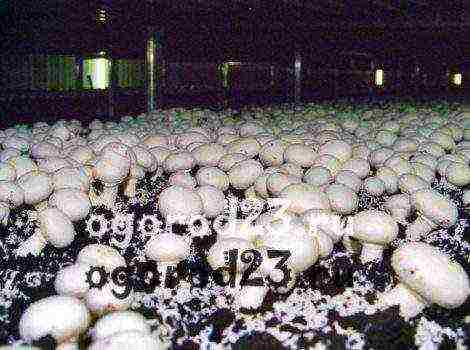
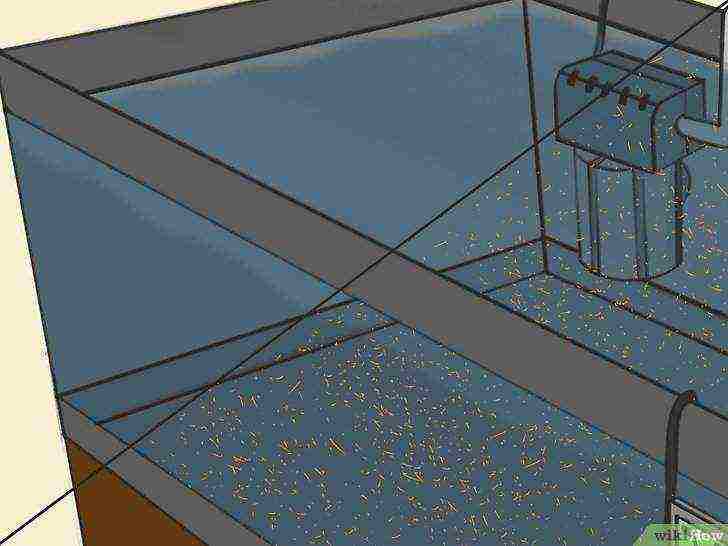 Watch for the growth of brine shrimp.
Artemia grow and multiply very quickly. From cysts, they hatch very small, and then grow into small crustaceans.They do not need any assistance from you to hatch and grow, as in an aquarium with good conditions all this happens naturally.
- If brine shrimp do not grow or hatch, check the salt concentration and water temperature to identify possible problems.
- Be aware that part of the Artemia population dies naturally, this is not unusual.
Part 3 Maintaining the right conditions in the aquarium
-
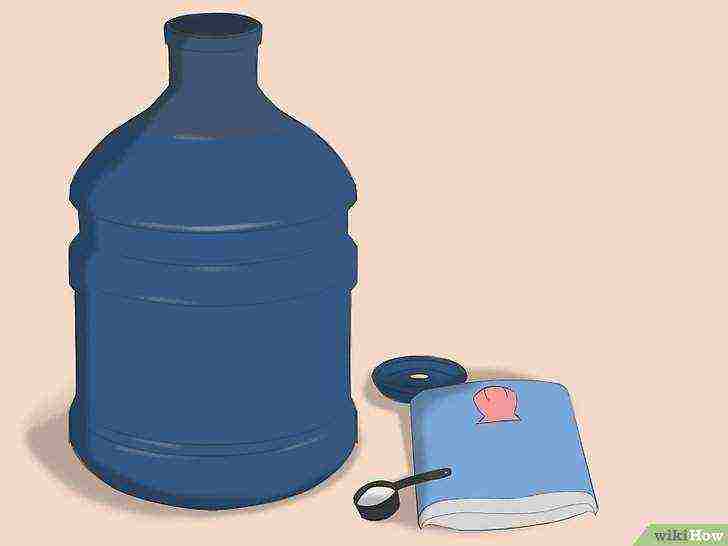 Prepare a supply of salt water.
You will need this supply of salt water in order to change the water in the aquarium. If you have about 4 liters of prepared salt water on hand, then changing the water in the aquarium will not be difficult.
- Fill a 4 liter container with reverse osmosis filtered water.
- Add aquarium sea salt to the water according to the manufacturer's instructions.
- Place the lid on the container and store in a cool, dry place until you need it.
-
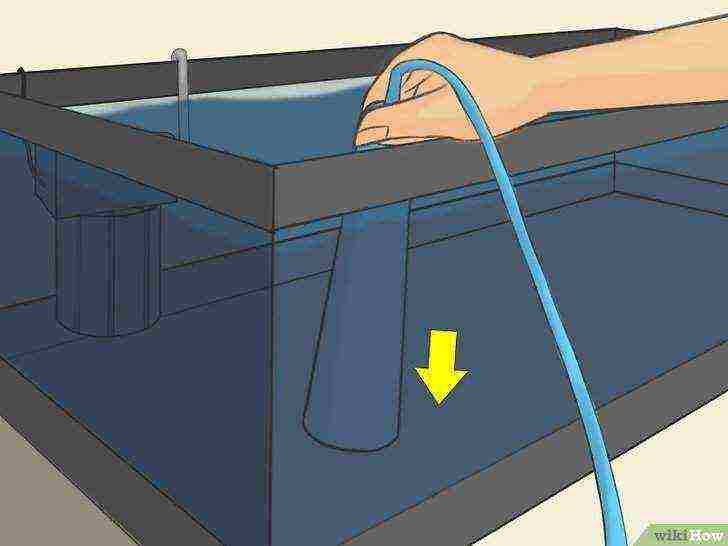 Use a siphon to regularly perform partial water changes in the aquarium (approximately 20% of the aquarium volume or 8 liters per week).
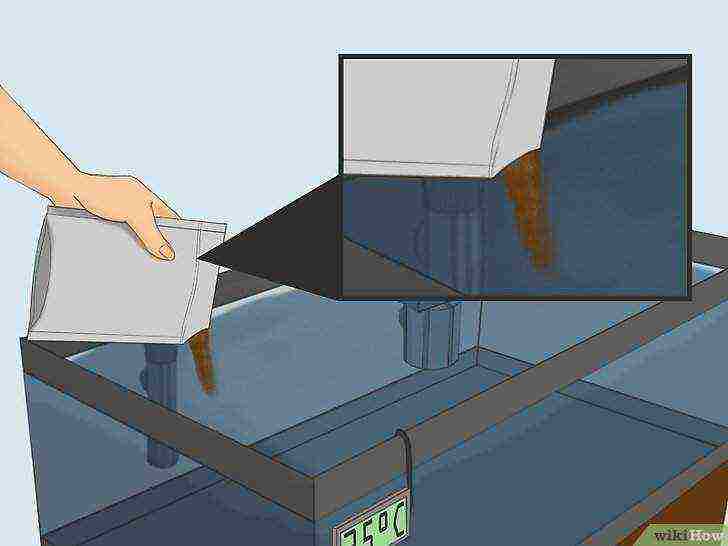
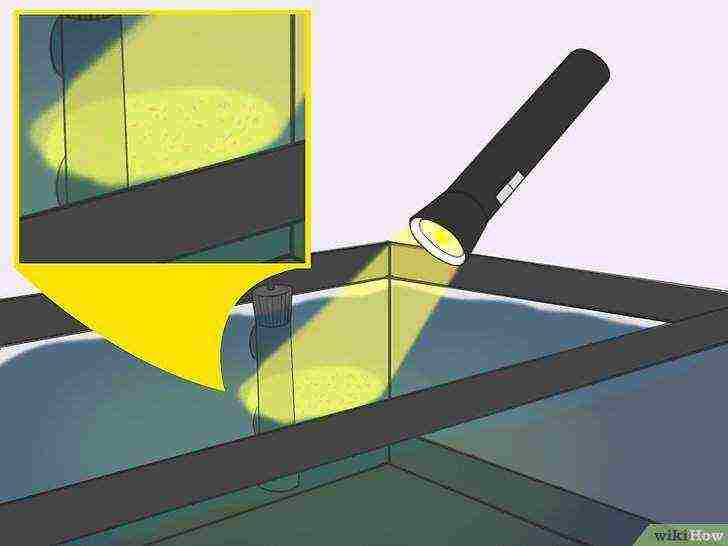
Be sure to turn off the filter compressor before changing the water. Wait for the moment when the water in the aquarium stops circulating and completely stops. Shine a flashlight on the surface layer of water so that all brine shrimp float to the surface.
- Siphon off any dirt from the bottom of the aquarium.
- Then fill up the drained volume of water with pre-prepared clean salt water.
- Check the salt concentration and temperature in the aquarium to ensure that all parameters are within the normal range.
-
 Wash or replace the filter sponge every 1-4 weeks.
The filter sponge can become very dirty. To wash (or replace) it, you must turn off the compressor, remove the sponge from the filter and rinse (or replace with a new one). Replace the clean sponge, replace the filter and turn on the compressor. Typically, the sponge needs to be replaced with a new one about once a year.
- When cleaning the filter, use a flashlight to illuminate the opposite side of the aquarium so that brine shrimp does not interfere with you.
- You may need an assistant to remove the filter from the aquarium or illuminate the water with a flashlight.
-

Regularly check the temperature and purity of the water and its salt concentration. All of these parameters are important for a marine aquarium. Make it a rule to check these values in the aquarium weekly.
Part 4 Feeding Artemia
-
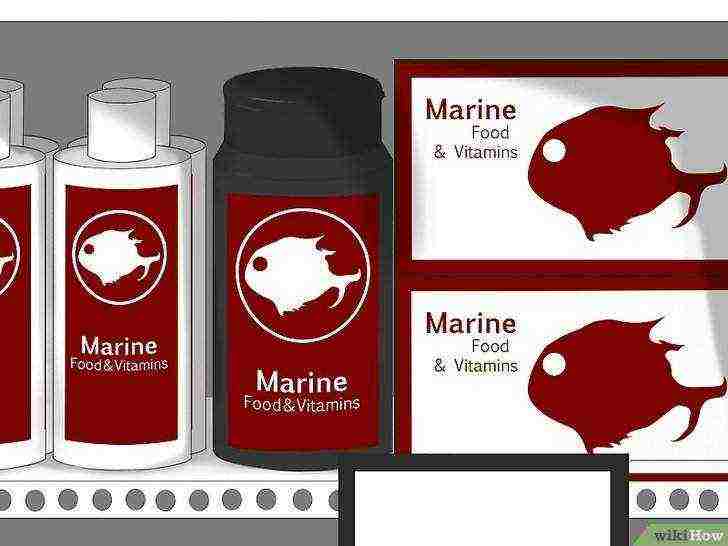
Use fortified feed. Selcon is a fairly popular brand of fortified fish feed; but there are also many other brands of food available in specialized aquarium stores. If you have any difficulties with the selection of food for brine shrimp, consult the seller. It is also always possible to purchase feed in bulk via the Internet.
-
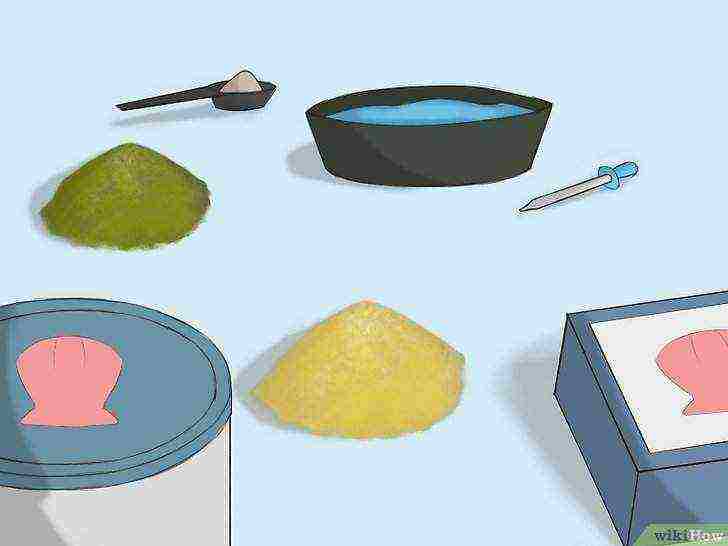
Feed brine shrimp yeast, pureed herbs, egg powder or milk powder. Artemia is not picky about food, they calmly eat all of the above. Artemia can also be fed with spirulina.
-
Give brine shrimp only a little feed, but several times a day. Don't overfeed your crustaceans! If the water in the aquarium becomes too cloudy and contaminated with food, clean the aquarium and continue to feed less Artemia.
Part 5 Catching Artemia for fish feeding
-
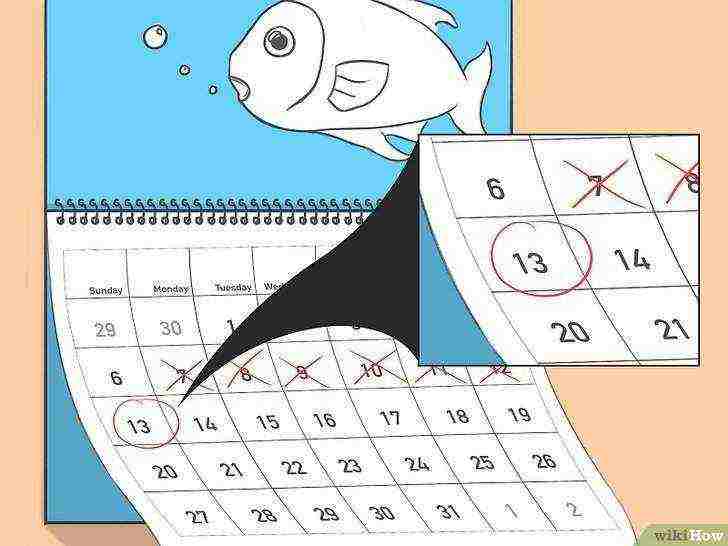
After eight days, start catching the grown Artemia. Of course, if you are raising Artemia just for fun, there is no need to catch them. Nevertheless, after 8 days the crustaceans will grow to such an extent that they can be easily caught with a net and fed to the fish.
-
 Switch off the compressor.
After 10 minutes, empty cysts will float to the surface, and non-hatched cysts will fall to the bottom.
Now you can easily catch live brine shrimp.
-
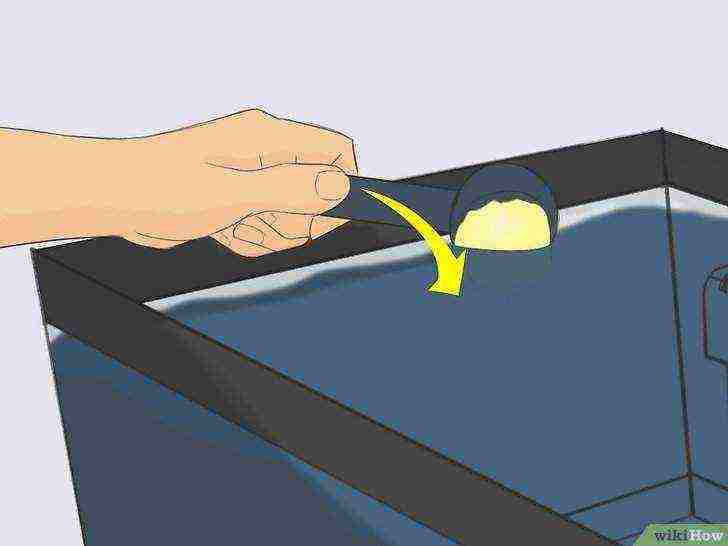
Use a flashlight to light the place where you want to collect brine shrimp. All brine shrimp will float to the light, so it will be easy to catch them with a net.
-
 Trap adult brine shrimp with a net.
Small brine shrimp will easily slip through the net of the net, but adult crustaceans will not be able to do this. Catch as many brine shrimp as enough to feed your fish.
-
Feed the brine shrimp to the fish. Release brine shrimp into the fish tank. Fish will gladly feast on nutritious crustaceans.
Tips
- Experiment with different ways of hatching and raising brine shrimp. Choose for yourself the one that suits you best.
- Artemy is attracted to light. Highlighting the water with a flashlight will allow you to collect crustaceans in one place and facilitate the catching procedure.
- Sometimes on sale you can find whole kits for growing Artemia, which include everything you need. Typically, these kits are found in specialized aquarium stores.
- If you cannot find a special siphon for cleaning gravel in an aquarium on the market, you can use a kitchen syringe instead.
Warnings
- Be careful when working with water and electrical appliances at the same time. Although air compressors are designed to aerate water, they come in different qualities and the electrical part of the appliance should not be submerged in water anyway.
What do you need
- 40 liter aquarium
- Sponge filter for aquarium (with tube, sponge and air compressor tube holder)
- Air compressor
- Aquarium water heater and thermometer
- Packaging with Artemia cysts (eggs)
- Aquarium salt (when preparing a new aquarium, you will need about 300 g of salt for every 10 liters of water)
- 4 liter container with lid
- 40 liters of reverse osmosis filtered water
- Refractometer or hydrometer for determining salt concentration
- Siphon for cleaning gravel
- Torch
Article Information
This page has been viewed 15,484 times.
Was this helpful?
I probably won't be mistaken if you write that the vast majority of novice aquarists start with dry flake fish food. However, after some time, we begin to think about feeding our pets with live food. The issue of feeding with live food is especially acute at the moment when young guppies suddenly appear in the aquarium. Of course, in the summer you can catch food in the pond, you can try to feed it with frozen live food, but the best option is live food that can be grown at home. Read more about growing brine shrimp at home below.
Where to buy brine shrimp eggs
Artemia eggs can be purchased at a pet store or ordered online. For example, in the city of Smolensk, and in most cities, in our pet store you can buy a mixture of AQUA MENU ARTEMIA YU - universal live food for fry and small and medium-sized aquarium fish.

In the box you will find two sachets: the larger sachet will contain small brine shrimp eggs with a characteristic meat smell, the smaller sachet will contain slightly larger food for the fry.
How to get rid of Artemia
To remove brine shrimp, you will need to fulfill a number of simple conditions.
1. You need a container with a volume of at least three liters of water. I usually add a third of the aquarium water and two-thirds of the standing tap water to the container. For breeding brine shrimp nauplii (the so-called small crustaceans that have just been born), you can also use a small aquarium with a volume of 10-15 liters.
DEAR SITE VISITOR
DONATE TO THE SITE AT LEAST 10 RUBLES!
THIS IS THE COST OF TRAVEL ON THE ROUTE,
AND IT WILL HELP ME SOLVE A COMPLEX
LIFE SITUATION. I WILL BE GRATEFUL TO EVERYONE!
2. For every liter of water you need two tablespoons of table salt. Personally, I make a solution of salt water at the rate of one and a half teaspoons of salt per liter of water.The best option is sea salt, but table salt is also suitable. The only thing you need to take is not iodized salt, since iodine is harmful to crustaceans.
3. Pour the required amount of brine shrimp eggs into a container with water (for example, a teaspoon per liter of water).
4. It is necessary to provide an intensive supply of oxygen to the container with the prepared solution using a compressor. If the compressor makes a lot of noise and does not have air regulation valves, then the aeration can be turned off at night.
In extreme cases, you can try to do without aeration at all, but then the output of crustaceans will be less. Ideally, you should try to keep the eggs of brine shrimp in motion all the time, and not lay at the bottom without oxygen access.
5. Provide lighting, preferably around the clock, for vessels with brine shrimp eggs.
6. At a temperature of about 25-27 degrees, the hatching of crustaceans from the egg shell occurs in 24-36 hours. Drinking 40% of brine shrimp eggs is considered good.
Important!
Aquarium water must not be used if you have recently used ANTIPARA type medications in the aquarium. This will lead to the death of crustaceans immediately after hatching. Better to use regular, chlorine-free tap water!
How to collect farmed brine shrimp for feeding fish fry
After the hatching of crustaceans has occurred, it is necessary to turn off the aeration. Artemia crustaceans have a positive phototaxis, so light can be used to attract them to one place in the aquarium. After attracting crustaceans to a certain corner of the aquarium, they can be collected with a thin hose, passing water through a cloth napkin, through which water will pass freely, but the brine shrimp nauplii will be retained. You can also try to harvest brine shrimp using a landing net.
How to speed up and increase the yield of brine shrimp
There are many ways to increase the yield of brine shrimp crustaceans. The most popular is freezing brine shrimp eggs in the freezer for at least five days.
How to feed Artemia
You can try to grow brine shrimp to adulthood in a regular ten-liter aquarium. To do this, you will need to feed Artemia. In general, in nature, Artemia feeds on bacteria (the so-called plankton), detritus residues and microalgae. Nauplii need feeding only on the third day. Artemia grows large in about eight days.
In the aquarium, Artemia can be fed with yeast, egg yolk, spirulina, milk powder or flour. For feeding with ordinary baker's yeast, dissolve a small portion of the yeast in a small container of water and stir well until cloudy white water is formed. Then pour the resulting solution into a container with brine shrimp until the water becomes slightly cloudy. This cloudy water is left for about a week. After a week, the crustaceans should filter out the water, and the water should brighten.

If we ensure (which happens by itself in bright light in summer) the formation of algae plaque in the aquarium (on stones, the walls of the aquarium or a jar, on a piece of ceramics), then we will solve several problems of growing brine shrimp nauplii to adults at once. Firstly, algae will remove excess harmful substances from the water. Secondly, the algae will enrich the water with oxygen. Thirdly, the algae will serve as food for brine shrimp.
You can also feed Artemia with specialized foods that can be purchased at a pet store or online.
ATTENTION !
Keep in mind that crustaceans live in fresh water for about 6 hours. This should not be forgotten when feeding your freshwater tropical fish. Be careful when feeding fish in a marine aquarium. It may happen that brine shrimp outgrow the fry and an undesirable situation will occur when not the fry feeds on brine shrimp, but the brine shrimp bites on the fry.
Some biological details about brine shrimp
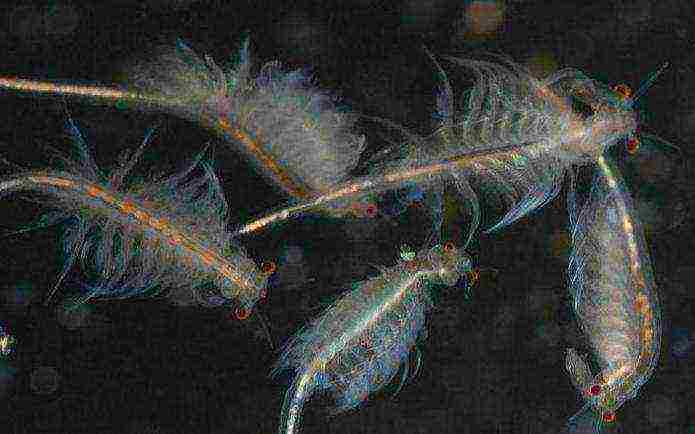
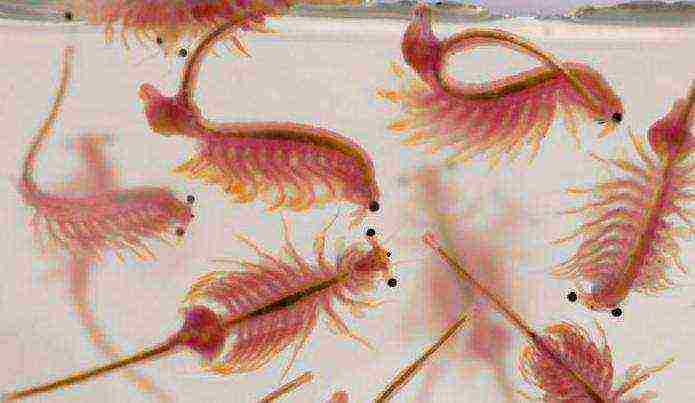
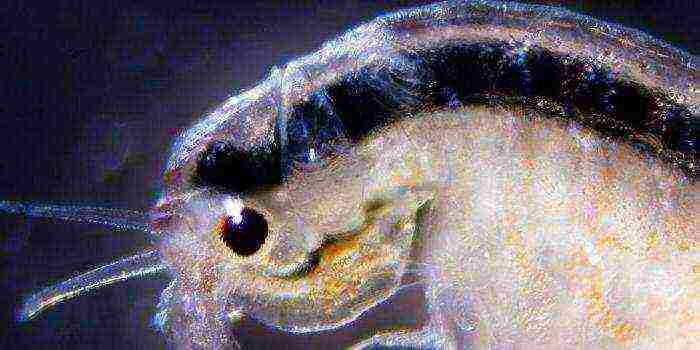
Artemia is a small crustacean that lives in salt water bodies. Freshwater brine shrimp is also found in nature. Artemia is one of the few animals that can withstand very high concentrations of salt in water that no other animal can withstand. Adult brine shrimp can grow up to 18 mm in length. The way of feeding brine shrimp is filtration. The closest relatives of brine shrimp are the cyclops and daphnia, familiar to every aquarist, living in fresh water reservoirs.
Artemia cysts or eggs retain their viability for two hours even when boiled and at very ultra-low temperatures (from - 190 to + 105 degrees Celsius). Some literary sources claim that even dinosaurs survived brine shrimp. Artemia is one of the first animals to visit the comos.

Artemia sheds throughout its life, approximately every 12 hours. The life cycle of brine shrimp is about six months. Under favorable conditions, Artemia does not lay eggs, but immediately produces nauplii. By reducing the salinity of the water, the lifespan of brine shrimp can be extended.
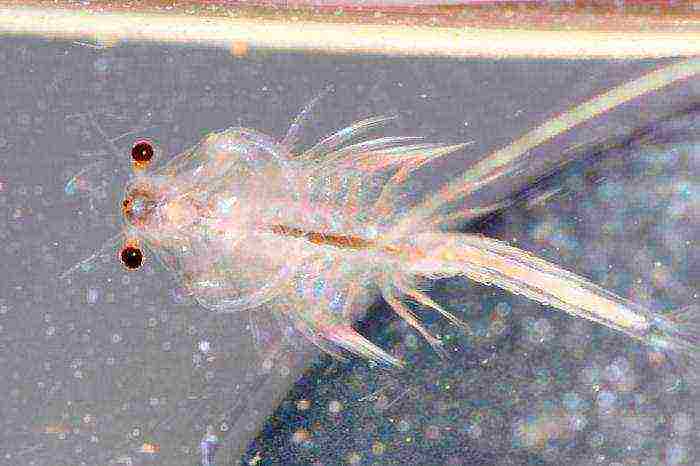
Crustaceans never sleep. To maintain vitality, crustaceans require constant filtration of water. Crustaceans have three eyes. One eye appears in the nauplii, and then, as the crustacean grows, the other two eyes appear. Artemia are dioecious. A female brine shrimp is capable of producing about 200 eggs or small nauplii every four days.
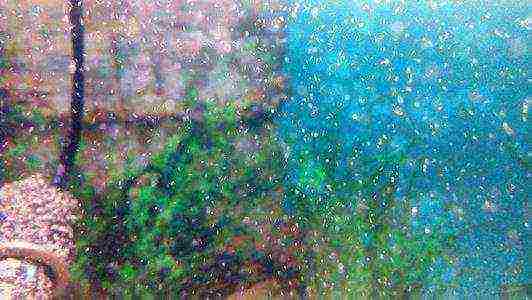
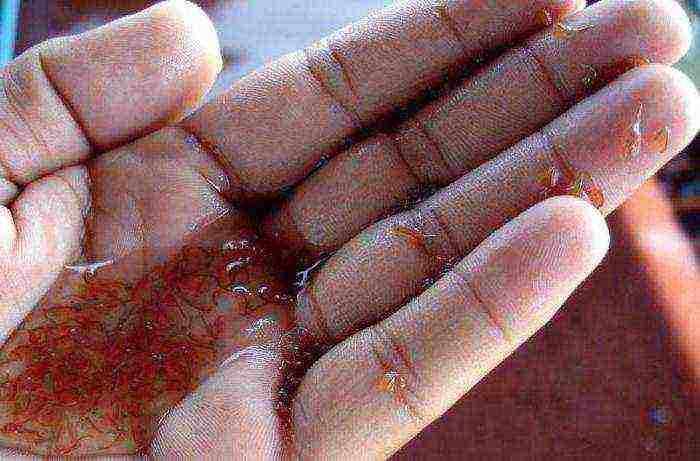
It is noteworthy that the level of oxygen in the water can be determined by brine shrimp. With a lack of oxygen, Artemia will acquire a reddish-brown hue, with an increase in oxygen concentration, the crustacean has a light, almost white color. Interestingly, under favorable conditions, the Artemia population is able to grow so much that the water takes on a red or pink hue. The water is said to have turned bloody.
The value of brine shrimp for breeding and feeding fish
Artemia is a very valuable and nutritious food for raising fry of many species. fish. Using brine shrimp cysts, nauplii can be produced effortlessly at any time of the year. Artemia is well absorbed by the young, guaranteeing a high survival rate of the young, contributing to rapid growth and great appetite in the young.
Decapsulated Artemia eggs, which are by no means less valuable food than the crustaceans themselves, play an important role in the rearing of young animals.
Every aquarium owner who breeds fish understands the importance of using high-quality, healthy food that is offered to fry. Artemia is one of the best options for these purposes. The use of food from such crustaceans offers a wide range of benefits.
What is Artemia fish food? How is this food useful for aquarium dwellers? How to breed these miniature crustaceans? We will talk about all this in our publication.
Artemia - what is it?
Artemia salina are primitive crustaceans that live in salt waters. Adults are capable of reaching sizes of no more than one centimeter. Such creatures are widespread in the coastal zones of America and Eurasia. They are found in reservoirs, where there are about 300 grams of salt per liter of liquid.
Artemia feeds on organic matter and single-celled creatures, passing a significant amount of water through itself. Thus, the crustacean acts as a real natural cleaner of reservoirs. The shade of these creatures directly depends on the nature of the diet. Artemia can be red to greenish in color.
Large adult crustaceans in natural conditions are prey for numerous inhabitants of water bodies and birds. Frozen brine shrimp is often used by aquarium lovers. Fish food of this plan can be used for growing crustaceans at home. The procedure does not require any special skills.After all, such creatures are unpretentious to living conditions.
Reproduction
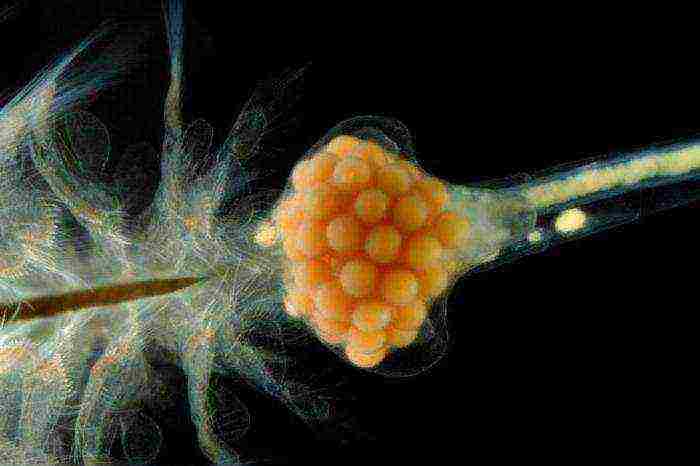
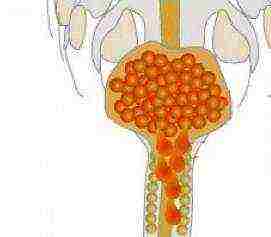
Food for fish brine shrimp, a photo of which can be seen in the material, reproduces offspring as follows. Eggs fertilized by males are concentrated in a special sac on the female's abdomen. After a while, nauplia larvae hatch from them.
With the deterioration of environmental conditions, the breeding method changes somewhat. The female lays eggs in a substrate in which the embryos reliably protect the cocoon containing nutrients. In this form, nauplii are able to remain viable for the most indefinite period. As soon as conditions improve, larvae hatch from such a sac. In this case, the minimum number of individuals from the clutch survives. However, this method of reproduction allows brine shrimp to maintain the population.
The benefits of the feed
Food for Artemia fish, a photo of which can be seen in the article, has a number of advantages, among which it is worth noting:
- The possibility of storing eggs for breeding crustaceans in a dry form for the longest period. In this case, the embryos develop normally when they are placed in a suitable environment.
- The incubation of brine shrimp nauplii takes a maximum of several days. Breeding feed takes place according to a simple and understandable scheme. Therefore, even with the unexpected birth of fry of aquarium fish, there will always be something to feed them.
- The benefits of brine shrimp (fish food) are obvious. Such food is well absorbed by young animals. The use of the feed results in a high survival rate and rapid growth of fry.
- The owner of the aquarium can take dry food for brine shrimp and grow the number of nauplii that is required at the moment.
- The organization of the crustacean breeding process requires a minimum of time, investment and effort. To figure out how to grow brine shrimp, just follow the simple instructions.
Methods for increasing the germination of brine shrimp
There are several solutions, the use of which makes it possible to increase the number of nauplii that hatch from eggs. One of the most effective methods is the freezing of seed. Excellent germination is noted after storing brine shrimp eggs in a freezer at a temperature of about -25 ° C. It is recommended to leave the nauplii in this state for several months by placing them in a saturated saline solution. After the specified period has passed, the eggs are removed from the refrigerator and left for a couple of days at room temperature. As a result, the embryos will be fully prepared for effective incubation.
Another way to increase the germination rate of brine shrimp (fish food) is not to use a freezer. The solution requires the treatment of nauplii embryos with non-concentrated hydrogen peroxide. The eggs are placed in a 3% chemical solution for about 30 minutes. Next, the seed is thoroughly washed and sent to the incubator. A certain number of eggs can be dried and left to breed for crustaceans in the near future.
Incubator organization
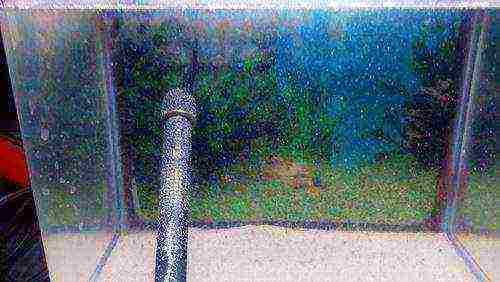
The best option for breeding fish food (brine shrimp) is a spacious container made of plexiglass. Water is poured here, in which salt is dissolved in the amount of one tablespoon per liter of liquid. The incubator provides high-quality round-the-clock lighting. To do this, you can use lamps, the power of which is at least 15 W. Such sources of illumination are located along the walls of the container, which also allows you to heat the water. If the room in which the crustaceans are grown is poorly heated, it is recommended to place the incubator in an insulated box.
Another solution that allows a significant number of Artemia nauplii to grow is to use a conventional plastic bottle with a cut-off bottom. The latter must be moved with the neck down.A sprayer should be installed in place of the plug. You will need several such bottles. Both containers must be filled with an aqueous solution of sodium chloride. The atomizer, which is installed at the necks, must be periodically supplied with air. This will prevent brine shrimp eggs from sinking to the bottom. You should also warm up the water. Its temperature should not fall below +25 ° C.
How to breed food for brine shrimp?
To begin with, dried eggs are poured into an incubator, which is filled with salt water in advance. As noted above, high-quality lighting is provided here and the optimum temperature is maintained at + 25 ... + 30 ° C. Air is periodically fed into the container, which causes the nauplii to be suspended.
As a rule, the first larvae of brine shrimp begin to hatch from the eggs within a day. After several days, their increased concentration is observed, which is sufficient to catch and start feeding fish fry.
In order for the larvae to remain viable, they must be periodically fed. For this, ordinary baker's yeast is used. The latter dissolve in water to form a cloudy liquid. You should use no more than one gram of yeast per liter of water. This amount of substance is sufficient for nutrition and growth of brine shrimp larvae.
Catching brine shrimp for fish feed

If you follow the instructions for breeding such crustaceans, after a while the nauplii will begin to free themselves from their outer shells, gain body weight and actively move in the water column. To catch them for food, it is enough to direct a stream of air and a lighting lamp to a certain area of the incubator. Adult brine shrimp will concentrate in the presented area, after which they can be removed from the reservoir with a small net. With this method of catching crustaceans, immature individuals will not enter the aquarium with fish fry.
Feeding features
It is necessary to feed brine shrimp to fish in small portions. The crustaceans must be eaten without residue. Otherwise, the nauplii will die, the water in the aquarium will turn sour, which will require regular replacement. In fresh liquid, brine shrimp dies within a few hours. The larvae settle at the bottom and begin to rot.
Finally
As you can see, it is not difficult to grow brine shrimp as food for fish. The main thing is to create optimal conditions for breeding crustaceans. Such creatures act as an extremely nutritious food that provides the inhabitants of the aquarium with a whole range of nutrients, vitamins and trace elements.
Everyone who breeds fish understands how important healthy food is, both for newborn fry and for other fish. And just such food is brine shrimp. The use of this food has already been appreciated by a huge number of aquarists around the world. Therefore, in today's article we will talk not only about why these crustaceans are useful, but also how to breed them at home.
Benefits of Application
For more than a decade, these crustaceans have been considered one of the favorite food of various inhabitants of artificial reservoirs. So, their indisputable advantages include:
- Excellent food quality that favorably affects the survival and growth rate of fry.
- Fast and predictable incubation process, allowing newborn fish to be fed even in the event of unexpected spawning.
- Obtain a pre-planned number of brine shrimp as the aquarist needs.
It is also especially worth noting that her eggs have the ability to be stored for a long time without losing the ability for further development.
Of the minuses, one can only name the fact that their distribution at home will require the allocation of some time and labor to organize and conduct the entire incubation process.
What are brine shrimp eggs?
Today there are 2 types of eggs on sale:
- Decapsulated.
- Ordinary.
As for the former, these eggs are completely devoid of their protective shell. But do not worry that future crustaceans will die. As practice shows, it is the lack of protection that can allow the emerging crustacean to look more plump. This happens due to the fact that he does not need to spend his strength not breaking the shell. But in addition to the possible positive, there is also a negative aspect. So, these eggs require a special reverent attitude towards themselves.
Also, although they can be used as feed, one important point follows here. If the hatched brine shrimp continues to live in the water for some time, before the fry eats it, then the decapsulated eggs falling to the bottom in no way attract the inhabitants.
It should be noted that the eggs of brine shrimp go through the process of incubation in a saline solution, and the appearance of the larvae itself largely depends on the batch. So, in order to remove brine shrimp, those eggs should be used that have a shelf life of no more than 2-3 years, but in some cases it is allowed up to 5. If you take such, you can be sure that more than half of the crustaceans will hatch.
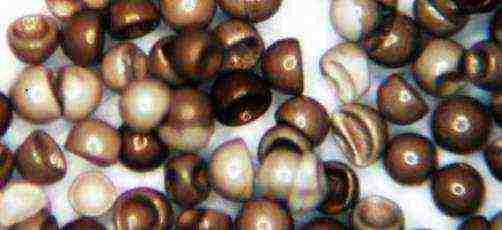
Also, using a strong magnifying glass, you can independently predict the output of the larvae by calculating the number of unfilled egg shells as in the photo below.
Artemia salina: increasing germination
Today, there are many options for increasing the germination rate of brine shrimp, but the freezing method is the most popular. So, the eggs laid in the freezer for 1 day before the start of incubation can increase the yield of crustaceans tenfold. But if spawning is planned in a few weeks, then it is best to keep the eggs for about 2-3 weeks. As a rule, the best results with this method are achieved when the air temperature is from -20 to -25. It is permissible to put brine shrimp eggs in a solution with table salt. Remember that before starting the incubation process, it is best to get them out of the refrigerator and leave to lie down at room temperature for a few days.
It is also permissible to increase the germination capacity of the Artemia salina species when treated with hydrogen peroxide. To do this, eggs are soaked in a 3% solution and left there for 15-20 minutes. After that, they must be washed with water and transferred to an incubator. Also, some aquarists practice the option in which they leave some of the eggs to dry for further setting in portions. It should be noted that in the absence of a refrigerating chamber, this option is very good.
Incubation
As soon as the dormant period is completed, it is necessary to proceed directly to the incubation process itself. To do this, we take the eggs and send them to the incubator for brine shrimp, shown in the photo below. As a rule, the structure of incubators can vary considerably. The main thing is not to forget that the number of the main components must necessarily include:
- Salt solution.
- Aerator.
- Backlight.
- Heating.
brine shrimp
It is worth emphasizing that aeration must be done in such a way as not to give even the slightest opportunity for the eggs to settle to the bottom. Also, we must not forget about the fact that the breeding of brine shrimp is successful, it is necessary to constantly light the incubator. If the air temperature is below normal, then it is advisable to transfer the incubator to an insulated box. Typically, the ideal temperature range is 28-30 degrees. If the temperature is slightly higher, the crustaceans can hatch much faster, but they will also quickly end, thereby disrupting all the plans of the aquarist.
The final stage
The crustaceans that have come into the world spend the first time on freeing the eggs from the shell, as shown in the photo below. They are so reminiscent of parachutists at this moment that most aquarists call this stage the "parachute" stage.It should also be noted that at this stage, feeding the fry is strictly prohibited in order to exclude even the slightest possibility of intestinal clogging. But the "parachute" period does not last long, and as soon as the crustacean is freed from the shell and begins to move actively, it can be used as food for the fry.
The only thing that can cause inconvenience is his capture, given the swiftness of his movement. Therefore, turn off the purge and light one of the corners in the incubator. It should be noted that brine shrimp with excellent positive phototaxis will precisely move towards the light, which will not only organize them for feeding the fish, but also help to distinguish active crustaceans from those who are still in the "parachute" stage.
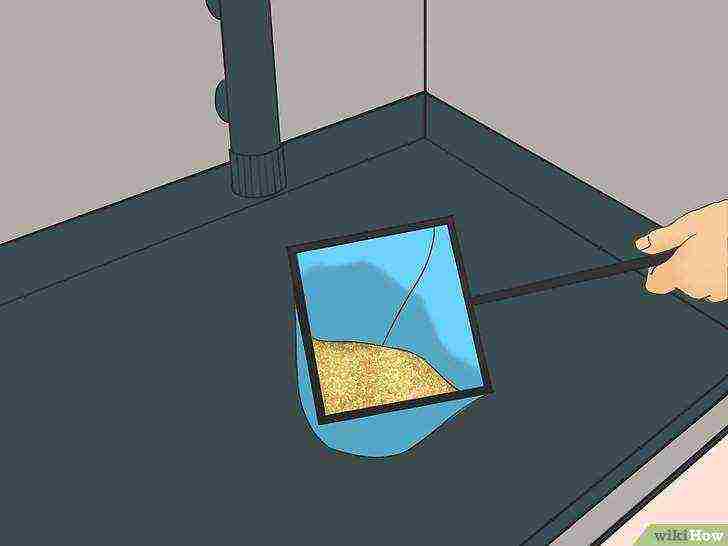
There is also another method designed to drain crustaceans. An incubator sloped bottom is ideal for this purpose. Further, as soon as the purge is turned off, empty eggshells instantly float upward, leaving those eggs that have not hatched at the bottom. The crustaceans themselves accumulate in large numbers in the bottom layer, from where they can be collected without any special problems by taking a siphon. Further, all that remains is filtering with a net. You can also douse it with fresh water, but this already depends on the type of fish for which the brine shrimp was prepared.