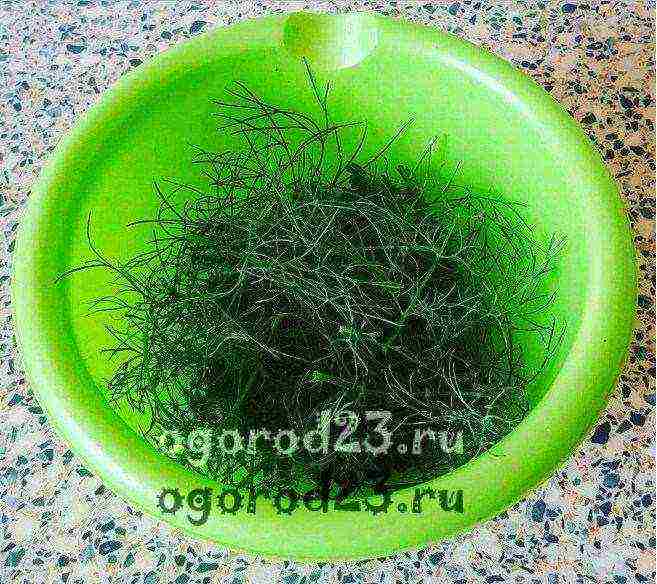
Content

It is convenient when there is always fresh greens at hand - the prepared dishes with it become more aromatic and tastier, so you can often find dill on the windowsill among prudent housewives. At home, this unpretentious plant feels no worse than in the garden, and with good care it gives a lot of lush greenery.
Choosing the right dill variety is the first step to a good harvest
It would seem that even inexperienced gardeners should not have any questions about how to grow dill at home: after all, you just need to sow seeds in a pot with soil and do not forget to water the seedlings, removing the weeds. But in fact, instead of the expected dense thickets of fragrant dill, thin pale blades of grass, practically without aroma, sway sadly in the pot. What's the secret? How to plant dill at home and get greens that are no worse than those that are sold on the market all year round?
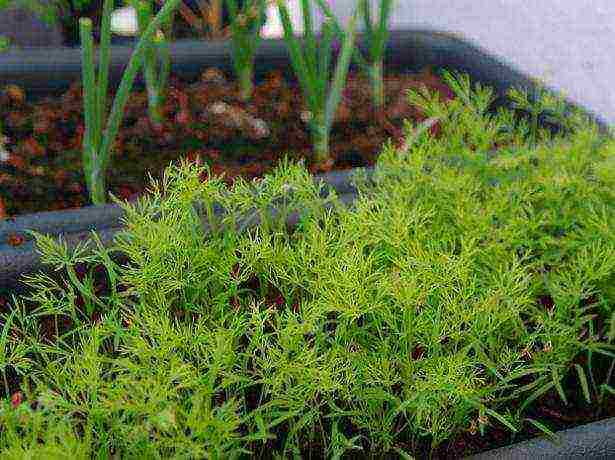
For the purpose of growing dill at home, gardeners most often choose the early-ripening variety Gribovsky
To grow dill at home, you will need:
- seeds of a fruitful unpretentious variety of dill;
- soil for indoor plants;
- fertile garden land;
- suitable containers (pots, containers);
- fluorescent lamps;
- complex mineral fertilizers.
Video about growing aromatic dill
For the purpose of growing dill at home, gardeners most often choose the early maturing variety Gribovsky. This variety of dill is not picky about care, resistant to temperature extremes, high yield and disease resistance. Its greenery has a strong aroma. In order for Gribovsky dill to give a good harvest at home, it is enough to sow it in fertile soil and prevent weeds from appearing.
The following varieties are also suitable for growing on a windowsill: early-ripening Grenadier, mid-ripening Richelieu with bluish-green fragrant leaves, late-ripening Kibray with beautiful wide leaves. Gardeners are also cultivated at home and southern varieties, which have a more spicy taste, but are more finicky.

And late bush varieties do not have time to ripen in the beds over the summer.
Since there is no special variety of dill intended for growing on the windowsill, when choosing a seed, the main attention should be paid to the ripening time. It is important not to be mistaken here: although early varieties give green mass in a very short time, they quickly stretch into flower stalks and are worse leafy than late-ripening varieties. And late bush varieties (Gourmet, Salute, Russian size) do not have time to ripen in the beds over the summer, but they are great for growing at home. Such dill on the window forms dense, well-leafy bushes, from the axils of which new shoots are formed.
Instructions on how to grow dill on a windowsill
In the garden, dill can grow on almost any soil, but successful cultivation of dill at home is possible only in a fertile soil mixture, which must be prepared in advance. To do this, in the fall, you should prepare loose garden soil and mix it before sowing with purchased neutral soil for indoor plants.Select a container for crops of a sufficient size so that the dill is not crowded, and do not forget about the drainage layer at the bottom of the container.
Since dill seeds germinate for a long time due to the high oil content, they must be soaked for 20 hours before sowing in warm water through which oxygen is continuously passing (for example, using a compressor from an aquarium). Another option is to simply place the seeds in warm water for two days and change it to fresh water every six hours.
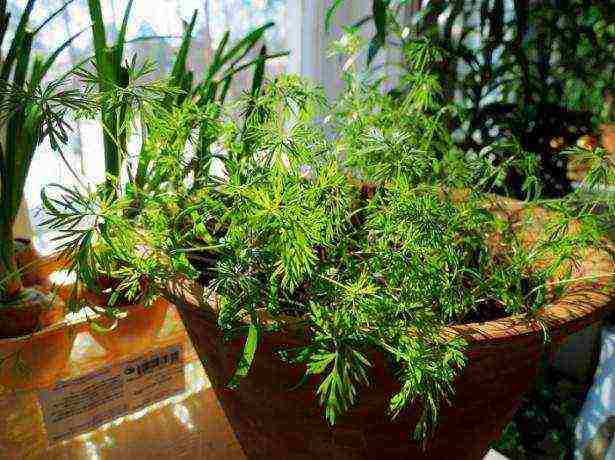
For best results, you can make grooves a centimeter deep in the ground, spill them with water and lay the prepared seeds on the bottom.
Seeds can be sown directly on the surface of the moistened earth, without grooves and pits, sprinkling with peat mixed with humus on top. Sufficient seeding rate - 0.3 g per 1 square decimeter of soil. For best results, you can make a centimeter deep groove in the ground, spill them with water and place the prepared seeds on the bottom. From above, dill seeds are sprinkled with dry earth from the edges of the grooves, so that a dense crust does not form on the soil surface, which prevents the emergence of seedlings. Cover the container with crops with cellophane and put it in a dark place with a temperature of about +20 degrees for a week.
After cutting, the stems and leaves of dill do not regrow: in order to continuously cut fresh greens, sow seeds on the vacating area of your micro-vegetable garden every three weeks.
Growing dill on the windowsill - the secrets of success
Growing dill at home, first of all, you need to remember that this plant is very fond of light. Place the crops on a light windowsill, and in winter, provide additional lighting for the dill by installing fluorescent lamps at a height of 50 cm above the plants. On the windowsill, it is enough to turn on the lamps in the morning for five hours, but if the boxes with dill are in the back of the room, the lighting should last at least fifteen hours.
Video about growing dill on a windowsill
Dill care rules at home:
- dill must be watered regularly, especially paying attention to watering during seed germination and when young shoots appear;
- once every two weeks, it is recommended to feed the plantings with complex mineral fertilizer;
- it is best to grow dill at a temperature of +18 degrees, but even on a glazed balcony when the temperature drops to +8 degrees, the plants will feel quite comfortable;
- if the temperature in the room is higher than +20 degrees, you need to increase the illumination, otherwise the dill bushes will turn out to be elongated, sluggish and light;
- in the first week, as the shoots seem, it is advisable to lower the temperature in the room at night by opening the window, or to carry out the crops to the glazed balcony so that the dill does not stretch out.

The dill needs to be watered regularly, especially paying attention to watering during seed germination
Growing at home can be more or less hassle depending on what time of year you plant the dill. The easiest way to grow dill on a window is from March to August, since planting without additional lighting forms lush greenery, provided there is fertile land and a light windowsill. In the autumn-winter period, without additional illumination, the plants will stretch and fall, which means that you will have to pay more attention to them, and the costs of growing will increase due to the consumed electricity.
Rate the article:
(14 votes, average: 4.1 out of 5)
Greens on the table should be all year round - this is what doctors advise, and they are right. No vitamins from the pharmacy are able to replace natural products either in quality or in effectiveness. Prudent housewives grow these greens at home, in addition to always having the freshest vitamins at hand, green plants improve the indoor climate. Compared to other indoor plants, dill is not considered capricious. But here, too, you need to know a few secrets. The correct approach to growing this crop will avoid many troubles. How to start growing dill at home?
How to grow dill on a windowsill
Variety selection
The correct choice of seeds depends not only on the time of emergence of plants, but also on their biological development. This means that you need to pay attention not only to the growing season, but also to the size of the dill. Experienced growers advise using mid-season varieties Gribovsky, Richelieu or Grenadier for growing at home. If you want to increase the ripening time of ripe dill, then you can sow late-ripening varieties together with mid-ripening ones. The proportions are approximately 50x50.
Practical advice. Dill seeds quickly lose their germination. Do not purchase them more than two years old.
The late-ripening Kibray variety has proven itself well, it has an excellent smell and wide leaves, can be used both as a seasoning for various dishes, and as an element of decoration.
Dill Kibray
But we must remember that this variety requires strict adherence to all the recommended growing rules. Early ripe varieties give green mass in the shortest possible time, but then they quickly stretch out and throw out peduncles. It is considered not advisable to sit them down. We'll have to wait about a month for the crop to appear, so that in a week or two it would no longer be possible to use it.
Seed preparation
Dill seeds need to be prepared before sowing
The better the seeds are prepared, the faster the seedlings will emerge and the stronger the plants will be. It is better to soak in warm water overnight. It is advisable to do disinfection at the same time.
Soaking seeds in potassium permanganate
For this, a weak solution of potassium permanganate was used earlier. Today it is problematic to buy it. Firstly, not every pharmacy sells potassium permanganate. Secondly, it is sold only by prescription of doctors. Is it possible to do disinfection at home without potassium permanganate? You can, for this, use one of the proposed methods.
- Etching with boric acid. For a two-hundred-gram glass of water, you need to take a teaspoon of boric acid. It is necessary to soak for no more than 2-3 hours at a solution temperature of approximately t ° = + 25-30 ° С. Next, the seeds must be removed from the solution and rinsed thoroughly under running water.
Boric acid
- Etching with hydrogen peroxide. Take a 2-3% peroxide solution and soak the seeds in it for 7-8 minutes. After dressing, the seeds must be rinsed.
Hydrogen peroxide for seed treatment
Take seeds with a reserve, it is better to thin out the seedlings later than to have an insufficient number of plants.
There are options for sowing dill seeds without presoaking and dressing. We do not recommend doing this for several reasons. First, the time of emergence of seedlings increases by 5–6 days. Second, they become more uneven. If the soaked seeds give all shoots with an interval of several days, then in dry seeds, it can take up to two weeks between the appearance of the first and last shoots.
With regard to dressing, diseases in the early stages of development have not yet benefited any plant. It is not worth risking the harvest, especially since it does not take much time for all the preparatory operations.
Recommendations for sowing dill
Sowing seeds
You can plant large containers at once or grow seedlings first, and then transplant them. We recommend using the first method, it is faster, easier and easier. For dill, cylindrical pots with a volume of about 1 liter or long rectangular pots with a wall height of about 10 centimeters are suitable.
We prepare containers for sowing
Drainage from ordinary pebbles or expanded clay must be done to the bottom.
Drainage in a pot
It is better to use purchased land. There is no such - do it yourself. Take one part of sod land and mix in one part of river washed sand. It is advisable to add vermicompost or dumb humus to the soil. For lovers of mineral fertilizers, we recommend using complex kits.The instructions for use are indicated on the packaging, follow the recommendations of the manufacturers and everything will be fine.
Pot with soil
Recently, coconut soil has been very popular. What can you say about such a substrate? does incredible things. In all respects, the soil made from coconut shavings is in no way superior to the mixtures familiar to our compatriots.
Coconut substrate
Except for the price, of course. There is a desire - buy expensive "coconut" mixtures, there is no desire - use ordinary substrates. In both cases, the yield will be the same. It depends not only and not so much on the soil, but on the correct observance of all recommendations for growing dill.
Step 1. Use a stick to make grooves in the ground at a distance of about five centimeters, the depth of the grooves up to 2 centimeters.
The grooves can be pushed through with a plate
Step 2. Carefully sow the presoaked and treated seeds into the grooves. If you wish, use a match or a toothpick to level them a little and distribute them evenly along the entire length of the groove. It is recommended to sow not very densely; it is enough to make two parallel rows on a standard oblong pot. If the soil is not very damp, dampen it with a cooking spray. It is much easier to sow on wet ground, the grooves keep their shape and depth, the walls do not crumble.
Sowing seeds into grooves
Step 3. Cover the seed grooves with soil, no need to tamp. Place the pot on the windowsill and wait for the shoots to emerge. Make sure that a hard crust does not form on the surface of the earth, it prevents the emergence of seedlings.
A pot of seeded dill under a film
It is recommended to cover the container with cling film or polyethylene, the optimum temperature is no more than + 20 ° C. If everything is done correctly, the first shoots will appear 5-6 days after sowing. As soon as sprouts have appeared, the film is removed, the backlight is used, the temperature regime is controlled.
Seedling care
Dill is a light-loving plant, in winter it is imperative to use additional lighting. For this, it is recommended to use economical LED lamps, the height of their location must be adjustable. With a lack of light, the plants become very elongated, the stems become thin, and the number of suitable leaves decreases.
Practical advice. Pulling of plants can also be observed at too high temperatures. If it is very warm on the windowsill, then you can put the plants on the floor at night.
Photo of growing dill on the windowsill
The soil is regularly watered, but not overflowed. Dill reacts equally negatively to both lack of moisture and its excess. Once every two weeks, the plants should be fed, use complex mineral fertilizers for this purpose. The optimum temperature is not more than + 18 ° С, with an increase in the stems are very stretched. Greenery on the window can be grown all year round.
Top dressing of dill with saltpeter
After the emergence of all shoots, it is necessary to do thinning. Too dense crops oppress each other, their growth slows down. Leave the plants at least two centimeters apart.
Dill needs to be thinned out if sown too thick
In addition to leaves, dill roots are also used for cooking. After the plants have used all the branches or have thrown out the peduncle, it is recommended to keep them on the windowsill for about a week. Then dig up the roots, rinse them thoroughly in running water and dry them. The dried roots can be stored for up to a year; during cooking, they are used both in whole and in crushed form.
How to make a backlight for dill
How to make a backlight
As we mentioned above, dill reacts negatively to an increase in temperature. This means that in addition to the standard requirements for the backlight, there is one more thing - it should not emit heat. During manufacture, use only "cold" lamps.Fluorescent lighting fixtures give completely cold light. But their use is not recommended due to the presence of mercury vapors inside and the resulting problems during disposal.
Fluorescent lamps
The second way to minimize the heating of the dill during backlighting is to increase the distance between the lamp and the plant. The disadvantage of this method is that you will have to use more powerful bulbs, and this is an additional cost for energy carriers.
Any backlight should be of universal use. Do not make a separate backlight for each plant grown at home. The greater the number of hinge joints and the possibilities of adjusting the position of lighting fixtures, the wider the range of their application. During manufacturing, you should unquestioningly follow the rules of the PUE, cable connections should be made taking into account existing regulatory requirements. It must be remembered that during watering, water can enter the power lines, and this significantly increases the risk of electric shock. In addition, the backlight is installed on the windowsill, so it will not be difficult for children to get to it. Childhood curiosity can have dire consequences if safety rules are not followed during the manufacture of the backlight.
Practical advice
- Lighting should be uniform on all sides. Use aluminum foil to create this light; nowadays, it can be purchased without any problems in specialized stores. There are even portable screens - very easy-to-use devices. They not only make the illumination even, but can also be folded / unfolded and thereby increase / decrease the area.
Use foil for even lighting
- As soon as the plants begin to tilt in one direction or another, turn the pots 180 ° daily. The slopes of the plants indicate irregular and uneven lighting. At the same time as turning the pots, try to adjust the lighting fixtures in height and angle to the plants. With the correct adjustment of the position of the lighting fixtures and the optimal choice of power, the plants develop without deviations.
Don't forget to turn the dill box
- In winter, it is enough to illuminate the plants on the windowsill for 5-6 hours a day. If the plants are located far from natural light, then artificial lighting should be kept for about 15 hours. It is highly recommended to periodically lower the temperature to + 8 ° C. This can be done by any means, up to the removal of the dill to the glazed balcony. Of course, if the weather permits.
Dill seedlings in a pot
- It is better to water with rain or melt water. If this is not possible, tap water must be defended for at least a day to remove chlorine. Dill has a negative attitude to bleach, in addition, it inhibits the reproduction of beneficial bacteria in the ground, and without them, it is impossible for plants to assimilate nutrients. There are recommendations to use the so-called "magnetic" water for irrigation. To obtain it, ordinary water is passed through a special magnetic funnel. At present, agronomic science has not proven the positive effect of magnetic water on plant development, but many vegetable growers have noticed a very positive effect.
Dill on the windowsill fell out due to improper watering - photo
- In 3-4 weeks after the appearance of the first shoots, the plants can be covered with earth. This technique increases yields, makes plants more vigorous, and increases the number of leaves. In addition, the process of throwing out peduncles slows down.
- Sometimes there are cases when, after the appearance of the first two leaves, dill sharply slows down growth. Neither backlighting nor temperature changes help. Do not be alarmed, this is a feature of the development of dill.The inhibition period lasts no more than a week, then the vegetation of plants is normalized, growth continues at the usual pace.
Growing dill in an apartment
- After feeding the plants with liquid fertilizers, it is recommended to spray the leaves with clean water. Thus, the leaf burns will be excluded, chemical compounds will not get into the food.
Subject to agricultural technology, the first crop of greens can be harvested one and a half months after sowing.
Video - How to grow dill at home
 Psychologists point out that the sight of green houseplants helps to survive the winter time. If dill and other spicy herbs are grown on the windowsill, the benefits of such plantings will be many times greater, because the plants will not only remind you of summer, but also replenish the diet with vitamin greens.
Despite its unpretentiousness in the garden, in the conditions of an apartment, dill requires more attention, but in response to proper care it will certainly delight you with fragrant foliage and a long growing season. How to grow dill at home? What are the features of sowing and caring for this crop, and what can prevent you from getting a bountiful harvest of greenery on the windowsill?
Choosing a variety of dill for the windowsill
 If, when sowing parsley or celery, the appearance of a peduncle should be expected only the next year, then when growing dill from seeds in a dry warm microclimate of a room, the plant can bloom, practically without forming foliage. Therefore, the productivity of the vegetable garden on the windowsill primarily depends on the choice of the variety for sowing.
Today there are several dozen worthy varieties that have proven themselves in the open field. For a pot culture, plants that give green mass as long and abundantly as possible are suitable. Examples of such varieties include:
- Asparagus bouquet.
- Superdukat.
- Beam.
- Abundant.
- Kibray.
Dill plants forming a dense green bush on the windowsill feel good.
If necessary, actively growing shoots can be pinched to cause branching and the appearance of new foliage.
Growing dill from seeds at home
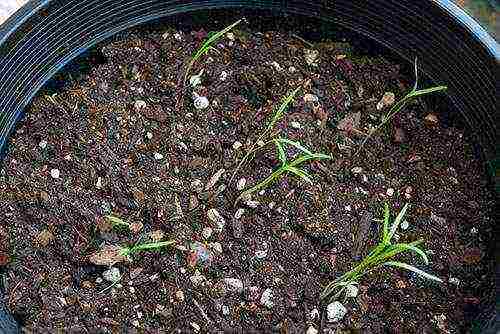 Like other umbrella crops, dill is characterized by tight germination. This is due to the essential oils that protect the seed, but also slow down its pecking. How to grow dill at home and bring greenery closer?
If you do not take special measures, it will take at least two weeks to wait for the emergence of seedlings even with regular watering, and in order to speed up the biological process, the seeds are soaked before sowing. To do this, use warm water or a solution of biostimulants, and in the latter case, after a daily stay in a solution of Kornevin or Ribav-Extra, the sprouts appear already on the 3-4th day, and the germination capacity increases to 100%.
What containers are suitable for growing dill from seeds? A wide container or pot with drainage holes is prepared for sowing dill. The capacity is selected so that several plants planted at intervals of 7-10 cm are not too crowded. The drainage layer, 1.5–2.5 cm thick, is made of fine expanded clay or stone chips.
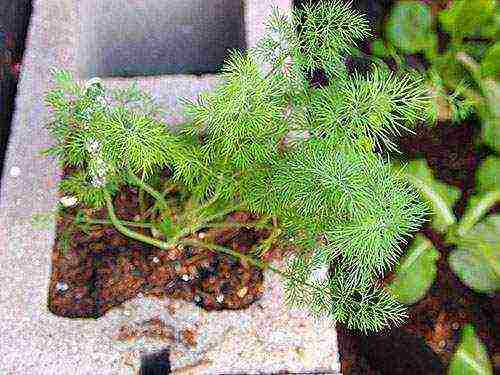 The soil for growing dill at home should be loose, retain moisture well, not acidic and fertile. A ready-made soil mixture for vegetable crops or seedlings is quite suitable, or you can get soil by mixing garden soil, peat, sand and humus in equal proportions. Sowing is carried out in moist soil to a depth of about a centimeter. In order to initially avoid excessive seedling density, the seeds are sealed at intervals of 2-3 cm, sprinkling with a layer of peat on top and carefully compacting the soil.
As shoots appear, they are additionally thinned out so that the plants do not interfere with each other and do not stretch out due to lack of space, nutrition and light.
Care features
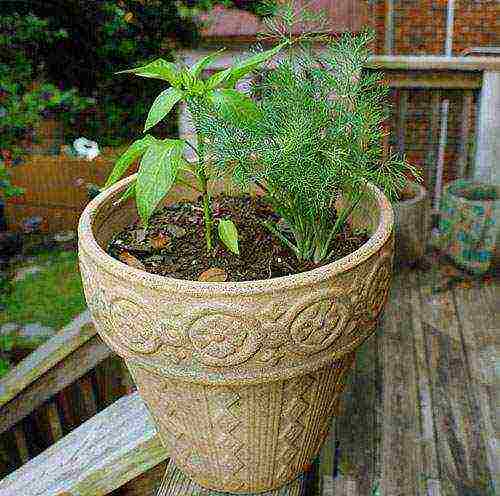 However, such a measure is clearly not enough.Even a south-facing room is less illuminated than a garden bed, and the air is sometimes drier and warmer than the ideal crop temperature range of 16-22 ° C. Therefore, it is more difficult to grow dill on the windowsill than in the open field.
Although the culture is cold-resistant, dill bushes grown at home will not lose their ability to grow even when the temperature drops to +8 ° C. But, once in a hot room, with a lack of watering, the plants refuse to form leaves and quickly release flower stalks. Dill reacts well to moisture, but here it is important to remember: "the higher the temperature, the more often and more abundantly watering."
- If it is cool enough on the windowsill, excess moisture can cause root rot and plant death.
- In hot weather or when the heating is on, the absence of moisture is quickly recognized by sluggish discolored shoots.
- At temperatures above +25 ° C, dill on the windowsill should be regularly sprayed, this will help the plant to cope with increased dry air and heat.
Watering is carried out as the soil dries, in small portions, preventing the formation of a dense crust on the soil.
 So that, as the bushes grow, they do not experience a deficiency of nutrients, they feed the dill on the windowsill twice a month. To do this, you can use complex additives with a low nitrogen content so that this element does not accumulate in the greens entering the table.
Lighting conditions for growing dill from seeds
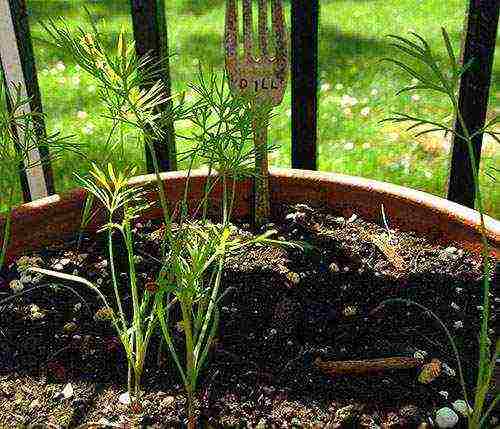 Green crops in the apartment are assigned the brightest places, while taking care that the direct rays of the sun do not fall on the pots.
If sowing dill even at home takes place from March to August, plants create lush bushes on well-lit windowsills and do not require additional lighting.
But most often dill is grown at home in the winter. And here you cannot do without artificial illumination of landings. It is best to hang a special phytolamp at a height of 50-60 cm from the home plantation, which gives the spectrum necessary for the plants. If this is not possible, white fluorescent lamps will do. Taking into account the illumination, daylight hours for dill on the windowsill should last up to 13-15 hours. Such a measure is especially important at the stage of emergence, until the plants have risen and matured.
By receiving the required amount of light, the bushes will not lean against the window pane, stretch out and look weakened.
How to grow dill on a windowsill so that the supply of greens to the table is uninterrupted? Unlike parsley, which for a long time releases new leaves instead of the harvested ones, dill practically does not form greens after cutting. Therefore, 14–20 days after the first sowing, the next batch of seeds is sown. In this case, on the windowsill there will always be dill ready to harvest with marketable greens of approximately 10 centimeters in length.
How to grow dill at home in winter - video
Any dish with the addition of fresh herbs becomes not only tastier, looks more attractive, and becomes much healthier. In winter, a vegetable garden under the snow. The green harvest will not come soon. How to grow dill on a windowsill in order to always have at hand fragrant vegetation rich in useful elements, vitamins - we will consider in detail in this article.
 This process does not differ in any special difficulties, tricks, but certain agrotechnical requirements should still be observed. Getting a good result, providing yourself with fresh herbs throughout the year is quite feasible. At home, this culture feels great, no worse than outdoors. Dill grows well in autumn and winter - when our body especially needs vitamin supplements.
Dill grown at home, photo:

↑ to the content ↑ How is dill useful for the body
They knew about the beneficial properties of dill in ancient times - herbs and seeds were widely used for the preparation of medicinal decoctions. Today, hardly anyone can argue about the importance of dill for our diet. The plant not only gives a piquant taste to dishes, but carries in its composition a powerful vitamin complex, as well as a source of valuable macro- and microelements. Dill improves the functioning of the gastrointestinal tract, cleanses the intestines (thanks to green fibers), its beneficial components normalize metabolic processes in the body, eliminate bloating.
Learn the peculiarities of growing dill on the windowsill - in case of viral, colds, this plant will come to your aid. With increased pressure, nervous irritation or sleep disturbances, a decoction of greens (seeds) of dill will become a real medicine, natural and harmless. An exception for admission is hypotension (so as not to lower the pressure even more), individual allergic reactions. Even pregnant women, nursing mothers will help dill. The first - it will help get rid of toxicosis, prepare the body for breastfeeding, the second - will increase lactation, if circumstances so require. For more confidence, it is better to consult your doctor, and then feel free to use dill, teas, infusions from it. Now, let's start with the most basic - with the choice of a variety that is ideal for home growing.
Dill pot, photo:
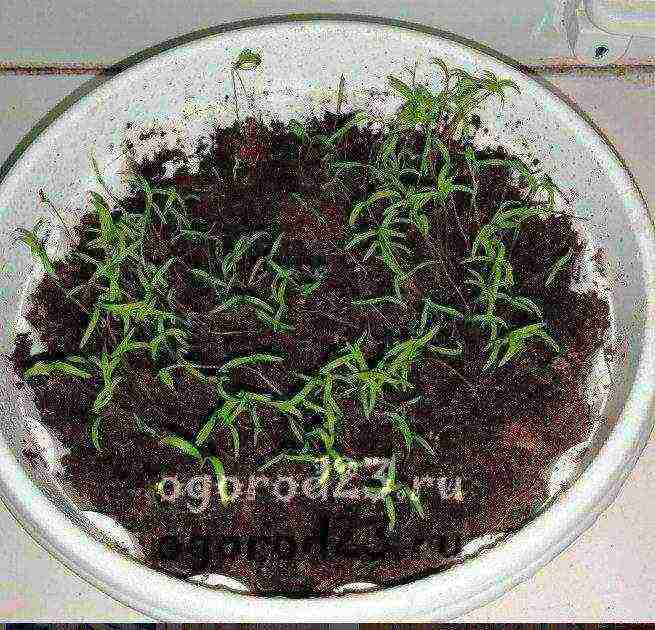
↑ to the content ↑ Dill on the windowsill - varieties
You can sow seeds at any time of the year, for harmonious development and growth they need good lighting and fertile soil. An interesting fact is that there are no special varieties for indoor cultivation of this culture! Many people unknowingly try to acquire early varieties - this should not be done. Firstly, in terms of ripening, the early-maturing species will outpace the usual variety by about 10 days, and secondly, it will not have that characteristic spicy aroma to which we are accustomed. Early dill is short-lived, and its bushes are not at all as lush as in late-ripening or mid-ripening varieties.
According to the recommendations of experienced gardeners, in order to sow dill for the winter, give preference to varieties: "Gourmet", "Russian Size", "Salute", "Richelieu". The varieties Dill, Kibray, Amazon, Buyan are distinguished by special bushiness. Such greens from home beds are good not only for their intended use, they will also decorate your interior, will delight the eye with bright colors and splendor. If you still want to choose an early variety, then take "Gribovsky" or "Grenadier" - they have the best indicators for home breeding, based on feedback from gardeners from thematic forums on the Internet.
Before growing dill on a windowsill in winter, take care of containers for it. For these purposes, elongated plastic or clay trays (pots) are best suited, which can be purchased at the appropriate sections of supermarkets or flower shops. The container must have sufficient depth, because in addition to the soil, it will be necessary to lay down a drainage layer (expanded clay, medium-sized crushed stone or small pebbles). It goes without saying that the bottom of the pots must have drainage holes.
Suitable container with mortar, photo:

↑ to the content ↑ Dill - how to grow at home?
After you have decided on the variety, you need to choose the right soil. For these purposes, a ready-made soil mixture for indoor flowers is well suited. You can also mix equal amounts of neutral soil and garden loose soil in equal amounts. Or take the same proportions of peat, humus, turf soil - dill will really like this composition. To make sure that no harmful bacteria are present, bake the earth mixture in the oven (about half an hour), and then let it stand for 24 hours.
How to grow dill - what to do with seeds? An important nuance: the seeds should be pre-prepared ("wake up"). Soak them in warm water (about 8-10 hours), while the water should be changed periodically (after 2.5-3 hours). Experienced gardeners generally recommend soaking the dill fruits for at least a day, and you need to change the water every 5 hours. In any case, both options "work", and the procedure itself accelerates the emergence of seedlings, the growth of greenery.
Sometimes several crystals of potassium permanganate are added to the water, this nuance is especially relevant if the seeds are not of the first freshness, you have stored them for more than two years. After the fruits are slightly swollen from the "bath", they should be laid out to dry using a clean cloth. During soaking, you will see that some seeds have sunk to the bottom of the container - these seeds are no longer suitable for planting, it is better to remove them immediately.
How to grow dill correctly? Clean river sand should be poured into the planting tanks on top of the drainage layer. The sand is laid in a thin layer; it is also recommended to pre-calcine it in the oven. The soil is laid on the sand, it is imperative to moisten it. The seeds can be buried in any way - in grooves or simply in a uniform scattering over the area of the pot, after which they should be sprinkled with a thin layer of peat (about 1 cm), pressed a little. Then cover the container with plastic wrap, put it in a warm place (+18 .. + 20 ° C). You will have to wait about 10 days.
The film will create a greenhouse effect. If you are planting dill for the winter, then put the pot closer to the battery - this way you will create the necessary microclimate for successful sprouting. Lift the film periodically to remove condensation. As soon as shoots appear, the container can be transferred to the windowsill or any bright place where the greens will grow further. Sprouts need light, this culture itself is light-loving, therefore, dill must spend all stages of life in a lighted place.
Sprouts, photo:
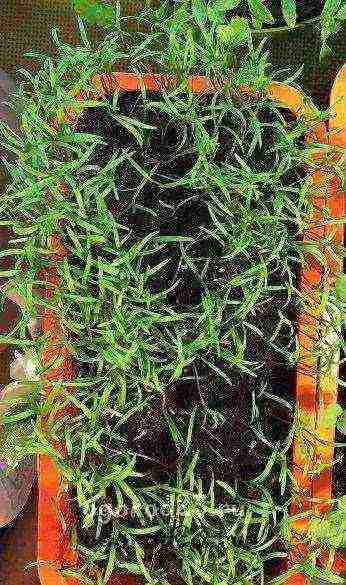 Dill - how to grow? South windows are the best place to place your greenery pots. In winter, when the daylight hours are very short, your mini-garden will have to be supplemented with fluorescent lamps. Additional illumination time should be approximately 5 hours, while the lamps should be placed above the containers (a distance of about half a meter). Special phytolamps are also perfect for these purposes.
↑ to the content ↑ Dill on the windowsill in winter -peculiarities of cultivation
The optimum temperature for the favorable growth of dill is +18 .. + 20 ° C. Keep in mind that if the column of the thermometer rises much higher, then the plants will lean to one side, become lethargic, pale. If you feel a lack of light, the dill will begin to stretch in length, the stems will become thin, and there will be few leaves. This is a long day culture, with 10-12 hour daylight hours, the green mass grows, and it takes 14 hours for fruit to form. In our case, obtaining seeds is not so important, because we grow a plant to obtain fragrant greens.
The biological characteristics of dill imply sufficient moisture saturation, especially during the period of germination of sprouts and, in fact, of growth itself. It is important to find a middle ground here, since when oversaturated with moisture, the culture begins to wither, the earth becomes moldy, and if there is a shortage, it ceases to grow leaves, becomes coarse. Watering dill for the winter should be frequent, but in moderation, it is also recommended to practice irrigation from a spray bottle. If the plant is grown in summer, then watering or spraying should be done more often. For these purposes, the water must have a suitable temperature (not lower than 30 ° C), be settled or thawed.
The tricks of growing dill for greens - in addition to the requirements for lighting and watering, you should get rid of weeds in time. If the greens grow too densely, it can be thinned out - remove weaker representatives.This plant loves freedom, so this procedure is important for the comfortable development and growth of shoots. Do not be lazy, daily turn the containers with dill 180 degrees, so they will grow more evenly, without stretching in length. Fertilizers can be applied once a month; complex feeding is optimal for these purposes. Many gardeners practice vermicompost or the preparation "BIUD" diluted with water (1:20). Do not overdo it with fertilizing, if you planted seeds in fertile soil, then the addition of fertilizers should be minimal.
Harvest, photo:

↑ back to contents ↑ How to grow dill at home?
Based on the above, the most important criteria for growing dill are good lighting and proper moisture. The higher the temperature in your apartment, the more actively you should water the ground, irrigate the ground part of the plants. At first, as soon as the seedlings appear, it is advisable to lower the temperature near the containers with plants with the arrival of night. This is done so that the sprouts gain strength, and not stretch upward. This idea can be realized by taking the pots to the balcony before nightfall. You can also open the window to let the plants breathe fresh air. Naturally, consider the time of year outside the window outside temperature.
Now you know how to plant dill for the winter, how to grow it all year round, because there is no time limit for planting for this plant. Light, daylight hours are an important criterion for dill; in spring and summer it will be much easier to provide yourself with fresh greens than in late autumn or winter. How to grow dill on a windowsill - the instruction is simple: correctly selected soil, a suitable and bright place, additional lighting (if necessary), correct watering. If you follow these simple rules, you will always have lush, juicy, healthy greens at hand!
