Content [show]
 Healthy tomato seedlings are a guarantee of a bountiful tomato harvest. The mistakes that beginner gardeners make at the stage of sowing seeds and growing seedlings will certainly affect the fruiting of an adult plant. There can be no trifles in this matter! Let's try to figure out all the stages of growing tomato seedlings, starting with determining the timing of sowing and ending with planting bushes in open ground (in boxes - if growing on a balcony).
When to sow tomatoes for seedlings?
Roughly, tomato seeds should be sown 55-65 days before planting seedlings in open ground or a greenhouse. Seeds sprout pretty quickly - 5-10 days after sowing. Therefore, the average period of keeping seedlings on the windowsill (from the emergence of seedlings) is 45-60 days.
It is important to correctly determine the timing so as not to overexpose the seedlings on the windowsill. This is fraught with inhibition of the growth of an adult bush and a decrease in yield.
Average tomato sowing time:
- in the southern regions of Russia and Ukraine - from February 20 to March 15 (disembarkation in the OG - from April 15 to May 20);
- in the central regions of Russia - from March 15 to April 1 (disembarkation in the OG - from May 10 to early June);
- in the northern regions (Siberia, Urals) - from April 1 to 15 (landing in the OG - from May 25 to June 15).
To accurately answer the question of when to plant tomato seedlings, you need to know about the end date of spring frosts in your area. Counting from this period 55-65 days ago, you can accurately determine the date of the desired landing.
If you plan to plant tomato seedlings not in open ground, but in a greenhouse or on a glazed balcony, then sowing work can be started 2-3 weeks earlier.
Growing conditions for tomato seedlings
When growing tomato seedlings on a windowsill, create conditions for seedlings with:
- a lot of light - it is desirable that the windows face south, not shaded by trees (with a lack of natural light, artificial lighting with lamps is required);
- high humidity - spray tomato seedlings 1-2 times a day, use a humidifier, etc.;
- warm - during the day, the optimal temperature for tomato seedlings is 18-25 ° C, at night - 12-15 ° C.
Tomato seedlings: growing at home
Step 1. Preparatory work
Preparatory work may include:
- disinfection of seeds;
- preparation and disinfection of the soil.
Packaged seeds of well-known manufacturers do not need additional pre-sowing treatment. They have already passed the required disinfection at the enterprise.It is quite another matter if the tomato seeds used were collected with their own hands or bought by weight on the market. Such material can be infected with pathogens of various bacterial, viral and fungal diseases.
To eradicate the infection, use one of the following disinfecting solutions:
- 1% solution of potassium permanganate (1 g per 100 ml of water). Wrap the seeds in cheesecloth and soak in this solution for 15-20 minutes. It is not recommended to keep it longer - the germination of seeds decreases. After processing, rinse the seeds with water.
- 0.5% soda solution (0.5 g per 100 ml of water). Soak tomato seeds in it for 24 hours. In addition to disinfection, soda solution promotes earlier fruiting.
- Aloe juice solution (1: 1). Ready-made aloe juice can be purchased at a pharmacy or squeezed out of the leaves yourself (they are previously kept in the refrigerator for 5-6 days). Soak the seeds in aloe juice diluted in water for 12-24 hours. Tomatoes from seeds that have undergone such treatment are distinguished by increased immunity, improved yield and fruit quality.
- Fitosporin solution. When using liquid Fitosporin (in a bottle), prepare the solution as follows: dilute 1 drop of liquid in 100 ml of water. Prepare a solution of Fitosporin powder at the rate of 0.5 tsp. per 100 ml of water. Soak the seeds in the solution for 1-2 hours.
The soil can also be contaminated, especially if it is dug up from the garden. Safer soil bought packaged in flower shops. But even here unpleasant "surprises" can occur, so the best way to protect yourself (and seedlings!) From surprises is to cultivate the soil with your own hands.
The most popular ways to disinfect seedling soil:
- calcining in the oven (10-15 minutes at 180-200 ° C);
- warming up in the microwave (1-2 minutes at a power of 850);
- disinfection with boiling water (put soil in a pot with drainage holes and spill it in small portions of boiling water);
- disinfection with potassium permanganate (spill the soil with a strong solution of potassium permanganate).
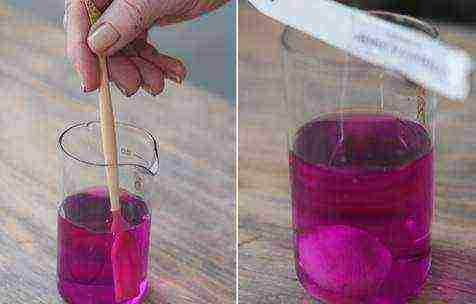 Disinfection of tomato seeds in potassium permanganate
All these methods can be combined with each other to obtain the most sterile and safe soil for seedlings.
You should not start planting tomatoes for seedlings immediately after preparing the soil! Moisten it and keep it at a positive temperature for 10-12 days. During this time, bacteria beneficial to plants will begin to multiply in the sterile soil. Only then can sowing begin.
Step 2. Sowing tomatoes for seedlings
Fill the container (cassettes, peat pots, plastic cups, cottage cheese boxes, shallow boxes) with prepared moist soil and make grooves about 1 cm deep in it.The step between the grooves is 3-4 cm. Place the seeds in them at a distance of 1-2 see more. The less often the seeds are sown, the longer it will be possible to keep the seedlings in seedlings without planting them. Sprinkle the grooves with soil.
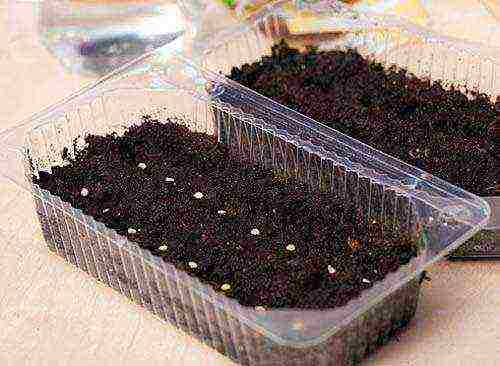 Tomato seeds are sown into the ground to a depth of 1 cm
You can make it even easier: place the seeds on the prepared soil and cover them with a centimeter layer of soil.
Cover the top with foil or glass to provide a constant microclimate for the seedlings with a humidity of about 80-90%. In order for the seeds to germinate, the temperature of their content should be 25-30 ° C. Therefore, place the seedling boxes near a radiator or other heat source.
Check soil moisture every day. When dry, spray generously with a spray bottle. In case of excessive moisture, open the film (glass) and wait until it dries. Sometimes, high humidity leads to the formation of mold on the surface of the soil. Then carefully remove the upper infected layer and spill the soil with a solution of potassium permanganate or an antifungal drug (Fundazole, Fitosporin).
The first seedlings of tomatoes appear in 3-4 days at a temperature of the above-ground air layer of 25-28 ° C, at 20-25 ° C - in 5-6 days, at 10-12 ° C - in 12-15 or more days after sowing.
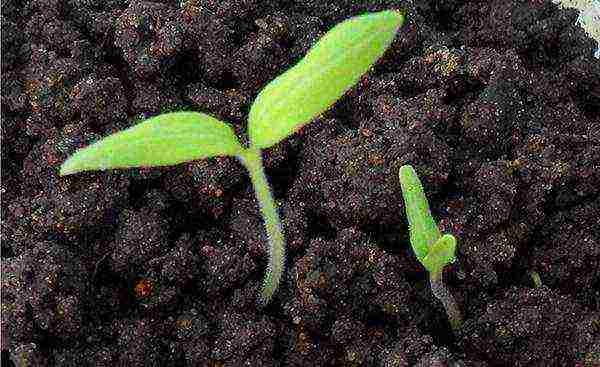 Cotyledonous leaves of tomato seedlings emerging from the ground
More details about when to sow tomatoes for seedlings, how to choose tomato seeds and sow them correctly in the ground, is shown in the video:
Step 3. Care of tomato seedlings
Lighting
Growing tomato seedlings is impossible without good lighting! Therefore, after the emergence of seedlings, put the seedlings on the lightest windowsill. In February and early March, the light for the seedlings in any case will not be enough, therefore, if possible, use additional lighting with fluorescent lamps.
There is a version (author - Tugarova T.Yu.) that the best development of tomato seedlings can be achieved if the seedlings are illuminated around the clock for the first 2-3 days after germination. After that, you can switch to the usual supplementary lighting mode - 16 hours a day (the total duration of daylight hours).
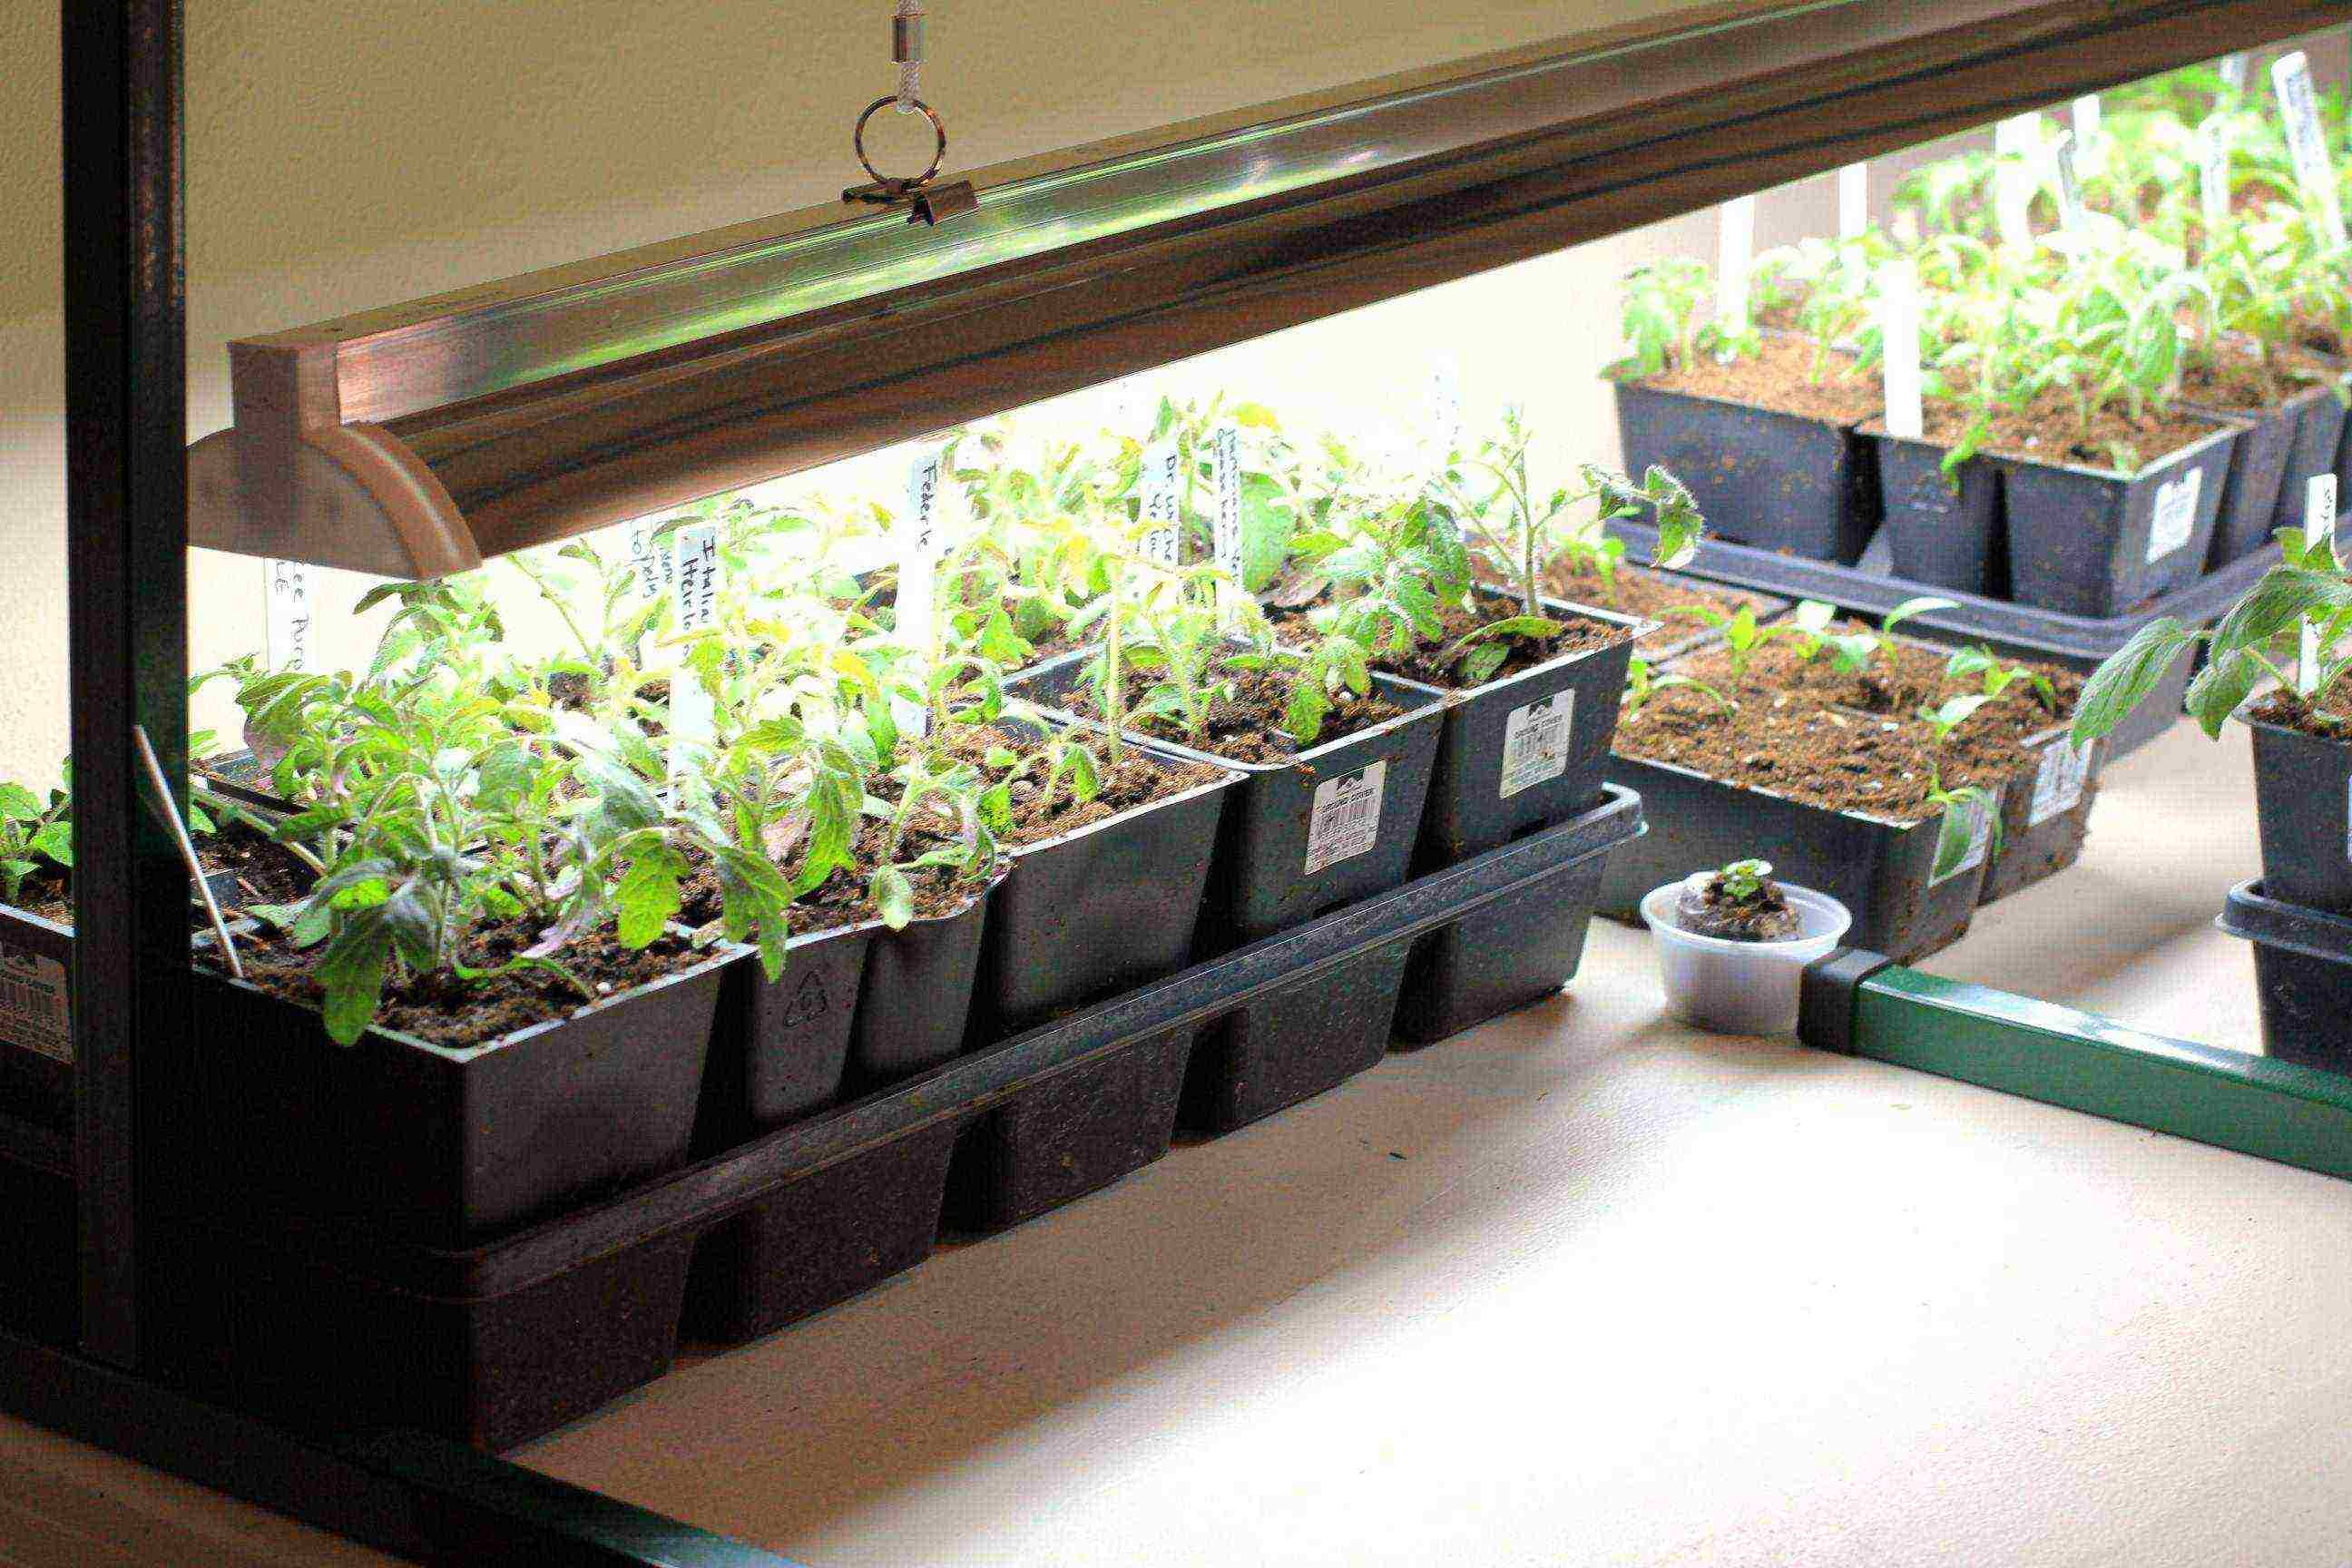 Tomato seedlings under fluorescent lights
Humidity and watering
Young seedlings should be kept in high, almost extreme humidity; drying is unacceptable. Therefore, do not rush to immediately remove the film (glass) from the seed containers. Open it a little bit every day so that the seedlings get used to the fresh air, but at the same time remain in the "greenhouse". After 1-2 weeks, the shelter can be completely removed.
Tomato seedlings growing under the film at home may not need watering for a long time. Look at the condition of the soil: do not breed the swamp, but, at the same time, do not let the top layer dry out (while the roots of the sprouts are still small and are in the upper layer of the soil, so drying it will mean drying out the roots). Water the tomato seedlings carefully, under the stem. In order not to damage the sprouts, you can use a syringe (without a needle) or a pipette.
After removing the film, the frequency of watering tomato seedlings should be proportional to the amount of heat and light. With an increase in temperature and lengthening daylight hours, tomatoes begin to grow and quickly "drink" moisture from the ground. Accordingly, the soil dries out faster, watering is required more often.
It is important not to dry young tomatoes. Often inexperienced gardeners are faced with such a nuisance: in the evening, coming home from work, they notice their seedlings completely wilted, although in the morning they still looked quite normal. It is necessary to check the seedlings in the morning, when there is still no hot sun. If you notice that the sprouts are a little sluggish, water them immediately. Otherwise, at noon, the rays of the sun can dry out the still weak young seedlings.
Bays can also be dangerous. It's bad that poured and dried tomato seedlings may look the same: the stems lose their turgor, the leaves wither. When you see such symptoms, pay attention to the soil. If it is wet, in no case add water - ruin the seedlings. Place the seedling container in a place protected from direct sunlight, do not water until the earth dries. In the future, adjust the amount of watering.
Cold windowsills combined with moist soil are especially destructive for young tomato sprouts. Therefore, watering in the evening (in February-April) is not recommended. At night, the temperature can drop significantly, the sprouts will freeze and begin to hurt.
Fresh air
As soon as a warm, windless day comes out, take the seedlings out into the fresh air: on the balcony, outside, or just open a window. Even in March, on a sunny day, the temperature on an open balcony can reach 15-20 ° C! If such a day coincided with the emergence of seedlings - great luck! Take out the sprouts to bask in the sun. The fact is that tomato sprouts on the first day after germination are protected from UV rays, which prevents them from burning. Such sprouts from infancy will be heat-resistant, hardened and can be “walked” in the sun on a regular basis.
If you did not have time to take out the seedlings in the sun on the first day, then it is no longer possible to do this in 1-2 days - the innate hardening has disappeared. In this case, you will have to gradually accustom the sprouts to the sun. The first day is enough 5 minutes. Then every day you can increase the duration of the walks by another 5 minutes.
Tomato seedlings, which were exhibited every day on an open sunny balcony (in the courtyard), by the time they are planted for permanent residence, quickly catch up in growth with those seedlings that were sown a month earlier, but were kept on the windowsill behind the glass and without illumination.
Top dressing
Tomato seedlings need feeding 2-3 weeks after the first shoots. In the future, fertilizers will have to be applied every week. It is best to use natural organic fertilizers such as manure or grass. Of the purchased ones, specialized fertilizers based on guano, humic fertilizers, vermicompost, etc. are good. Use half the dose indicated for the particular fertilizer to feed seedlings.
Step 3. Pick (transplant into large cups, pots)
The first true leaves of tomato sprouts appear on the 7-10th day. At this age, if the seeds were sown too heap in one container, you can pick the seedlings into separate cups. Despite the fact that tomatoes tolerate transplanting well, this must be done carefully. Transplant sprouts with a clod of soil on the roots. Some gardeners advise pinching the central root of tomato seedlings when picking. However, we do not recommend doing this - in any case, even with the most careful transplantation, the roots are still damaged. There is no need to additionally injure the plant. Moreover, it can be harmful: pinching up to 1/3 of the root will delay the development of seedlings for 1 week.
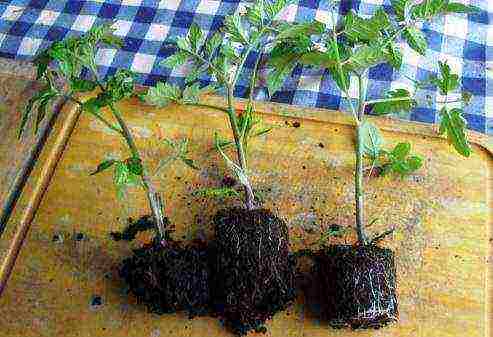 When picking tomato seedlings, a lump of earth on the roots should be preserved
The first transplant is carried out in small 200 ml cups.
After 2-3 weeks, the seedlings can be dived a second time - into larger pots. If the seeds were originally sown in individual containers (cups, cassettes), then this transplant will be the first. At the same time, it is not recommended to use pots less than 0.5-1 l. Professional gardeners prefer even larger volumes - 3-5 liters for each plant. But, you see, not every window sill can withstand such seedling plantations, especially in a city apartment. And this is not necessary: 1 liter of soil for 1 plant is enough for the eyes!
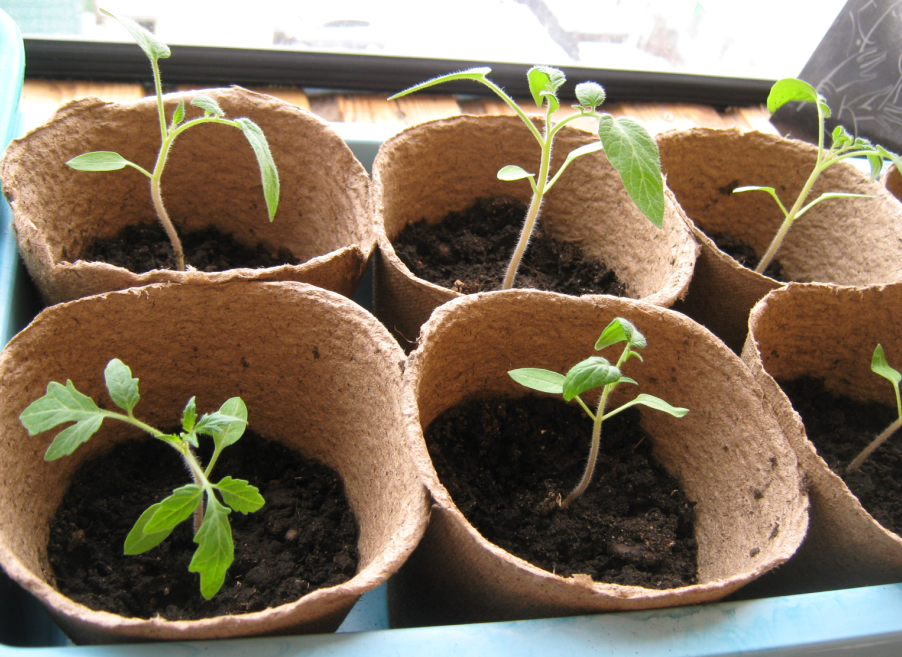 Picking tomato sprouts into peat pots
You can learn how to grow tomato sprouts and dive seedlings by watching the video:
Step 4. Preparing for planting for permanent residence (in the greenhouse, on the balcony, in the exhaust gas)
At the age of 1.5 months, tomato seedlings at home expel the first flower brushes. As soon as you notice them, know that after 10-15 days, the seedlings need to be planted for permanent residence - in a greenhouse, on a balcony or in an exhaust gas. It is impossible to delay the transplant, otherwise it will lead to a decrease in the yield.
If you decide to keep tomato seedlings on the windowsill for more than 45-60 days, then it should be provided with at least 1 liter of soil per 1 plant. If you overexpose tomatoes in relatively small containers, even 10 days longer than it should, and let them bloom, then they will stop their vegetative growth and will forever remain "undergrowth". Even in exhaust gas, they will no longer be able to accelerate and will never turn into full-fledged plants. Accordingly, you will not have to wait for a full-fledged harvest from them either!
This problem can be partially solved by removing the first flower brush. The next brush will appear only after a week, that is, it will be possible to postpone the planting of seedlings for permanent residence for a week.
A good tomato seedling before planting should have thick stems, large leaves, a strong root system and developed buds.
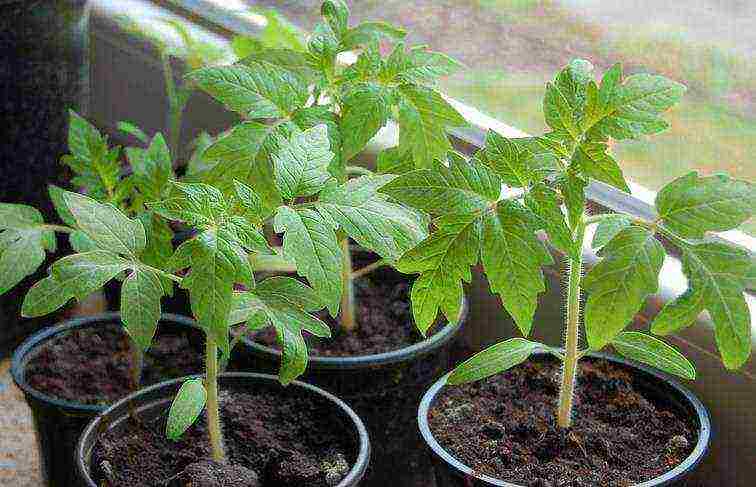 Characteristics of a healthy tomato seedling: powerful bush, large succulent leaves, thick stems, developed root system
Step 5. Planting tomato seedlings in the ground
The distance between the tomatoes in the greenhouse or the exhaust gas should be 30-40 cm. If you decide to grow garden plantations on the balcony, then 4-12 liters of land should be allocated for each tomato bush. 4-5 liters will be enough for undersized "balcony" varieties: "Balcony miracle", "Dwarf", "Hummingbird", etc.Large garden varieties suitable for OG ("Sasha", "Sunrise", etc.) are grown in containers of 10-12 liters.
For tomatoes, good fertile garden soil (black soil), mixed with peat soil "Universal" or "For vegetables" in a ratio of 1: 1.
Planting tomato seedlings for permanent residence is best timed to coincide with a cool, calm and cloudy day. Plant the seedlings by burying the center stem a couple of centimeters deep. After a few days, additional roots will begin to form along the buried stem. Overall, the root system will become stronger and stronger.
After planting, water the tomato seedlings with warm water and wait for the harvest!
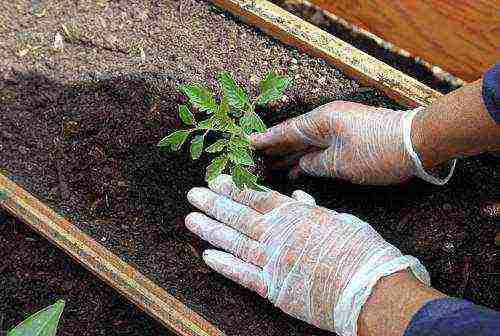 Planting tomato seedlings in a balcony box for permanent residence
And, finally, in order to better understand the intricacies of growing tomato seedlings and transplanting them to permanent residence in open ground, a greenhouse or onto a balcony, we suggest watching a short video posted below:
High-quality seedlings are the key to a good harvest. How to sow tomato seeds correctly, grow healthy seedlings and cut them open? Read about this in our article.
When buying tomato seedlings, you never know for sure how high-quality they are and whether they are ready for planting in open ground. The fact is that the lush green mass does not at all mean that the plants will grow strong and healthy.
And it's a completely different matter if you grow tomato seedlings yourself. So you will know exactly which variety will soon settle in your garden, when the seedlings are ready for planting in open ground and how soon to wait for the harvest.
Step 1. Decide on the time of sowing tomato seeds
The time of sowing tomatoes for seedlings depends on which variety you are going to grow. When purchasing a bag of seeds, pay attention to the ripening period of tomatoes (the period from germination to harvest). Tomato varieties can be divided into three groups according to the ripening period: early ripening, mid-season and late ripening.
| Varieties | Ripening period |
| Early ripening | 90-100 days |
| Mid-season | 110-120 days |
| Late ripening | up to 140 days |
If you know which group your chosen tomato variety belongs to, you can easily calculate the planting time. For example, to get the first early ripening tomatoes, say, by July 15, you need to sow the seeds about 100 days before. By this time, you should also add 4-7 days for the emergence of seedlings and 3-5 days for the adaptation of seedlings after transplanting them into open ground. Thus, it turns out that tomatoes should be sown around March 26.
Usually, seed producers indicate on the packaging when it is worth sowing a particular variety. So, if you are not sure that you have correctly calculated the sowing time, you can always check with the recommendations of specialists.
When choosing tomato seeds, be sure to pay attention to their release date. The best germination will be in seeds produced no more than 2 years ago.
Sowing timing of tomato seeds for different regions
| Culture | South and North Caucasian Federal District | Belarus, Volga Federal District | Central and Northwestern Federal District | Ural Federal District | Siberian and Far Eastern Federal District | Time from sowing to germination (days) |
| Greenhouse tomato | 3rd decade of January | 1st decade of March | 2nd decade of March | 3rd decade of March | 3rd decade of March | 7-8 |
| Open field tomato | 1st decade of February | 2nd decade of March | 3rd decade of March | 1st decade of April | 1st decade of April | 7-8 |
Step 2. Prepare the seeds for sowing
Whatever tomato seeds you are going to sow - collected from your garden or bought in a store - you need to disinfectto destroy pathogens. To do this, wrap the seeds in cheesecloth and immerse them in a dark pink solution of potassium permanganate (2.5 g per 1 tbsp. Water) for 20-30 minutes. Then rinse the seeds under running water and dry a little.
After disinfection, tomato seeds are recommended germinate - this will speed up the sprouting process. Take a paper towel, dampen it with water, and fold it in half.Place the pickled tomato seeds on one end of the napkin, and cover them with the other end.
It is most convenient to put a napkin with seeds on a saucer or a small plastic plate. Place the saucer in a bag and place in a warm place (for example, near a radiator). Make sure to keep the napkin moisturized constantly to keep the seeds from drying out.
Tomato seeds begin to germinate on the 3-5th day. Select all seeds that have hatched by this time for sowing. It is not worth sowing non-germinated seeds - even if they do sprout, the plants grown from them will be weak and painful.
Step 3. Prepare the seedling soil
You can purchase soil for planting tomato seeds at your gardening store. Any universal soil for growing vegetable seedlings is suitable.
This mixture can be "diluted" with garden soil. But keep in mind that the soil brought from the street needs preliminary processing. Bring it indoors for 3-5 days so that it has time to warm up before sowing the seeds. Then, for disinfection, spill the soil well with a pink solution of potassium permanganate and let it stand for another 1-2 days. After that, mix the purchased substrate with garden soil in equal parts and fill the seedling containers with it.
Step 4. Choose suitable seedling containers
You can sow tomato seeds in seedling boxes or separate containers. Today in the store you can find seedling boxes for every taste and budget. For single containers, plastic cups are the most practical option.
Sowing seeds in a container of each type differs only in that seedlings from a large container, when they reach a certain size, should be dived, and the sprouts from the cups can be transplanted directly into the open ground.
Step 5. Sow tomato seeds
In separate pots
Take plastic cups and punch drainage holes in the bottom of the cups. Then fill the bottom of the containers with drainage. It can be expanded clay, small pebbles or eggshells. Fill the cups with soil and pour well with warm water.
Make shallow holes (1-2 cm) in the ground and sow 2-3 tomato seeds in them. This is done in case not all seeds germinate.
Spray crops gently with a spray bottle. And cover the containers themselves with foil and put in a warm place.
IMPORTANT! After sowing the seeds and until the tomato seedlings get stronger, water them only from a spray bottle. If you water the crops with running water, the seeds will go deep into the ground and may not sprout. And if you water the weak filamentous seedlings from the watering can, they will "fall".
In general containers
Choose containers for sowing tomatoes that are not too large. It is enough that plants of the same variety fit in them - so later it will be more convenient to navigate in the seedlings.
Fill a container with earth and sprinkle well with water. Mark several rows at a distance of 4 cm from each other. Place tomato seeds in them every 2 cm.
Do not place tomato seeds too close together. Thickened crops are poorly ventilated, which can lead to a "black leg".
Using a pencil or a special stick, gently press the seeds into the soil to a depth of about 1 cm.Then sprinkle them with earth. It is no longer necessary to water the crops of tomatoes.
Cover the containers with plastic wrap or a special lid, if one was included. Place the containers close to the battery until the first shoots appear. This usually happens after 4-7 days. As soon as this happens, transfer the container to a bright place with a temperature not exceeding 18 ° C.
Remember that for good growth, seedlings need to be exposed to light for at least 12 hours a day. If this does not work out, you will have to purchase lamps for additional lighting.
Be attentive to the crops, from a lack of light, the sprouts may begin to stretch out. Before picking, they do not need to be fed with anything, it is enough only to moisten them in a timely manner from a spray bottle.
Step 6. Cut the seedlings
When the seedlings in the cups grow a little, they need to be thinned out (in the event that several seeds have sprouted in one container). It is necessary to leave only one thing - the strongest plant. In this case, do not pull out the "extra" seedling from the ground, because this can damage the root system and the second plant. To remove a weaker specimen, you need to pinch it off just above the soil level.
Tomato seedlings from the general container can be dived when the seedlings have 2 true leaves. Just do not confuse them with cotyledons - this is a common mistake of novice gardeners. Real leaves are the second pair of leaves.
Using a small stick or plastic spoon, carefully remove each seedling with a small clod of soil from the common box and transfer to separate containers. Bring the plants into the ground almost to the cotyledonous leaves.
The soil for transplanting seedlings can be taken the same as for sowing seeds. Only this time it is recommended to add complete mineral fertilizer to it at the rate of 1 tbsp. for 5 liters of substrate.
If you grow tomatoes of different varieties, do not forget to stick their names on the cups so as not to confuse the seedlings.
10 days after the pick, a new root system begins to form in the seedlings, and their growth is noticeably accelerated. With the appearance of the third true leaf, plants begin to need light especially badly. But no less than that, they need the right feeding. Usually, tomato seedlings are fed 2 times:
- 10 days after the pick (5 g of urea, 35 g of superphosphate, 15 g of potassium sulfate per 10 L of water);
- 2 weeks after the first feeding (10 g of urea, 60 g of superphosphate, 20 g of potassium sulfate per 10 l of water).
You can also feed tomato seedlings with ready-made complex fertilizers. If the plants are grown correctly, then by the time they are planted in the ground, the thickness of the stems should reach 1 cm, and the height of the plants should be about 30 cm. By this time, they should have 8-9 leaves and one flower cluster.
7. Plant seedlings
The timing of planting tomato seedlings may vary depending on the region.
| Culture | South and North Caucasian Federal District | Belarus, Volga Federal District | Central and Northwestern Federal District | Ural Federal District | Siberian and Far Eastern Federal District | Time from sowing to germination (days) |
| Greenhouse tomato | 3rd decade of March | 1st decade of May | 2nd decade of May | 2nd decade of May | 3rd decade of May | 45-50 |
| Open field tomato | 2nd decade of April | 3rd decade of May | 1st decade of June | 1st decade of June | 1st decade of June | 45-50 |
Plants ready for transplanting should have a strong and thick stem, a healthy appearance and 6-8 true leaves. The height of the plant, as a rule, depends on the variety, so it is difficult to orientate on it.
Growing tomato seedlings is very easy if you follow all the recommendations outlined above. In spring, growing tomatoes on the window will compete with the home flower garden. And how the seedlings smell after watering! Try to grow it yourself - and you will definitely succeed!
Tomatoes are a favorite vegetable on our table with excellent taste and nutritional qualities. The variety of varieties allows it to be widely used both fresh and processed. Fruits of some varieties are preferred to be added to salads, while others - to pickles and marinades.

Growing tomato seedlings at home
To get a good harvest of tomatoes from your garden, you need to know and follow the rules for growing tomato seedlings. First, even in the fall, it is advisable to prepare a nutritious soil. Then you need to carefully select and prepare seeds, which should also be planted in the ground according to certain rules. And the seedlings must be properly monitored and looked after.

Seedlings of tomatoes
It is permissible to plant tomato seeds directly on the beds. And in order to get fresh tomatoes on the table as early as possible, you should use the seedling method of growing tomatoes.
Sowing and transferring seedlings
Depending on how you plan to grow tomatoes in a permanent place, you should select the sowing time.
- Greenhouse seeds are planted from 15 February to 15 March.
- Seedlings, the seeds of which were planted in the first two decades of March, are later planted on open beds, for which it is required to build a shelter for the first time.
- For plants that are planned to be planted in open ground without any shelters, seeds are planted from March 15 to March 31.
Timing of planting tomato seeds for seedlings
In other words, if the seedlings are intended for further cultivation before harvesting from the greenhouse, then the sowing of the seeds should be done approximately one and a half to two months before transplanting. If the seedlings are supposed to be transferred to open ground, then it is advisable to sow the seeds within a period of two to two and a half months from the planned date of planting.
Important! In climatic zones where there is a likelihood of late frosts in the spring, it is better to wait with planting seedlings until the risk of this negative factor is minimal.
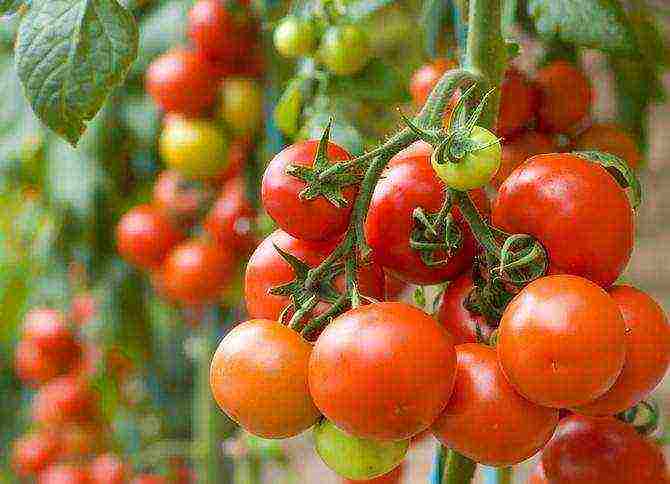
Growing seedlings of tomatoes (tomatoes)
Step-by-step instructions for growing tomato seedlings at home
Table. How to grow tomato seedlings at home.
 Step 1. Preparing the soil |
Prepare the soil and fill the seed boxes with it. |
 Step 2. Seed preparation |
Immerse the seeds in a 5% salt solution for 10 minutes. Then, after rinsing thoroughly, leave in water until it swells. Alternatively, you can simply soak the seeds in water. To do this, they must be wrapped in a damp cotton rag or napkin and placed in a shallow plate. Cover the top with something to prevent moisture evaporation and keep it in a warm room for 24 hours. |
 Step 3. Planting seeds |
One of the methods. Sow seeds in grooves, the distance between which is about 5 cm. Pre-moisten the soil with a slightly warm solution in which the seeds were kept. The sowing depth should be 1 cm, and the distance between the seeds should be no more than 2 cm. Do not water after planting. The top can be covered with foil to speed up the seed germination process. |
 Step 4. Pick |
Transfer the sprouts to separate pots. |
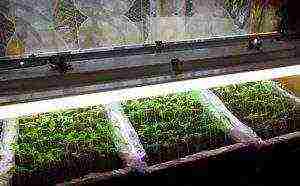 Step 5. Lighting arrangement |
Tomatoes need a lot of light. After the first shoots appear, special lamps should be installed above them. |
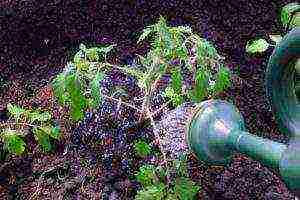 Step 6. Watering and hardening |
Tomato seedlings are watered in the morning. The water temperature should be + 28 ° C. In sunny weather, you need to do this every day. It is preferable to use soft water such as thawed water. If there is no sun, watering is done when the soil dries up. Seedlings need to start hardening two weeks before transferring to the beds. |
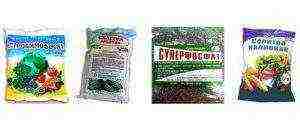 Step 7. Top dressing |
To obtain a rich harvest, it is advisable to feed the seedlings with fertilizers. Top dressing is done during watering. |
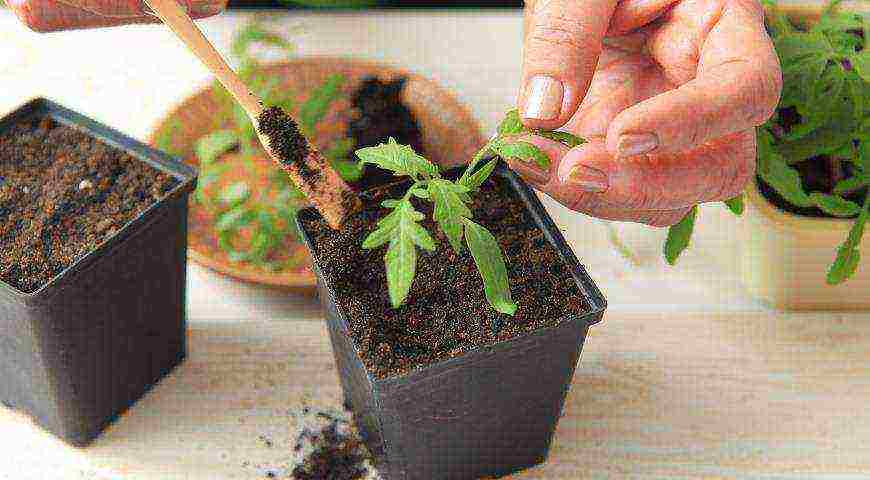
Pickling tomato seedlings
Soil preparation. Planting seeds
Some points of our step-by-step instructions need explanation. Let's consider them in more detail.
Soil for tomato seedlings
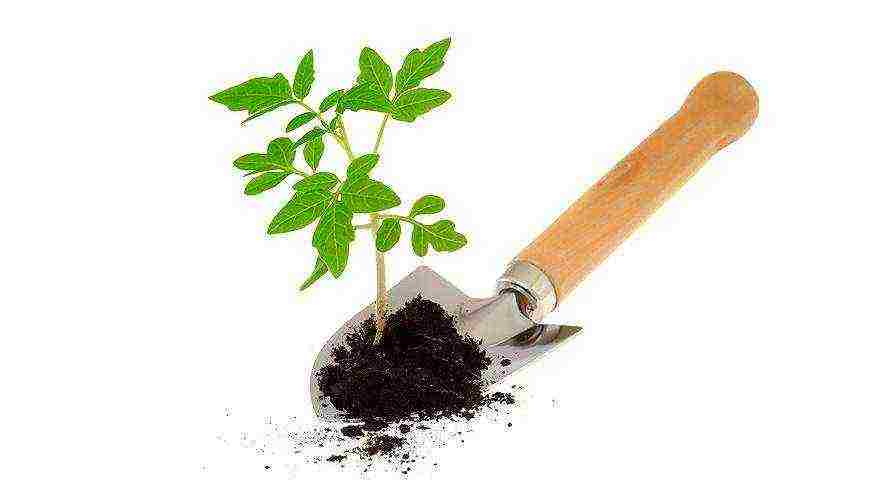
It is best to use soil prepared in the fall for tomato seedlings. Vermicompost, sand and other additives are mixed into the soil, including peat, sod land and humus. The proportions of the constituent parts are selected depending on the incoming ingredients. Tomatoes love soil that absorbs moisture well, allows air to pass through, is not acidic and is quite nutritious.
Advice! We recommend preparing a mixture of 50% turf, 40% humus and 10% peat.
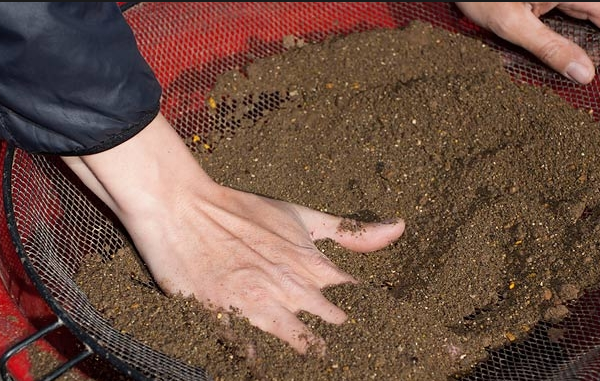
Sifting the earth through a sieve for tomato seedlings
If the seeds are supposed to be sown in boxes, then in the future it is necessary to dive. In this case, the seed boxes are filled with soil by two-thirds. Before actually sowing, it is recommended to moisten the seed pits. Nutrients can be added to the water.
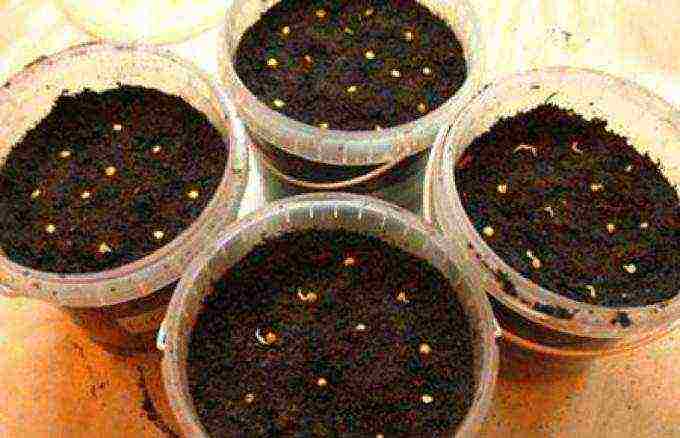
Planting tomato seedlings

"Zircon"
It is advisable to grow tomato seedlings at home without further diving. The fact is that during the picking, the roots of plants are damaged. It takes about 7 days for tomatoes to settle down in a new place and restore the root system. Therefore, the fruits from such plants can be obtained a week later.
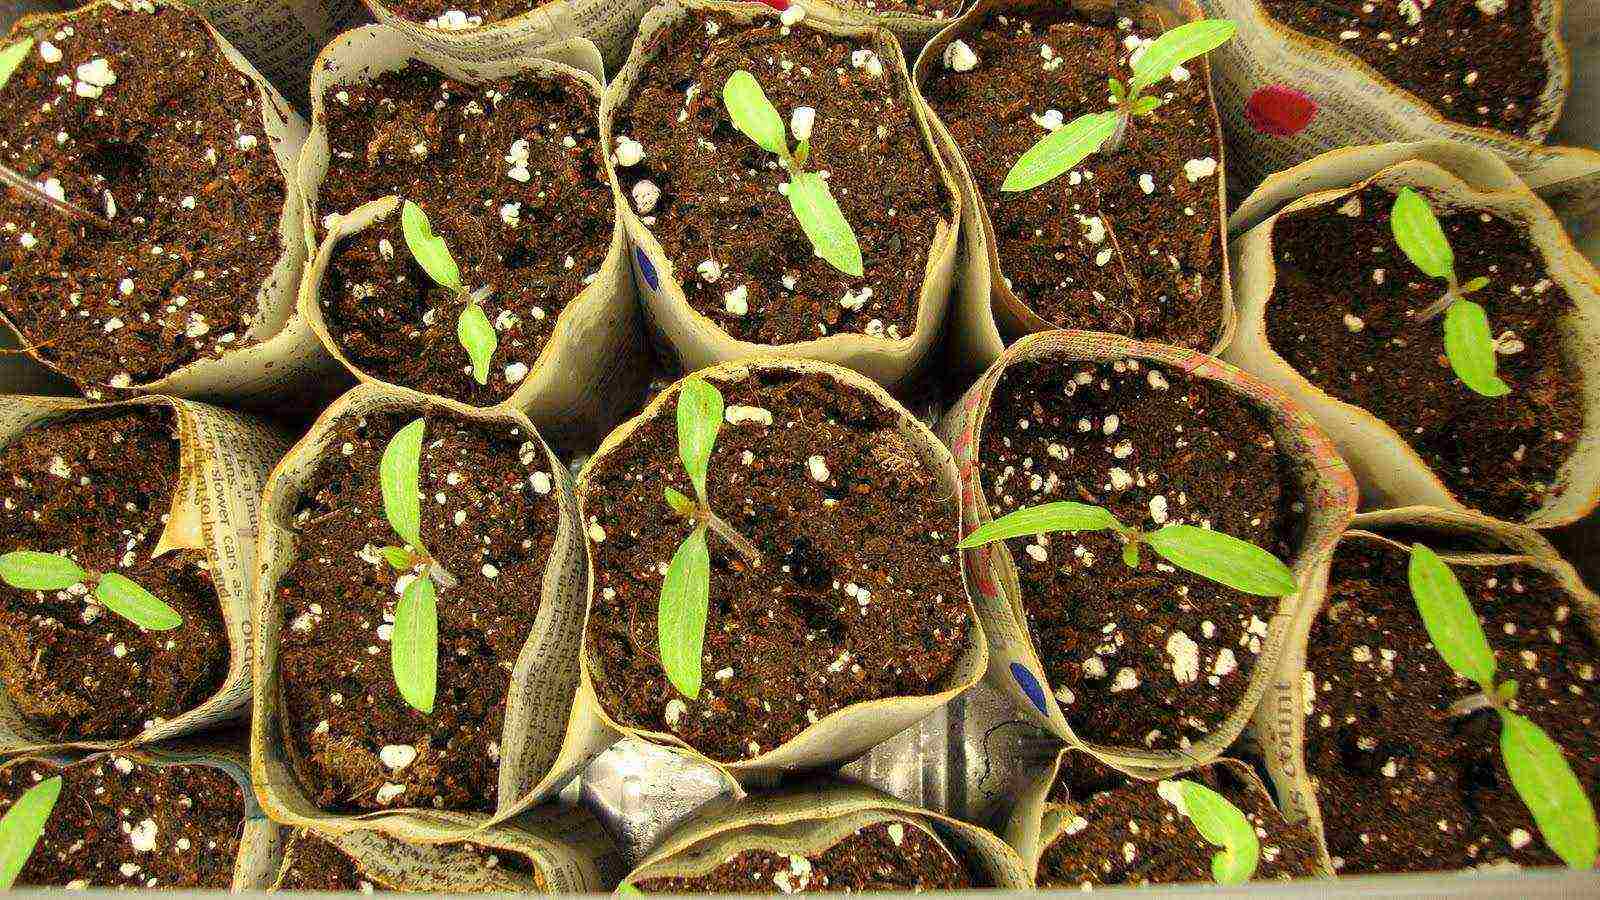
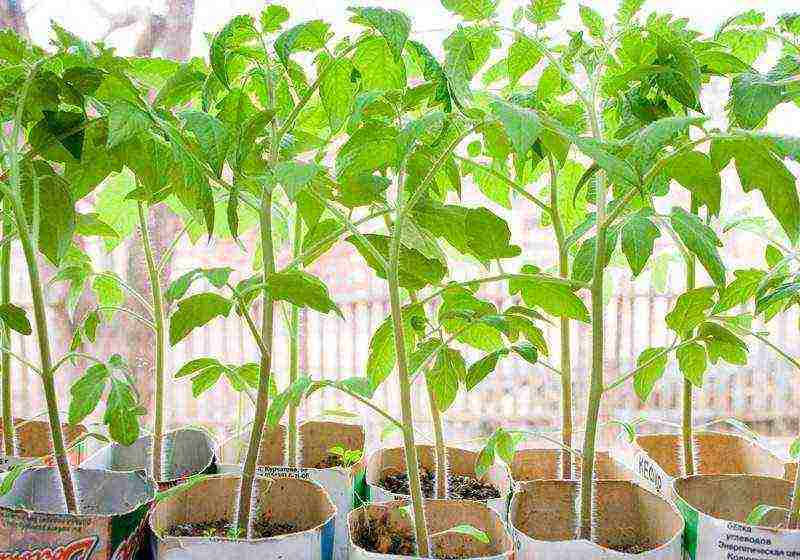
Tomato seedlings in separate paper cups
If you do not plan to grow tomatoes on an industrial scale, then sowing seeds is best done immediately in separate plastic or peat pots. In this case, when transferred to open ground or a greenhouse, the plants will immediately begin to grow and develop rapidly.
Sowing early tomatoes should be done only in cups or pots with a volume of at least 500 ml.
You can grow tomato seedlings at home using special seedling boxes if you plan to plant them in a greenhouse in the future. Then you can do without picking or sowing directly into pots. Seedlings grown in a similar way are transferred directly to the greenhouse.
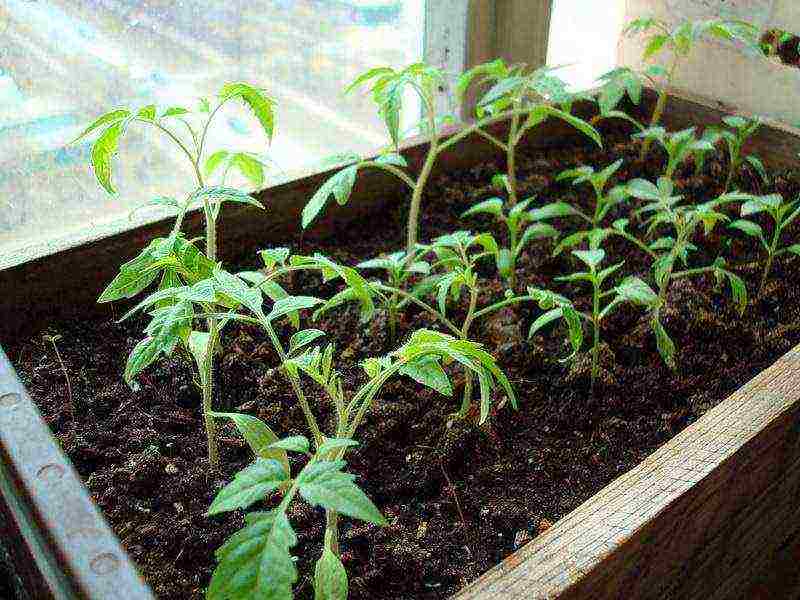
Growing tomato seedlings
Sowing rules
- Sowing in boxes is carried out with an interval of 5 cm between seeds. It is also necessary to make indents of 10 cm between the rows. Such measures are needed in order to avoid thinning the seedlings.
- It is advisable to deepen the seeds by no more than 1.5 cm. Otherwise, you can get rare and weakened seedlings.
- After sowing, the container must be covered with a film, after moistening the air under it with a spray bottle. Keep in a dark, warm room until sprouts appear. Seedlings can begin to appear after 3 days. When sowing in open ground or a greenhouse, it takes longer to wait for seedlings.
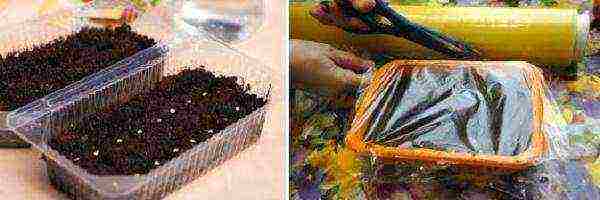
Covering seedlings with foil
- When the sprouts appear, the film must be removed and the boxes with the seedlings should be placed in the light. For example, on a well-lit windowsill.
- After the cotyledon leaves open, it is necessary to discard not good enough sprouts, as well as those that have not gotten rid of the seed box.
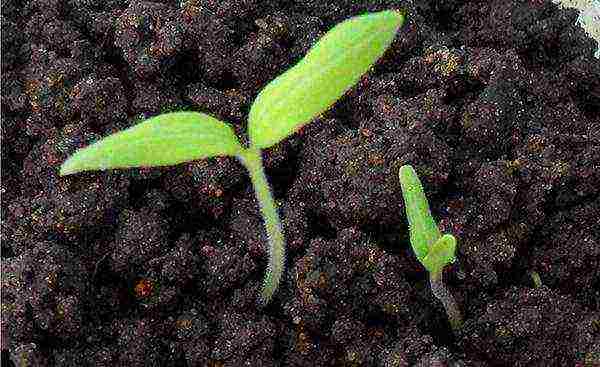
First tomato sprouts from seed
How to care for seedlings
In the first two weeks after sowing the seeds, the night temperature in the room where the boxes are installed should not exceed + 15 ° C. During the day, it should be no more than + 20 ° C.
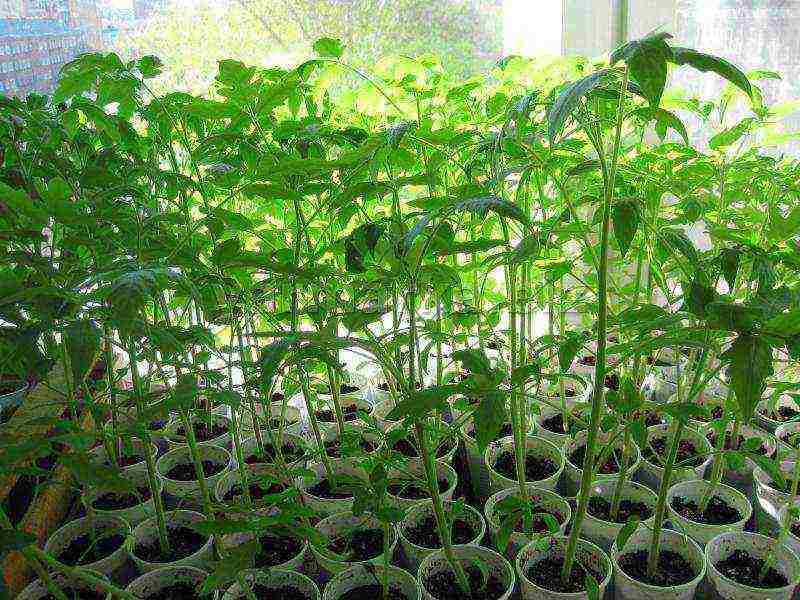
Care of tomato seedlings
After two weeks, hardening is carried out, in which the temperature is maintained at no more than + 10 ° C at night, and no more than + 15 ° C during the day.
The air in the room should be humidified to 65%.
When the plants have two true leaves, it is recommended to thin out the seedlings. For further growth, it is required to maintain strong plants with a thick stem and bright leaves, removing all weak seedlings 5 centimeters in diameter from them.
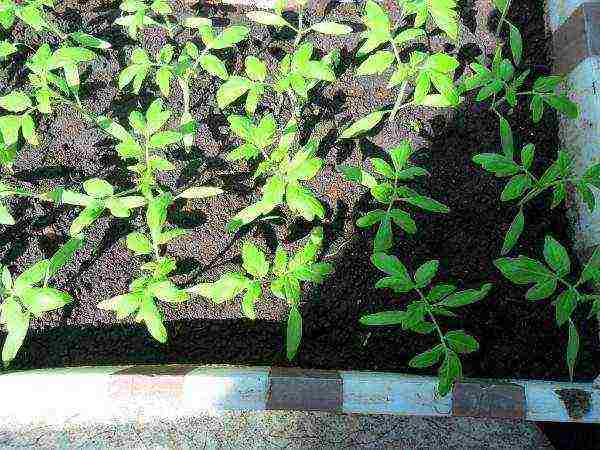
Seedlings in a box after the third thinning
A pick is made when the third true leaf begins to appear in the seedlings. To support the root system, which will inevitably suffer during this procedure, the plants are watered the night before with a solution of water and superphosphate at the rate of 2 granules per 1 sprout. When diving, the soil is taken the same that was used for sowing.
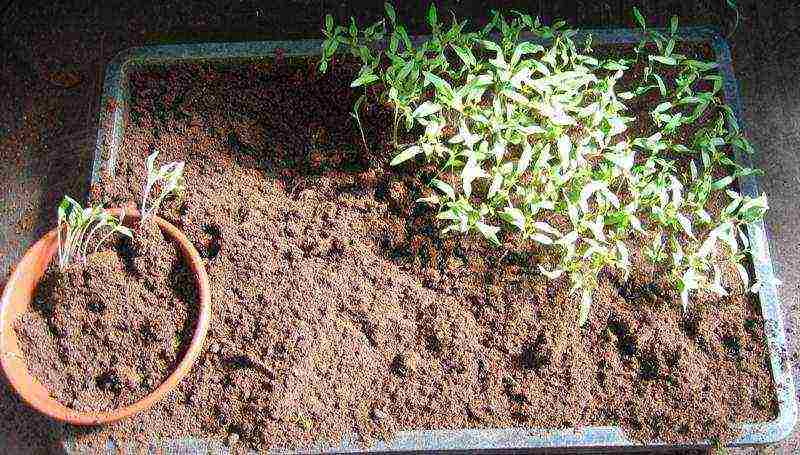
Pickling tomato seedlings
If you are late with the dive, then the yield indicators will decrease by about a quarter. When diving directly into the greenhouse, it is necessary to maintain an interval between plants of about 10 cm.
How to care for seedlings
Young seedlings require daily morning watering, as well as strict adherence to the permissible temperature regime. The room in which it will grow must be regularly ventilated to prevent disease.
At this time, the plants will develop very intensively, so the seedlings require additional lighting. With a lack of light, it can stretch. We recommend purchasing phytolamps for the organization of illumination. When using them, it should be borne in mind that seedlings should not be illuminated for more than 12 hours a day.If the seedlings are grown without additional lighting, the flow of natural light can be increased. To do this, the container with plants is installed at an angle to the window, the reverse side of which is covered with a light reflecting canvas. For these purposes, a mirror or a layer of foil may be suitable.
Illumination of tomato seedlings
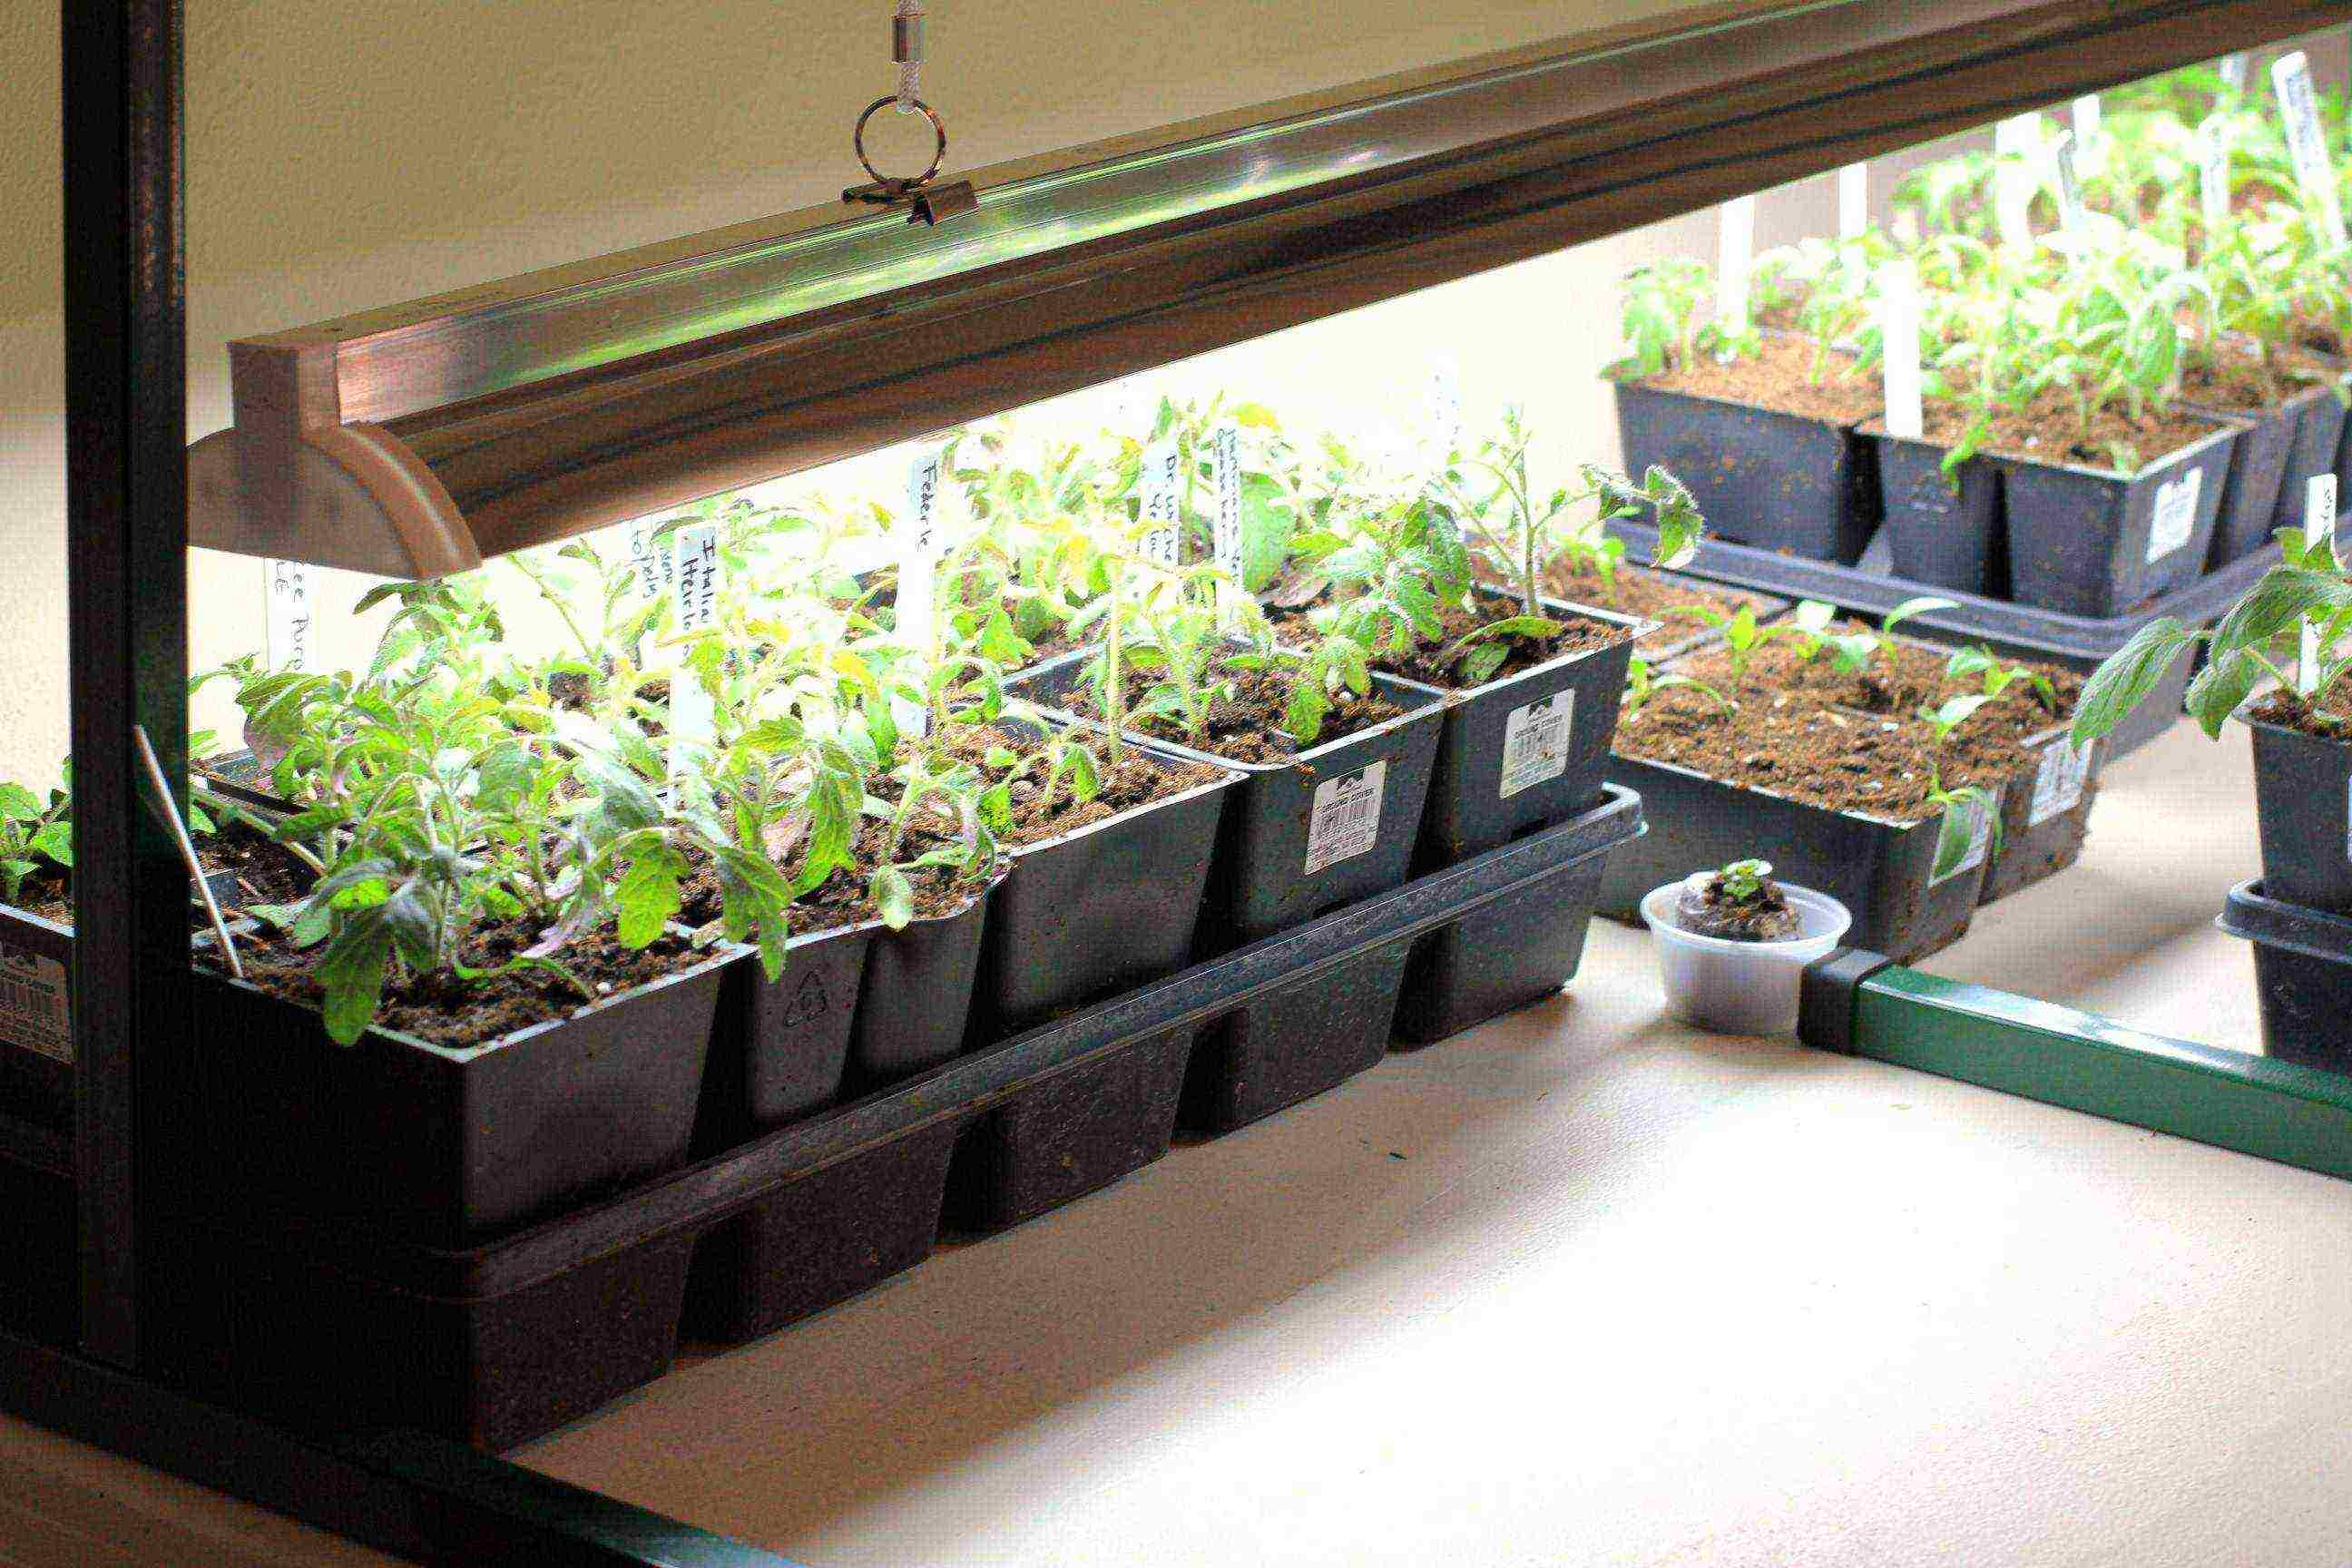
Tomato seedlings under fluorescent lights
Advice! When the plants have 5 leaves, split off the first 2. In this case, the seedlings will grow more slowly upward.
When the daytime temperature reaches + 14 ° C and above outside the window, it is recommended to start taking the seedlings out into the fresh air. This is done so that she gets used to the sun. At first, leave it in the shade for half an hour, gradually increasing the time interval.
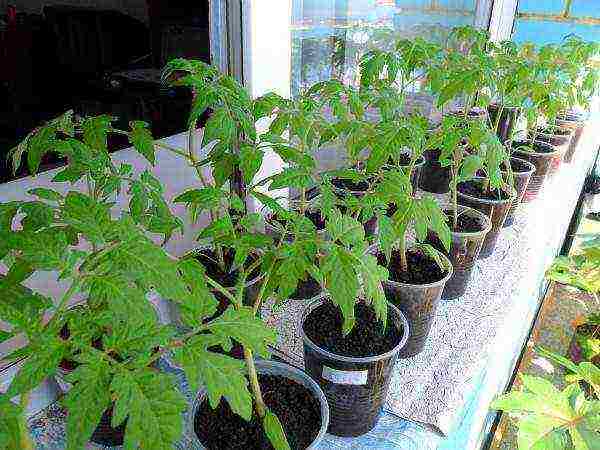
Seedlings of tomatoes on the loggia
In the morning, when watering, it is recommended to feed tomato seedlings. This significantly increases its quality and the volume of future harvests. Fertilize as follows.
- The first feeding is carried out 10 days after the dive. For fertilization, a solution of 5 g of ammonium nitrate, 10 g of potassium sulfate, mixed with 15 g of superphosphate and diluted in 5 liters of water is taken. Watering with a lukewarm solution.
- 7 days before transferring seedlings to open ground, they should be fed again. For seedlings of good quality with bright green leaves, a solution of 20 g of superphosphate and 12 g of potassium sulfate per 5 liters of water is prepared for fertilization.
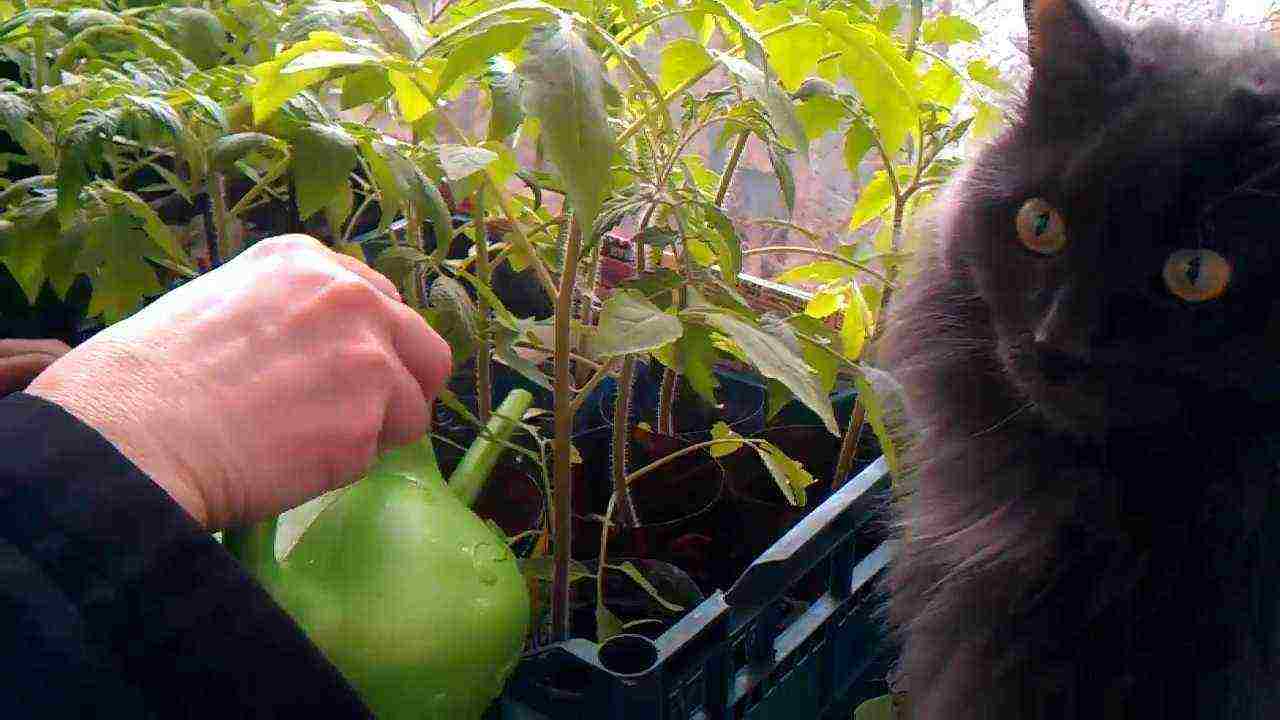
Top dressing of seedlings
If there is a lack of nutrients, the seedlings will look bad. Their greens will be pale, and a purple tint may be noticeable on the stems.
In these circumstances, seedlings should be fed differently:
- for fertilization for the first time, you need to take 250 g of dung or cow dung, mix with 35 g of ash and dissolve in 5 liters of water;
- do the second feeding with the same solution;
- for the third, keep 500 g of droppings in 2 liters of water for 24 hours, then add 50 g of ash to the mixture. The proportion is based on 1 bush.
Why do tomatoes crack in a greenhouse
Large and aromatic tomatoes grown in our own greenhouse are a good source of vitamins and minerals for the home table, as well as an opportunity to earn additional income. However, quite often the appearance of a tomato is spoiled by deep cracks. Read more here.
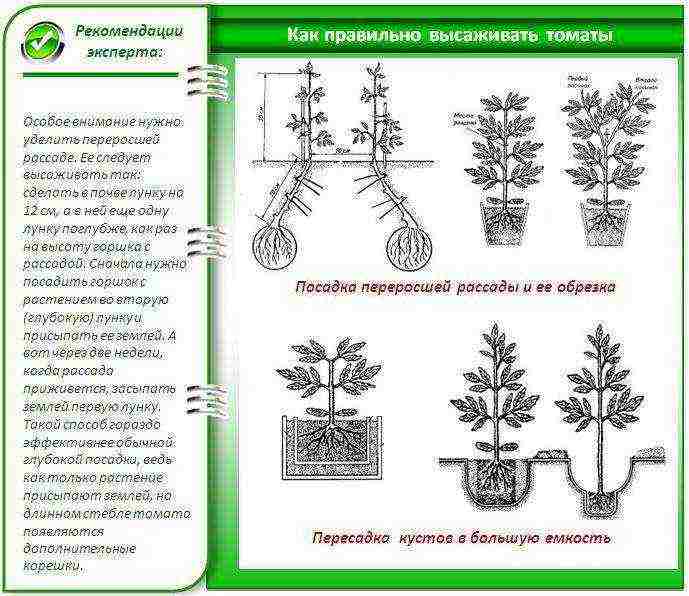
Planting tomato seedlings in greenhouse soil
Video - Growing tomato seedlings at home
Tomatoes are a crop that must be germinated before being planted outdoors, in a greenhouse, or in a home flower pot. There are many options for obtaining quality seedlings, and each of them has its own supporters. For example, seeds can be planted:
- dry or pre-soaked (pecked);
- hardened or not;
- with various watering options;
- feeding or without additives.
How to plant tomato seedlings at home
Let's consider one of these options, which is simple, affordable and gives 100% results.
Stages of planting tomatoes at home
Buying seeds
How to choose the right tomato seeds
This is not a problem at the moment. The main thing is to choose a variety that will take root well in your climatic conditions. It is also important to pay attention to the production date. It is optimal for the seeds to be harvested for the previous harvest. Germination and other indicators are standardized by law.
The best tomato seeds for the middle lane
Seed preparation
After you have selected high-quality seeds from the bag, you need to prepare them for planting. You can plant tomato seeds in dry form - this method has enough fans. Moreover, it is believed that hybrid varieties should not be soaked. But most gardeners still prefer to pre-soak the seeds.
You need to do the following:
- we disinfect - we keep it for a day in 0.8% acetic acid, treat it with a 1% solution of potassium permanganate for 20 minutes, rinse;
- start growth - wash with hot (about 60 ° C) water for 30 minutes;
- soak - put in warm (25 ° C) water for a day;
- we harden (this increases the resistance to temperature extremes) - we leave it in the refrigerator for 24 hours, it is possible for two days.
The process of disinfection of tomato seeds
Useful: there are special mixtures for disinfecting seeds, as well as compositions for watering seedlings, which include the necessary antiseptic impurities.
After that, we select the required amount of the best-grown (hatched) seeds and plant them in the ground.
Priming
There are enough options for mixtures for vegetable crops in stores, there are also specific soils for seedlings of tomatoes, peppers, eggplants. You can also make your own soil mixture, mixing in equal proportions:
- ordinary garden soil;
- humus;
- peat.
Soil for growing tomato seedlings
It is advisable to feed the soil with superphosphate, wood ash, and water it with mineral fertilizers. The latter should be added in the following proportions:
- potassium sulfate (contains sulfur, calcium, potassium, magnesium) 20 grams per 10 liters of water;
- urea - 10 g / 10 l;
- superphosphate - 30 g / 10 l.
Important: if you buy ready-made soil, these fertilizers and top dressing may already be included in its composition. Then you don't need to add anything.
Landing dates
Tomato seedlings are considered the best if they were planted 50-60 days before planting in open ground or in a greenhouse. So, for central Russia:
- early varieties should be sown in mid to late February;
- greenhouse - in the first week of March;
- usual - in the last week of March.
But, of course, you need to be guided by climatic conditions and by the thermophilicity of the variety.
We plant seeds in the ground
Planting sprouted tomato seeds in separate containers
A variety of containers can be used for tomato seedlings. Most often, seeds are sown in a common container, for example, plastic or even cardboard boxes, purchased and homemade boxes. Later, the plants are planted - dive. But you can plant each seed in its own container, although this complicates care and slows down the development of the root system. The procedure is as follows:
- We pour a layer of expanded clay into the box so that the water does not stagnate.
- We pour in the soil 5–6 cm, tamp it a little, water it a little, loosen it.
- We make grooves 1–1.5 cm wide and deep at a distance of about 5 cm from each other.
- We spill the soil, and especially the grooves, with water or nutrient mixture with a temperature of about 50 ° C.
- We place the seeds at a distance of 3-4 cm from each other in the groove, slightly (!) Crushing them into the ground.
- We fill the grooves from above with loose soil, lightly crush it, but not much.
- Sprinkle with water from a spray bottle. Everything should be slightly moistened, abundant watering is unacceptable.
- We close the box on top with a greenhouse film, glass or just transparent polyethylene.
- We put the container with the future tomato seedlings in a place with sufficiently high illumination and a temperature of about 22-25 ° C.
Creating a greenhouse effect for tomatoes
Tip: you can pour ground red or black pepper between the grooves - it will prevent the appearance of parasites, midges.
What to do when shoots appear
After the shoots appear (hatch), and this should happen in 3-10 days, the top cover of the box must be removed and the plants must be moved to a cooler room. The optimum temperature is 17–20 ° C during the day and 15 ° C at night. The insolation should be very high. Then the "loops" of the sprouts will very quickly unfold the first leaves - cotyledons, and later real leaves will appear.
Table of approximate terms of emergence of sprouting seeds.
| 28–32 | 4–5 |
| 24–26 | 6–8 |
| 20–23 | 7–10 |
| less than 20 | 10-14 and more |
Creating additional lighting for seedlings
The most powerful are the seedlings that appear on the 6-7th day at a temperature of 25 ° C. They must grow together. Those that are far behind can be cut off immediately, if, of course, you have enough seedlings. Just do not "uproot" them, as this will disrupt the root system of other plants.
How to water and feed
After sowing the seeds, the first watering will take place around the 10th day. By this time, mass shoots should appear and take shape well. For a start, 1 teaspoon of water for each plant will be enough.
Further, before the appearance of the first true leaves, watering is carried out approximately once every 5-6 days. The soil should be moist, but not wet. Otherwise, oxygen will not flow to the roots, and this will slow down their development or even cause decay. Before picking, somewhere in 2 days, tomato seedlings can be fed with mineral fertilizers and watered.
Important: picking is carried out when the soil is slightly dry. So the last watering before it needs to be done somewhere in 1-2 days.
Picking
The process of picking tomato seedlings
When the first two true leaves appear in tomato seedlings (the lowest ones are false and are called cotyledons), a pick can and should be carried out - planting plants in individual pots. For this:
- We take out the group with the earth from the box.
- We carefully disassemble the clod of earth, separating one plant.
- We pinch the main root root (this can be omitted if the tomatoes grow on arid soil, which will rarely be watered).
- We transplant the plant into an individual container with a volume of about half a liter. There should be holes at the bottom of the pot for water drainage. We fill the container with soil about 2/3, make a hole in which we place a young tomato. At the same time, it is necessary to take it away from the group with a lump of earth, since the roots already have lateral processes - hairs that can be damaged by knocking down the earth.
- Sprinkle the stem of the plant with earth about 1/2 or 2/3 from the root to the cotyledon.
- Gently crush the ground around the seedling.
- We water the plant too much.
Video - Tomato seedlings: from seedlings to picking
What to do with seedlings from picking to planting in the ground
- Plants need to be watered regularly, however, the first watering after picking can be done no earlier than 4 days. At first, tomatoes are irrigated about once a week, but as the seedling grows, the frequency of watering increases. It is necessary to pour enough water to soak the entire earthen lump. The next watering is only after the soil dries up. Before planting in the ground, the tomato will require daily watering. The water temperature is about 22 ° C, it is advisable to defend the water.
- You need to feed the plants with nitrogenous, phosphorus and potassium fertilizers. It is better for novice gardeners to purchase ready-made mixtures, dilute them in water and water young tomato seedlings. If you want to prepare the solution yourself, then its composition for 10 liters of settled water should be as follows:
- ammonium nitrate - 10 g;
- superphosphate - 35 g;
- potassium sulfate - 10 g.
Tomato seedlings need to be watered regularly.
The first feeding is carried out on the 12th day after the pick. You can repeat feeding after 10-15 days.
Important: Phosphorus and potassium are found in regular ash, so proponents of "pure" fertilizers can use a solution of 1 tablespoon of ash per liter of water.
- Daylight hours for young tomato seedlings should be about 12 hours. It is desirable that the plants are oriented "towards the sun" in the same way that they will be oriented on the site.
- The ideal temperature for tomatoes is 22-24 ° C during the day and 14-16 ° C at night.
- Hardening of seedlings is an important process, because it is impossible to achieve ideal conditions in the natural environment. So 10-12 days before planting in the ground, you need to gradually lower the temperature to 14-15 ° C. The temperature can be set between 12-13 ° C in 4–5 days. Airing, cloudy weather, changes in humidity - all this will accustom the plant to future real conditions of existence.
As a result, a tomato seedling should have 7 or more leaves, the trunk thickness should be about 7 mm, the height should not be more than 25 cm, the root system should be well developed.
Let's summarize
Before planting tomatoes in the ground, they must be germinated at home.To do this, prepare seeds and land, sow, dive after the appearance of two leaves, feed, water and maintain the correct temperature and light conditions. And then all the plants will necessarily take root, and the gardeners get a good harvest of tomatoes.
