Content [show]
Calla is a herbaceous perennial plant that belongs to the aroid family. There are other names: calla and arum. The homeland of this plant is the African continent. In this climate, calla lilies can grow up to two and a half meters in height. The plant has rather large, heart-shaped, arrow-shaped leaves. Calla lilies bloom in small flowers, neatly wrapped in a large "blanket", which creates something like a funnel. This makes the flower attractive to many gardeners.
Homemade calla lilies in a pot, which everyone can take care of, usually does not smell. But those plants that grow in the garden, in warm weather, exude a pleasant and delicate aroma, reminiscent of pineapple combined with vanilla. So, calla lilies in pots: how to care?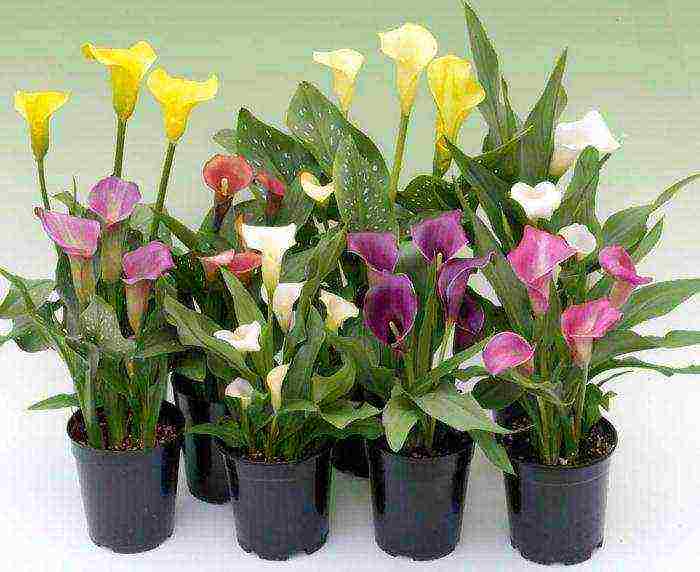
Is it easy to grow calla lilies?
Many people find it very difficult to grow these plants at home, as they require careful maintenance. However, this is not at all the case. According to experts, calla lilies in a pot, photos of which prove their beauty, are unpretentious, and no special tricks are needed to grow them. The main thing is to create optimal conditions that will be as close as possible to natural for this plant. In fact, growing calla lilies is not that hard. To make the plant feel comfortable, you just need to follow a few rules.
Lighting
So, calla in a pot, home care for which does not require much effort, is very demanding on light. In addition, it is a thermophilic plant. These two facts should be considered when choosing a place. This is one of the basic rules of success. Calla lilies grow well in places where there is diffused sunlight or partial shade. There is one more peculiarity. Callamas in the evening need a small portion of the direct rays of the sun.For the formation of peduncles, these plants need a day of light lasting more than 12 hours. This is one of the important conditions. After flowering, daylight hours should be at least 8 hours and no more than 10.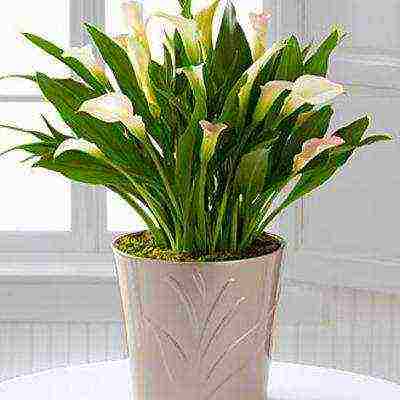
Watering and humidity
Calla is a moisture-loving plant. Do not forget about this. This is especially important when growing Ethiopian calla lilies. After all, this plant grows practically in a swamp, where there is very high humidity not only of the air, but also of the soil.
Calla flowers in pots can have different shades of bedspreads. This makes them popular among flower growers. Plants with colored bedspreads are not so demanding on moisture. However, don't forget about regular watering. The amount of water depends on the period. For example, watering should be more abundant during flowering and moderate during dormancy. It is not recommended to overdry the soil in the pot.
The room must have high humidity. Of course, this is very difficult to achieve. To keep the plant comfortable, you can spray it more often.
Indoor temperature
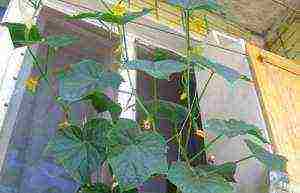
Growing calla lilies in a pot is a simple process. Of course, if you follow certain rules. Do not forget that calla lilies usually grow in southern latitudes, where temperatures are constantly high. These plants are very difficult to tolerate when this figure drops to 8 ° C. Therefore, keeping calla lilies on the balcony is only worthwhile in warm weather. In winter, the plant should be transferred to a room where heating devices are installed. The most favorable temperature for the growth of calla lilies is from 20 to 25 ° C.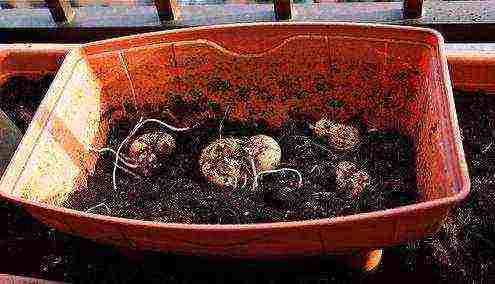
The pot must be chosen correctly
An important role in the cultivation is played by the capacity in which the calla lilies will grow. For Ethiopian, it is best to use a pot or container that is large enough. If the container is small in volume, then the calla will simply not bloom. Even with fertilization, only the green part of the plant will develop and new leaves will appear. But calla lilies in a pot will not bloom. Home care for this plant consists not only in timely watering, but also in the correct selection of temperature conditions, containers for planting and soil. It is worth noting that Ethiopian calla lilies prefer to grow in splendid isolation.
For one plant, you should choose a pot with a diameter of more than 20 centimeters. As for the material from which the container is made, it is better to give preference to porous ones. This will allow the plant to breathe, and excess moisture will go away faster.
You don't need to be an inventor to grow red calla lilies in a pot. In terms of free space, these plants are not particularly capricious. For them, a three-liter container is quite suitable.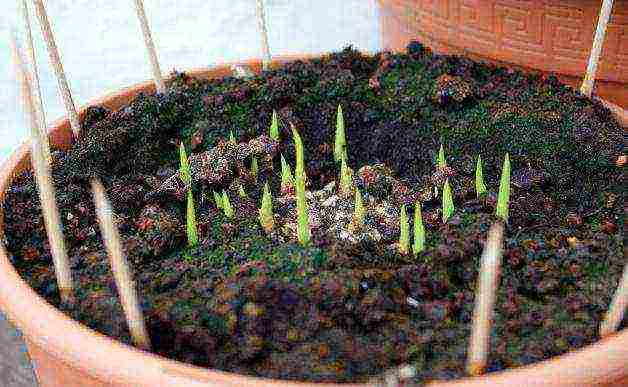
Soil composition
How is calla lilies grown in a pot? Home care for this plant must be carried out throughout the year. Do not plant calla lilies in regular soil. They grow best in a mixture of sand, rotted manure, peat and garden soil. It should be noted that the acidity of the soil should not exceed 6.
Transfer
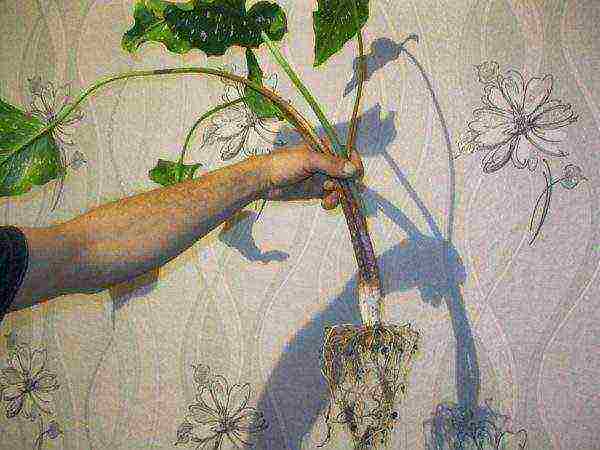
Planting calla lilies in a pot is another crucial moment. Do not transplant a weak plant or damaged shoots. In order for the calla to quickly get used to its new place, you should use not ordinary soil, but soil, which is as close to natural in composition as possible.
Before replanting the plant, it is necessary to rinse the roots. This should be done with extreme caution. Otherwise, you can infect the flower with a new disease or introduce bacteria into the wounds. As a result, in a new place, calla will suffer from a new ailment.
After that, a little soil should be poured into the pot and the plant should be placed. The transplant does not end there yet. The roots should be carefully sprinkled with soil, and then watered. Calla is a plant that requires a lot of water. Therefore, the transplanted sprouts should be watered abundantly.Of course, you should not be too zealous in this regard.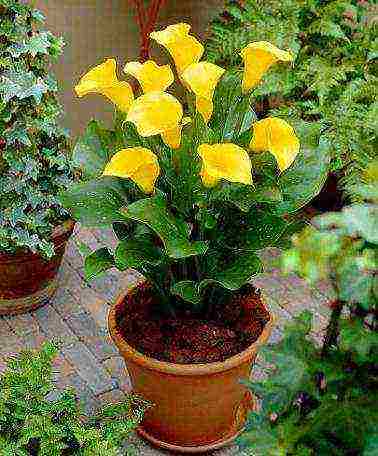
Bulbs
Let's figure out how to plant a calla in a pot and grow it from an onion. First of all, the use of such material is the easiest method for growing such plants. Calla lilies reproduce very easily by roots and bulbs. The main thing is to create optimal conditions for their growth.
For those who do not know what a bulb is: this is where the growth of a new plant begins. It's not really root. But in terms of its structure, the calla bulb is very similar to it. To be more precise, it is a thick and rather large process of the main root, from which young shoots appear in the future.
As soon as the calla bulb accumulates a sufficient amount of moisture and useful components, it begins to release new shoots. In the process of photosynthesis, the bulb will supply all the necessary substances to the plant.
Planting calla lilies in a pot is a simple process. To prevent the bulb from spoiling in the pot, it is recommended to make drainage holes. After that, a hole is made in the container with a depth of at least 10 centimeters. An onion can be planted in the resulting hole. You need to place it so that the sprouted tips look up and are placed strictly horizontally. After that, you can sprinkle the roots with earth and water the calla.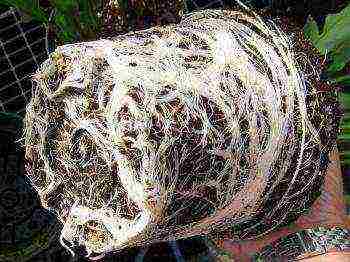
How to feed?
So how is calla lilies grown in a pot correctly? Home care for this plant consists not only in timely watering, but also in high-quality feeding.
If the climate in your country is mild and the temperature never drops below zero, then you have the opportunity to have flowering calla lilies in your garden all year round. Of course, this takes a lot of time and effort. The plant should be fed once a year without fail. However, this is not enough for calla lilies to bloom all year round. To achieve what you want, it is worth fertilizing more often. This should be done regularly, about twice a month. Fertilizer can be added to the compost in the soil, or you can mix the slurry with water for irrigation. Even a beginner can take care of calla lilies in pots. Using various tricks, you can grow charming flowers that will delight not only the eyes, but also the soul.
However, when applying fertilizer, you should be careful. After all, the plant can be overfed. In this case, the calla can die. Burnt leaf edges are signs of excessive fertilization. This indicates that the plant has received a lot of nitrogen.
In addition, there is one more rule, without which growing calla lilies in a pot is not possible. So, the less the plant receives solar heat and light, the more fertilizer needs to be applied to the soil. This has a positive effect on the flowering of calla lilies. Therefore, it is very important to place the plant pot correctly and calculate the required amount of fertilizer.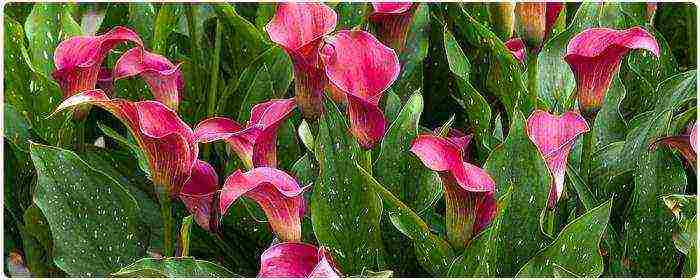
Finally
Calla is an elegant and very beautiful flower. Caring for this plant is not that difficult. The main thing is to follow all the rules and carefully take care of the calla lily. This is the only way to achieve abundant flowering, which will delight any gardener. It is worth noting that calla lilies can be grown not only in pots, but also in the garden. These plants will perfectly decorate the site and the house. In addition, they just look amazing in bouquets.
Not all city dwellers can go to summer cottages, and in order not to get away from nature, they arrange a flower garden on the windowsill. Planting calla lilies at home will give the room a solemnity and style. That part of the plant, which is usually called a flower, is actually a veil, a large bracts that envelop the ear, on the stem of which there are many small flowers. Calla lilies can also be grown outdoors, in regions where the temperature does not drop below 0⁰, they can even bloom all year round if provided with proper care.The flower is good at home in a pot, and in a flower bed, and in bouquets.

How calla lilies reproduce
Calla tuber quickly grows overgrown with children. If you do not transplant a flower every year at home, soon the entire area of the pot will be covered with new young shoots, and caring for the plant will become impossible. When transplanting from one copy, you can get a lot of planting material. When you remove the onion from the ground, carefully separate each piece with a bud with your hands. It can be planted at home in a new container or in a flower bed. If you are a little late and the babies do not separate from the mother tuber, just break the rhizome into pieces. Sprinkle the wounds with crushed coal.
Planting flowers by seeds is possible. There are not always pollinating insects indoors, sometimes at home you will have to arm yourself with a brush and start transferring pollen from flower to flower. Do not store the grains: the fresher they are, the better they will germinate. Immediately after collection, place them in a damp cloth and keep at home in a warm place. Usually, after 2 days, the seeds begin to hatch. Sow the swollen specimens in a pot of seedling potting soil. Until shoots appear, plantings are easily rotting. The best care is not to water them from above, but to fill the sump with water so that the soil is moistened through the drainage holes. Spray the dry surface of the earth with a spray bottle.
When sprouts appear, place the container in the light and keep at home at a temperature of about + 22⁰. After 2 months, cut the seedlings into separate pots, and after a year, plant them in a permanent place. Some flower growers prefer not to pick, but immediately plant 2 swollen grains in a glass. After the emergence of shoots, the strongest plant is left, and the second copy is removed or transferred to another container. All care for young plants is reduced to watering as the soil dries out.
Usually, planting and growing from seeds at home allows you to get a new species that does not look like the parent plants. There are different colors of the bedspread:
- white;
- yellow;
- pink;
- red;
- blue;
- purple;
- black.
Perhaps the seeds you received in 2 years will give an unexpected result and at home there will be a flower of a completely unusual shade on the windowsill. Try transferring pollen from a black flower to a white or red flower and see what happens. On a warm day, you can take the pots outside and entrust the breeding work to insects. If you don't like surprises, buy seeds of the desired variety from the store.
Planting calla lilies in a pot
In order for calla lilies to develop well at home and give large inflorescences, you need to properly equip the place where the cultivation will take place and provide the plant with good care. The roots should be spacious, so choose a pot of at least 0.5 m with a diameter of 0.4 m or more. Check drainage - although this plant lives in swamps in its homeland, stagnant water is harmful to it. Cover the bottom with expanded clay or pebbles for drainage. You can buy special soil for calla lilies, or you can independently prepare a composition of equal parts of leafy soil, turf and compost.
You can take the bulbs from your friends when they are replanting their flower. When buying planting material, pay attention to its appearance.
A quality bulb has certain characteristics:
- large, even, firm;
- have a peel of uniform color without wounds and damaged areas;
- have a healthy kidney.
Calla planted in March takes root well at home. Before planting, soak the tubers in a pale pink solution of potassium permanganate, and then inspect each specimen. Remove all sore spots, growths and other defects, and treat the wounds with a disinfectant solution. It is a good idea to keep the bulbs in a growth stimulant solution, then planting and growing will give the best results.
Indoor calla lilies produce large leaves, a long stem, and a heavy inflorescence.In order for the rhizome to hold tightly to the soil, when planting at home, bury it to a depth of 6 to 12 cm. Until a sprout appears from the ground, keep the pot under the film so that it is warm and humid inside. At this time, maintenance is not required, just open the container every day for airing and make sure that the soil does not dry out. After the emergence of the shoot, the pot must be placed in a place with a temperature of + 15⁰ to + 18⁰, where the maximum lighting occurs in the afternoon. The southwest window of the house is very suitable, only the cracks must first be repaired so that the plant does not suffer from drafts.
Advice
If you have purchased rare bulbs, please read the instructions carefully. They may need shallow landing or special care.
Calla lily care at home
These plants are accustomed to the conditions of African swamps, so caring for calla lilies at home should be special. When a plant is actively developing, it needs a constantly moist soil. In order not to go around every day with a watering can, install a watering system for indoor flowers. Flowering will end, and the great need for liquid will disappear, water only when the top layer of the earth dries up.
The aerial part of the flower also needs moisture when growing. If the air is dry at home, place a pallet of wet pebbles next to the pot. In warm weather, spray the leaves with a spray bottle.
Advice
Calla lilies will warn you of changing weather better than meteorologists with accurate instruments. When dewdrops appear on the leaves and bedspreads, wait for rain.
You need to feed the plant with a special fertilizer for calla lilies. During the period of growth and flowering, more careful care is required, the flower needs to be fertilized every 2 weeks. If using other formulations, choose a formulation with a low nitrogen content. From an excess of nitrates, the flower can get sick. If you notice that dry areas have appeared on the edges of the leaves, completely eliminate nitrogen from the dressings.
Of the pests, aphids and spider mites can attack calla lilies at home. You can simply wash the leaves with soapy water, and if these measures do not help, treat them with insecticides.
At high humidity, the flower is sometimes attacked by fungal infections.
- Gray rot. A grayish bloom appears on the leaves and flowers. The bush must be treated with fungicides.
- Brown rot. Leaves and peduncles dry up. Stop watering, add hydrogel to the soil, and treat the plant with fungicides.
- Bacterial rot. The peduncles and the base of the leaves darken. Gradually, the entire aerial part turns yellow and fades. The disease is almost not amenable to treatment, the affected specimens must be destroyed.
- Anthracnose. Brown spots appear on the leaves, which gradually increase and turn into a reddish circle with a light center. Cut off the damaged parts, and treat the entire flower with fungicides.
Ripening the seeds weakens the tuber of the plant. If you are not going to harvest seed at home, trim the peduncle when the bedspread begins to take on a green tint. After that, in some varieties, the leaves wilt and fall off, and in some they remain green. Usually, the aerial part of the calla lily with a white veil is preserved, and the colored ones shed their greens and submerge in a dormant period. At this time, the plant needs to be transplanted, and the bulb must be freed from small children. When transplanting, remember that the tubers are poisonous. Keep children away from them and wash your hands thoroughly after handling.
Output
Capricious African calla lilies can bloom at home on the windowsill, even in the far north, if the plant is properly cared for. A large bush needs a lot of nutrients, do not forget to feed and water the flower in time. You need to be especially careful about moisture: a marsh plant does not tolerate dry air and soil, but it can get sick from excess water.
If the leaves do not wither on their own, some growers cut them off and let the bulb rest until the next growing season. Other indoor flower lovers have been growing calla lilies at home as evergreens for years. You can choose this option, just watch your pet carefully. If you notice that, despite good care, the plant has become depressed, the flowers are small, then do not torture it, cut off the leaves and let it rest.
It is difficult to grow calla lilies for bouquets at home: each plant produces one flower. To collect several compositions for a wedding or anniversary, you need to make all the window sills with pots. Planting and growing flowers in greenhouses or winter gardens will help to plant flowers for cutting, and at home several beautiful flowerpots will decorate the interior, create a good mood for the inhabitants of the home and guests. Do not chase after quantity, 2-3 pots with colorful huge petals will create a cozy atmosphere even in the darkest room.
Calla lilies are quite unpretentious and do not require special care when grown at home and in the garden. However, in order for the cultivation of these delicate flowers to become carefree for you, you need to follow certain rules for planting and caring for calla lilies.
It is worth paying special attention to the fact that when growing calla lilies there is a risk of damage to the flower by diseases and pests. Preventive measures and methods for treating a flower and getting rid of parasites are described in this article as a separate item so that you do not have any difficulties with this.
The article also provides instructions for choosing a variety, planting and caring for, transplanting and propagating calla flowers, observing which you will decorate your gardens with wonderfully flowering plants, which will not require a lot of time and attention.
Origin and appearance
Calla (Cálla –lat.) Belongs to the genus of perennial coastal and wetland plants. Translated from Greek, the name "calla" means "beautiful". The habitat is swampy shores and swamps of the Northern and Southern Hemispheres. It is found in regions with subtropical, temperate and subarctic climates. This plant can be seen in its natural environment in Russia, Europe, Canada and South Africa.
- In various literary sources "calla lilies" are called similar species from the Aroid family. Among them: calla, arum, zandexia.
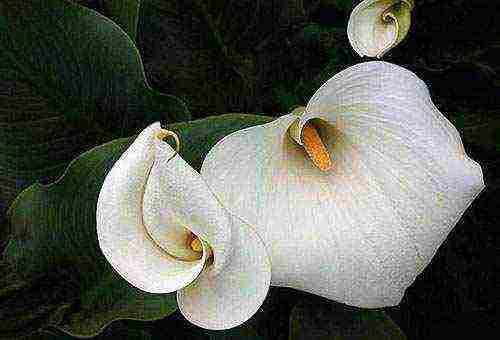
- Until recently, only Zantedexia from Ethiopia (Zantedeschia aethiopica - lat.) Was grown in Russia - a tall plant with thin yellow-cob inflorescences wrapped in snow-white bracts-bedspreads.
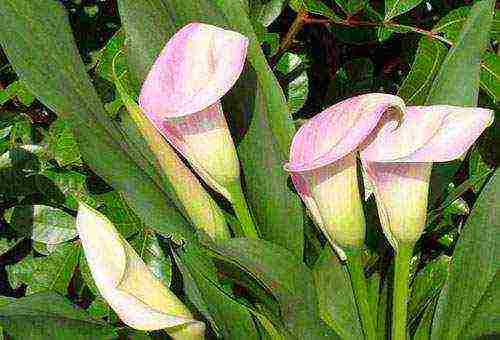
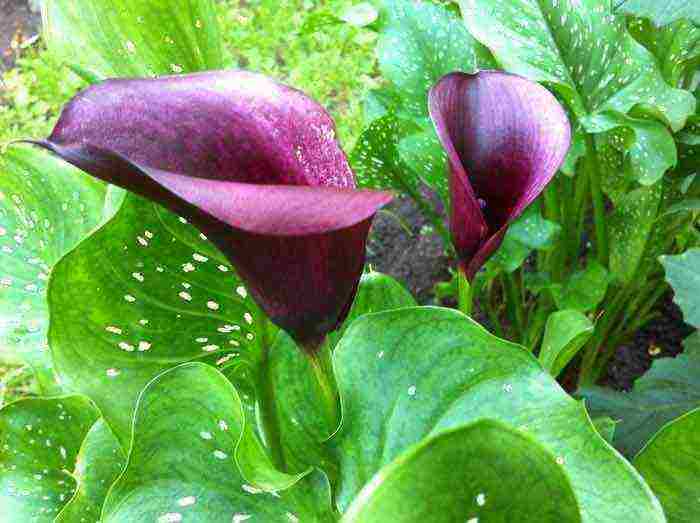
- Today, in addition to whites, florists have at their disposal such varieties as: golden-yellow Calla Elliott, pink-lilac and red-burgundy Calla Remman.
- The conditions for growing plants with multi-colored bracts are often fundamentally different from the usual agrotechnical methods of caring for white calla lilies.
The flower has a thick hollow rhizome that spreads over the soil surface. In species with white bracts, the root system does not have bulbs or tubers. Calla lilies with colorful veils are tuberous plants. 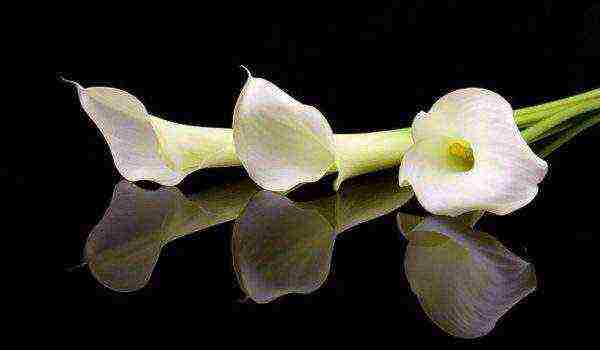
Form of leaves, flowers and fruits
Calla lilies have single, oval-heart-shaped leaves. They have a shiny thick plate, the length of which reaches from 6 to 14 cm, and the width is from 5 to 12 cm. The top of the leaf plate is pointed, resembling arrowheads. The color of the leaves is green, very intense. On the leaf plate, there may be blotches in the form of white specks.
Small, unisexual flowers, which form tall cobs, are arranged on a thick, upright stem. The flowers are surrounded by a spectacular veil - a large funnel-shaped bracts, which in nature have a white inner color. The outer side of the bedspread is light green.The natural flowering period begins in late May and ends in mid-August.
The fruits are bright red berries that form a cylinder-shaped ear. Ripen thirty days after the end of flowering. Under natural conditions, ripening occurs in late summer or early autumn.
Calla is one of the most popular plants among landscape designers, florists and florists. It is not surprising that breeders have bred its numerous varieties, which are successfully used for composing romantic bouquets, and for decorating personal plots, and for placement in interiors.
Rules for the care of calla lilies in pots
In order for a calla to have a gorgeous appearance, you must follow a couple of rules:
- Domestic calla lilies are not whimsical, it is a pleasure to take care of them. To make her comfortable, she needs light, warmth and a small pot - this will be enough for her to grow and delight with her flowering.
- Indoor feces need a sufficient amount of water. It is very important that moisture is maintained during the growing season. When the flower reaches maturity, you need to water it sparingly, only after the top layer has dried can you water it. Better to water when the soil is completely dry. If the water stagnates a little in the pot, then this will provoke decay, drying of the roots is irreversible.
- At home, this plant needs to be fed from January to March. Fertilize it once a week. You can buy a special fertilizer, and if you don’t find it, you can safely purchase fertilizer to stimulate flowering.
- One of the most important points is the indoor air. If the temperature is above 20 ° C, the plant should be sprayed daily with a spray bottle.
- After purchase, the flower should be transplanted into a larger pot. She loves slightly acidic earth. Mix a little sand, deciduous soil and peat. Transplant once a year in November.
- Maintain a temperature of 23 ° C in summer, 14 ° C is normal in winter. The flower should never stand in a draft. In the spring, accustom the flower to the light gradually. Cut off yellowed or withered leaves.
- This plant can have such diseases: anthracnose, gray rot, bacterial or root rot. All these diseases manifest themselves only if you have not been properly looked after. Avoid direct sunlight, drafts, drying out or waterlogging of the soil, and then your feces will be healthy.

Tips for Successful Growing
If you decide to have such a "miracle" for yourself, then you should prepare for its appearance:
- For cultivation, a window sill is ideal, which is illuminated only at the end of the day.
- Pick up the pot. The correct choice would be a pot with a height of at least 60 centimeters, and the radius from the point of growth of the flower should not be less than 20 centimeters. The fact is that growth occurs quite rapidly if properly fed. This can be done not only with ready-made fertilizers. You can dig a small groove around the edge of a large pot, then add a little fruit rind, seed husk, and soil over it. Drizzle with water at room temperature, and add tea leaves periodically.
- Periodically, it is necessary to remove the top layer and change it to a nutritious substrate. Do this carefully so as not to damage the roots. In this way, you can achieve long-term growth without transplantation.
Remember that white and colored calla lilies need a different approach. Whites need more moisture. During the dormant period, they do not shed their leaves, but their growth continues. Colored, in turn, are not so demanding on moisture. They need bright light, and during the dormant period, they shed all the foliage. So if your flower has shed all its leaves, it shouldn't be thrown away - it is just getting ready for winter. 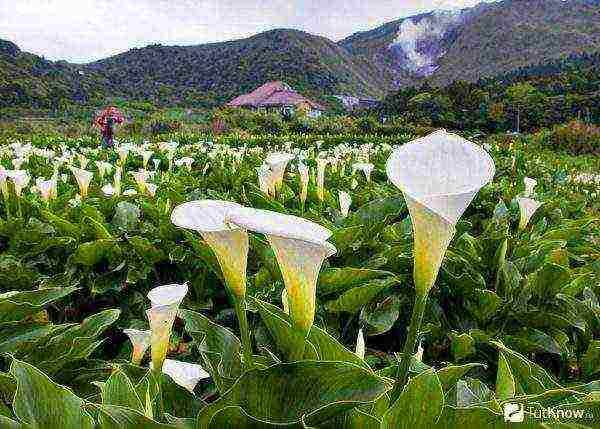
Care procedures
Planting is carried out before the beginning of the period of active growth - in April. The tubers are planted in separate containers.A thick, at least five centimeters, layer of drainage material - expanded clay, gravel, or broken brick should be placed on the bottom of the pot. Plants need a lot of free space, so the pot needs to be wide, but not too deep. The volume must be at least three liters.
In order for the beauty of calla lilies to delight you for many years, it is important to know how to transplant it correctly. First of all, it should be remembered that the transplant must be done every year - after the end of the dormant period. This is especially important for young specimens. It should be transplanted into pots, the diameter of which should be several centimeters larger than the same size of the previous containers. Sprinkle the rhizomes or tubers with a layer of earth, which should not exceed 2-3 cm. The hole must be dug with a depth equal to the diameter of the tuber, increased three times.
If the lateral shoots are promptly pinched off the calla lilies, and the top layer of soil is replaced in the container, then the adult plant can be left without transplant for two years. After the growing season, it is imperative to cut off the leaves on plants with colored bracts. The flower is poisonous, so it must be transplanted with gloves!
How to care for calla lilies
Caring for calla lilies at home is not particularly difficult. For planting it, it is better to choose a wide container or a small pot. It will grow especially well if there is good drainage in the soil. In order for the flower to grow well, it must be regularly watered and fertilized at least once a month.
Temperature and humidity conditions
- Growing calla lilies at home has its own characteristics. This flower loves light, so you need to take care of good lighting in the place of its growth (both in summer and winter).
- In winter, calla lilies are especially acutely aware of the lack of sunlight. With the onset of spring, the plant must be gradually taught to increase daylight hours.
- Calla belongs to thermophilic plants and does not develop well in cold conditions. The air temperature in the room should not fall below 18 ºC. But for good growth it is better to keep the temperature at + 22 + 23 ºC.
Features of caring for room calla lilies
Following the peculiarities of the structure of this culture and its origin, caring for it has its own differences from caring for other indoor flowers.
Humidity
The plant feels comfortable at 70-80% humidity, so it needs to be sprayed twice a day. Wipe the leaves with a damp cloth and place damp expanded clay or moss on a pallet.
When the plant fades, the watering frequency is reduced (for all species). Colored calla lilies should stop watering altogether after a month or two. It is impossible to immediately transfer the culture to the resting phase by stopping watering or cutting off the leaves. It is necessary that the tubers are fully ripe. The dormant period usually falls from October-November to the end of February. But this time may shift depending on the conditions of the flower.
Kalle also needs good lighting all year round. Better that it is indirect sunlight. In winter, there is a lack of it. With a lack of light, the culture may not bloom, letting only the stems grow. White calla lilies need to be illuminated even during the rest period. Colored views can lose their characteristic hue if there is insufficient lighting. 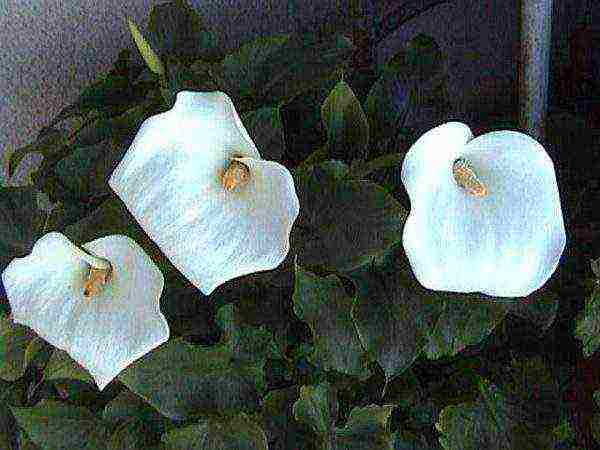
Rest period
The dormant period begins after the end of flowering.Calla lilies with rhizome put in a cooler room, stop feeding, reduce the frequency of watering. Leave in a similar state for 2-3 months.
Calla lilies with tubers leave alone, completely stopping watering, fertilizing and waiting for the natural drying of the ground parts of the plant. The tuber is then taken out of the ground and placed in a container with dry sand!
A container with tubers is placed in a fairly cold place for the winter. In the first half of Marchrested tubers removed from the sand, planted in a pot of soil and begin to water intensively.
Optimal temperature conditions
For both white and colored calla lilies, high temperature combined with low humidity are destructive - they are often affected by pests. Sharp temperature drops lead to the cessation of flowering.
- During the growing season, white varieties should be kept at + 18-20 degrees. When flowering ends, gradually reduce the temperature to 10-12 degrees. The rest period must be at least 2 months.
- Colored calla lilies feel comfortable at + 20-24 degrees. Light fluctuations in temperature, day and night, have a good effect on the formation of tubers and leaves.
- After flowering for ripening, the tubers are kept for 1 month without watering at + 25-27 degrees. When they ripen, they are laid without leaves on a dry hibernation at + 3-5 degrees, sprinkled with sawdust.
You need to be careful to ventilate the room where the flower is located, as it does not tolerate drafts.
Calla thrives in high humidity. To provide her with the necessary conditions, you can plant her in pots with pallets. The pallet is then used as a water reservoir. Moisture evaporates from it, saturating the air, increasing the humidity level in the room. 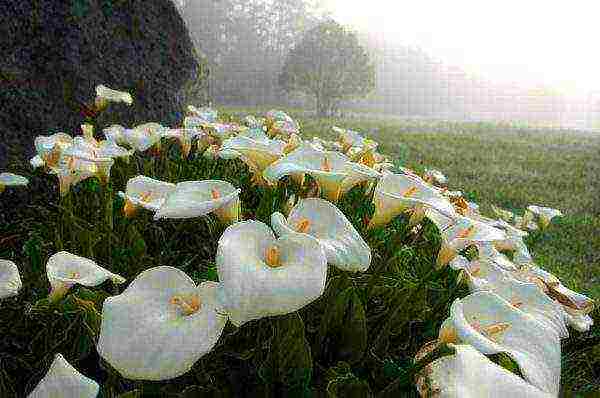
Lighting
During the period of active growth, the flower needs good lighting, which it needs for the formation of inflorescences. The plant should be on windowsills with bright but diffused light. The southern side of the apartment is optimal for placing callas. The duration of daylight hours should be at least twelve hours, therefore, in case of insufficient natural light, fluorescent lamps should be used. Poor lighting is the main reason why calla lilies do not bloom even with good care.
In winter, the flower needs rest. In plants with white bracts, growth stops, and colored calla lilies during the rest period, which lasts from two months to six months, completely lose their leaves and represent a dormant tuber.
The air temperature in the apartment should not be too high. Flowers develop well at +22 - + 24 ° С. In winter, the temperature regime should be lowered to +15 - + 18 ° С.
Priming
The natural qualities of calla lilies predetermine their love for moist soil, so the irrigation regime must be observed very strictly. The clod of earth in which this houseplant is located should always be moist.
- To provide the necessary moisture, the flower should be placed in a tray with sphagnum, pebbles or expanded clay, which must be constantly moistened.
- White calla leaves are sprayed daily with room temperature water. Plants with multi-colored bracts only need to be wiped with a damp cloth, as excessive moisture can lead to rotting of their tubers.
- Top dressing during the active growing season should be carried out regularly, alternating mineral and organic fertilizers. To avoid an increase in the mass of leaves and stems to the detriment of bud formation, do not feed fertilizers containing nitrogen before flowering.
Only after the formation of inflorescences can urea be added to the top dressing, as well as use the prepared infusion from the eggshell. In summer, you should feed an indoor flower every two weeks.
Soil composition and feeding
Acidified soils are suitable for calla lilies. Optimal next substrate:
- sod land (2 parts);
- sheet land (1 part);
- peat (1 part);
- sand (1 part).
In order for the flower to develop correctly, it must be fed in a timely manner. Sometimes in the summer calla lilies are planted in open soil, where they receive normal nutrition. But with constant maintenance in a pot, complex fertilizers are required. They need to be entered in turn once every 10-14 days.
So that the plant does not vigorously grow the leaves (which is reflected in flowering), during the growing season it is impossible to overdo it with fertilizers with nitrogen.When flower stalks appear, you need to feed the plant with urea, during flowering, add an infusion of eggshell. You can not spray the cover of the flower with top dressing, it may lose its decorative appearance. 
Watering and lighting
Proper watering is one of the main stages of growing calla lilies. These flowers are very favorable to regular watering and moist soil. Dry soil will cause them to stop growing. White calla lilies, accustomed to growing in swampy areas, are especially demanding for watering. When it is actively growing, it should be watered a lot. This should be done when the upper soil is 1 cm dry. The remaining water must be drained after 15 minutes.
Colored calla lilies should not be watered so abundantly. It is necessary to avoid stagnation of water in the sump, this can lead to decay of the roots. Watering is carried out with water at room temperature as the soil dries up by 2-3 cm.
The most important condition the growth and development of a flower is to ensure constant moisture in the soil in which the calla is located. Even the top layer of the soil should not dry out!
Still, do not forget about the natural conditions in which the plant develops - swamps and coastal zones.
Need to water every day using soft water with a little salt. In addition, to create an additional source of moisture, you can put a container with a flower on a pallet filled with pebbles, expanded clay or broken brick. They need to be moistened as they dry.
If water gets on the flowers during watering, then they will be covered with unsympatheticnon-decorative spots... To prevent this from happening, you do not need to spray the plant; instead, wipe the leaf plates with a damp sponge or napkin.
Features of watering and spraying calla lilies
The wide leaves of the plant require special care. They must be regularly wiped off dust with a damp soft cloth. In addition, you need to spray the plant.
Proper watering is essential for good growth and development. As noted above, calla lilies love moisture, so they need to be watered regularly and often. Dry potted soil can cause disease or death of the plant. It is especially important to monitor your watering frequency during the hot summer months.
The moisture content of the soil in the pot must be maintained at a constant level, especially during the growing season, and when the flower ripens, the number of waterings is reduced, watering only after the top layer of the soil has dried.
Home calla lilies: care and maintenance
In order for a flower to please for a long time with its beauty and sophistication, you need to follow a few simple rules:
- Calla lilies care begins with choosing the right pot, a light, cozy place and creating the required temperature regime. This coquette loves a lot of light without the direct rays of the sun hitting it. It is desirable that the temperature in the room is kept at 22-25 ° C.
- Callas need plenty of water. The main thing is that the soil is always moist throughout the growing season. When the seeds begin to ripen, watering can be reduced, it is enough to moisten after the top layer of the soil dries. It is impossible, of course, to allow stagnation of water, this will lead to decay of the roots, but overdrying is also unacceptable.
- From mid-winter to March, domestic calla lilies need to be fed every 10 days.
- Air humidity is an equally important criterion. At temperatures above 20 ° C warm, the plant must be sprayed. This procedure should be carried out carefully so that no water gets on the flower bedspreads.
- After purchase, these delicate creatures must be transplanted into a larger pot. For planting, a slightly acidic soil is used, consisting of peat, sand and a small amount of deciduous soil. Transplanted once a year in the month of November.
These gentle coquettes are afraid of drafts. The optimum temperature in summer is 23 ° C, in winter it is lower - up to + 14 ° C.After a dormant period, the pots of plants should be gradually exposed to light. Always cut off yellowed or withered leaves.
Caring for a strict coquette is not complete without incidents. The flower is susceptible to diseases such as bacterial or root rot, anthracnose and gray rot. These diseases are caused by improper care and maintenance. 
Transplant and reproduction
Correct transplanting is considered the key to good growth and flowering. When buying tubers, you need to pay attention to their appearance. They must be firm with live apical buds and light yellow skin. The tubers are sold from January to April. Before planting, they are recommended to be kept in a solution of potassium permanganate for 20-30 minutes in order to further protect against various diseases. This procedure allows you to identify previously invisible defects on the tubers. Damaged areas must be scraped off with a knife, and then treated with brilliant green.
How to plant tubers correctly? To begin with, a hole is made 5 cm in size, then a tuber is planted into it to a depth of 10 cm. If the plant is planted at a shallower depth, this will cause the leaves to lodge. Water the soil at the time of planting in moderation. Excessive moisture will cause the bulb to rot. Then the pot must be covered with a film to keep moisture and warmth.
Transplant required kalam with rhizomes.
Each year they are transplanted into a larger container, completely replacing the soil. A mixture of:
- turf land (2 parts);
- peat land (1 part);
- peat (1 part);
- humus (part 1).
The transplant is carried out in the spring, immediately after the rest period.
Reproduction in an apartment
Calla lilies can of course be propagated by seed. However, this method should not be used in an apartment, since seed germination is low.
The easiest way to reproduce is by dividing the rhizomes. This procedure should be carried out in the fall, carefully breaking off parts of the roots from the mother bush and placing them in separate containers with soil until spring. Storage temperature - +12 - +15 ° С.
The room where the rhizomes will be stored must be humid. The same should be done with tubers that form on the root system of some calla lilies. In spring, new specimens have shoots.
Reproduction is possible by dividing the tubers. Daughter bulbs are easily separated from mother ones. Seed propagation of a plant is more problematic, but exciting. Since you will have to pollinate the flowers yourself, you will never know what will turn out in the end. New flowers may not have much in common with their parents. Perhaps you will get a new variety by becoming a sort of breeder. 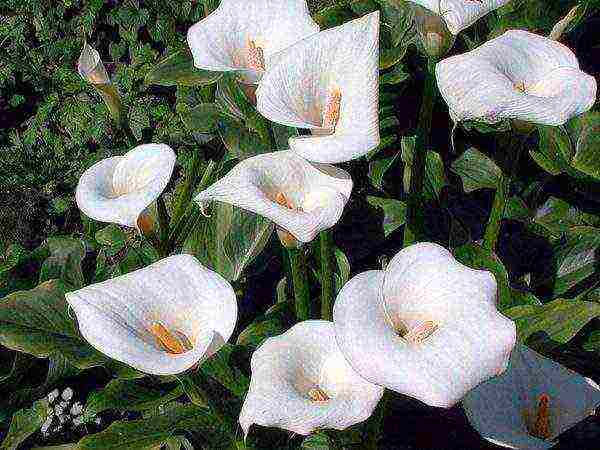
Increase in the number of plants
Calla lilies can be propagated by seeds, dividing rhizomes or tubers.
- Atseed propagation use only freshly picked. Suitable containers are filled with optimal soil, some wood shavings are poured there, seeds are planted and watered well. The container is kept warm by regularly watering. The sprouts are planted in individual pots.
- Rhizome division... With a well-sharpened knife, lateral daughter shoots are cut off and planted in separate containers. In this case, keep in mind that the neck of the rhizome should be on the surface of the soil.
- The tubers are planted into containers of suitable size, deepening by 5-10 cm. Tubers are placed upside down and wait about two weeks, periodically watering.
Emergence of new bulbs and reproduction of calla lilies
In calla lilies, the rhizome looks like bulbs. They divide, they become more, they grow and occupy an ever larger area. The excess must be regularly dug up and transplanted or thrown away. The bulb is transplanted into well-drained soil. Choose a sunny place for planting.
The bulb should be planted horizontally. The hole should be approximately 10 cm deep.Water the soil abundantly so that the tuber begins to grow well. You need to separate the bulbs with your hands. Each must have at least one kidney.
We transplant homemade calla lilies
- When the dormant period ends, calla lilies are transplanted into fresh soil. With regular pinching of fresh shoots and replacing the top layer of earth in the flowerpot, calla lilies can not be transplanted for 2 years.
- White flowers should be planted in pots that are suitable for tubers (at least 15 cm in diameter), but not very deep. A 5 cm drainage layer, a substrate, is placed in it. You can purchase a versatile substrate for flowering indoor crops.
- It is not necessary to place the calla rhizome deeply, but too shallowly. To calculate the correct depth, the diameter of the rhizome must be multiplied by three. When the plant is transplanted, the temperature should be raised a little. When it starts to grow actively (after 2-3 weeks), you can start active watering and feeding.
Once a year after flowering, the blooming sissy needs a transplant. This requires a large pot of new nutrient soil. When transplanting, you can reproduce by separating the babies from the mother tuber. This action is considered necessary, since thanks to this, the plants will bloom every year. Before transplanting, do not forget about abundant watering. During transplantation, the earthen lump cannot be destroyed. The same rule applies to palms, whose root system is no less demanding.
From pot to flower bed
If there is a desire to plant a whole flower bed, then the tubers are planted somewhere at a distance of 12 cm from each other. The smaller spacing will keep the flowers from growing beautifully. This rule should not be neglected if you want to achieve excellent flowering. Planting bulbs is an easy and quick way to get a beautiful flowering plant.
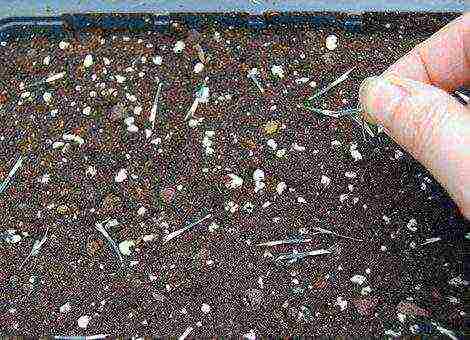
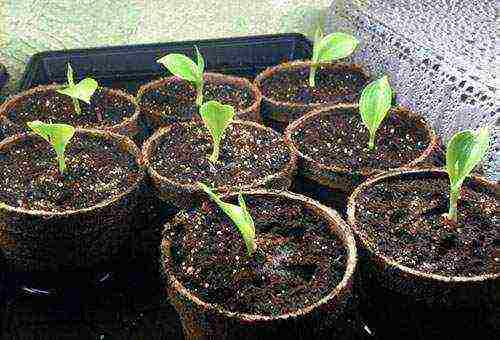
Experienced growers grow calla lilies from seeds. You can always find them in stores. To begin with, germinate the seeds in a damp paper towel, placing them in a dark, cool place. After 2 days, the seeds should show signs of growth, after which you can proceed to the next stage of planting. For sowing, ordinary seedling soil is suitable.
It is recommended to place no more than two seeds in each pot. To save them from decay, at this stage, watering should be done through the bottom of the pot. When the soil dries up, you can spray a little water on top. After the first shoots have appeared, calla lilies can already be planted in good large pots or in the garden. Before planting in new soil, the roots must be carefully and thoroughly rinsed. Care for a strict coquette is further organized according to general rules.
Calla lilies garden planting and care
The choice of planting material
When choosing a variety of garden calla lilies, you need to consider several different plant options and decide on one of the most suitable species that you will like the most in appearance and suitable for growing conditions. The most popular and widespread varieties among flower growers in our country are calla "Ethiopian" and "Rehmanni". These varieties are considered very capricious, but they have all the decorative qualities. Large eye-catching flowers rise on the stem at a height of about one meter and bloom for a long time.
If possible, it is recommended to purchase only tubers of "local" origin, because they take root faster and start flowering earlier, in contrast to those brought from other climatic conditions. Good quality tubers should not look sluggish or shriveled and should be large in size. When buying, you must carefully inspect each unit of planting material. 
Pick-up location
On the garden plot, it is recommended to choose only sunny planting places for calla lilies or, in extreme cases, partial shade.Flowers love warmth and abundant light, and even in a slight shade, their growth and development changes slightly in the negative direction. Although these capricious flowers can get burned by the scorching sun rays at noon and their leaves are best shaded during this period. The landing site should not be in drafts.
Soil requirements
It is desirable that the soil is fertile and with a low level of acidity. Calla lilies can also be planted on clay soils, if you first dig up the area and add equal parts of sand and peat during digging. Since the excess of nitrogen in the soil affects negatively for the flowering of the culture, organic nitrogen-containing fertilizing is needed in a minimum amount.
Boarding time
The ideal time to plant garden calla lilies is May. But the favorable period is determined by the stable air temperature above zero and the absence of night spring frosts. 
Possible problems and difficulties
With improper growing and caring for calla flowers at home, the following problems are possible:
- Stronglyelongated stems plants - very warm air and lack of lighting.
- Increasedfragility of leaf petioles - lack of nutrients in the soil.
- Calladoes not bloom - improper maintenance during winter, poorly expressed rest period.
- White bloom on sheet plates - defeat by a fungal disease "powdery mildew". It is required to treat the plant with colloidal sulfur, a solution of potassium permanganate (0.2-0.3 g per liter of water), a solution of soda ash with soap, Vectra, Skor, Topaz.
- Plantbecomes covered with an unpleasant gray bloom - fungal disease "gray rot". Treatment of the plant with fungicides Fundazol, Vitaros, Rovral is required.
- Suddenly startdry and fall off leaves and flowers - root rot. It is necessary to reduce watering, replace some of the soil with a new dry one, carry out processing with Previkur or Ridomil.
Diseases and pests
Despite care, calla can be susceptible to various diseases:
- When attacked by aphids and spider mites, drugs such as Aktellik, Komandor, Bison are used. With a weak attack, it is enough to wipe the leaves with soapy water.
- When gray rot appears, the foliage is treated with fungicides (Fundazol, Vitaros).
- If root rot is found, it is necessary to stop watering, replace the wet soil with a dry one, treat it with fungicides (Previkur).
- If affected by bacterial rot, diseased plants must be destroyed.
- With anthracnose, damaged leaves must be removed and treated with fungicides.
Knowing how to care for calla lilies at home, you can create a whole flower bed on the windowsill, and it is even more pleasant to give them to your friends as a holiday present.
Calla lilies diseases and care during this period
Most plant diseases are caused by bacteria or fungi, including:
- Gray rot can spread to all parts of the plant. There is a gray coating caused by the fungus. A flower can become infected in different ways: through soil, water, wind. With excessive air and soil moisture, the risk of fungal infection increases. A diseased plant is treated with Vitarox, Rovral and other fungicides. Before that, you need to air the room.
- Calla anthracnose is characterized by the presence of brown spots on the leaves. Leaves dry out and crack over time. They need to be removed and the plant treated with a fungicide.
- Root rot manifests itself in the form of wilting of calla lilies. If the plant is dug, then dry rot can be seen on the tubers. This disease occurs due to waterlogging of the soil. It is necessary to suspend watering the flower, or replace the soil with less moisture. Fungicide treatment is also needed.
- Bacterial rot is caused by bacteria in the culture. There are no means to combat it, so it is advisable to dispose of the flower.

Diseases characteristic of room calla lilies
Diseases of domestic calla lilies are most often caused by fungal infections and bacteria. Most often, the flower is sick due to improper care or neglect. Of course, prevention is the best way to fight disease.
It is necessary to carefully monitor the state of the soil in the pot, do not allow it to dry out or waterlogged, do not expose the plant to direct sunlight and drafts. To successfully deal with an already emerging disease, you need to know its features and symptoms. What diseases most often affect this indoor flower?
Anthracnose
The main sign of anthracnose is the appearance of brown spots on the leaves, their gradual cracking and drying. The main method of dealing with anthracnose is to remove damaged leaves and treat the entire plant with fungicidal preparations.
Gray rot
This disease has an adverse effect on all parts of the flower. A gray coating (fungus) forms on the plant. The cause of the appearance of gray rot is improper care, high humidity of the air and soil. To get rid of the fungus, it is necessary to treat the flower with fungicidal preparations (Vitaros, Rovral), and also regularly ventilate the room. 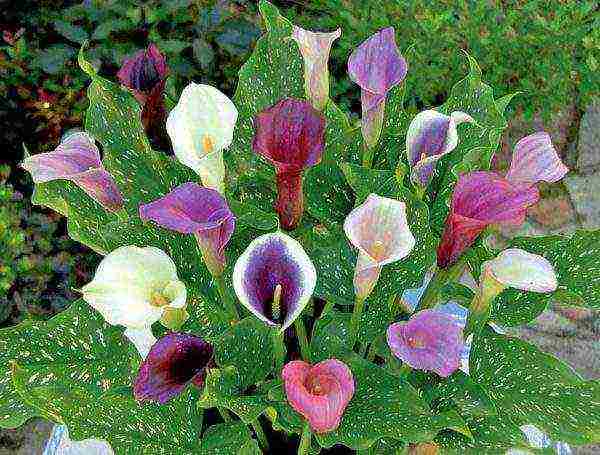
Bacterial rot
Bacterial rot is very difficult to treat, so it is better to destroy the affected flower immediately in order to prevent the spread of the disease to other flowers.
Root rot
Root rot leads to the gradual wilting of the flower. When removing the roots of a plant from the soil, you can see a plaque of rot on them. Most often, this disease occurs due to abundant watering and waterlogging of the soil. If root rot is detected in time, the flower can be saved. To do this, the soil in the pot is replaced with a drier one, the number of watering is reduced, and the flower itself is treated with fungicidal preparations.
More often than others, calla lilies are attacked by spider mites and aphids.
Aphid settles in large colonies, is clearly visible with the naked eye. Leaves a sticky bloom on the plant, sucks out juices, inhibiting growth and development. Insecticides Komandor, Antitlin, Iskra, Aktellik, Biotlin, Bison, infusions of onion and garlic will help get rid of aphids.
Spider mite "Decorates" the whole plant with a thin cobweb, the leaf blades are first covered with small yellow specks, which gradually grow, forming dried out areas. Such insecticides as Vertimek, Lightning, Fitoverm, Akarin can destroy ticks. 
Lack of flowering
Poor flowering or its complete absence occurs as a result of exposure to a variety of adverse factors:
- Rearrangement of the plant from place to place and frequent replanting weaken the plant and impair the flowering process;
- Insufficient fertilization and poor lighting in the room;
- Improper care during the growing season;
- Tuber overgrowth leading to weakening of the plant and poor flowering.
In the end, caring for calla lilies is not that difficult. It should be borne in mind that care for different types of calla lilies is different. For example, white calla lilies require more moisture, and their growth does not slow down during dormancy and no flowering.
For colored calla lilies, air and soil moisture is less important, but good lighting is a prerequisite for good development. In addition, colored calla sheds foliage with the onset of a dormant period. Inexperienced growers begin to panic, thinking that the plant has died. In fact, calla lilies are just sleeping, at the beginning of summer the leaves grow on it again.
Threats to the flower
Calla lilies can be affected by various diseases that are caused by both viruses and pests. If the leaves turn yellow and curl, and a mesh pattern appears on the peduncles, then these changes are caused by thrips. In this case, treatment with insecticidal preparations is necessary.
Changes in the color of leaves and flowers, as well as their deformation, can cause rot caused by the presence of certain bacteria. The flower should be treated with soapy water and appropriate ready-made products should be used for treatment.

Pruning calla lilies
As such, trimming is not applied to the flower, only dried leaves are trimmed. This procedure is recommended during the dormant period of the flower, from June to September. The plant does not bloom at this time, and some of the leaves on it wither and dry out.
Calla lilies breeding methods
There are three ways to reproduce a flower at home:
- The tuberous method involves the separation of small nodules from the maternal root. You can easily purchase such planting material at any flower shop. The size of each daughter nodule is 0.5-1.5 cm.
This size is not suitable for planting, therefore, it is necessary to carry out rearing by burying the planting material 4 cm into the nutrient soil. The best time for planting tubers is April. During planting, the temperature in the room should be at + 20 + 22 ºC; - The method of propagation by shoots involves separating the shoots from the main stem and rooting them in a nutritious soil, followed by transplanting them into a pot with fertile and well-drained soil;
- Reproduction of calla lilies by seeds is very troublesome. The fact is that the germination rate of the seeds of this flower is very low and even professionals do not always succeed in achieving the appearance of sprouts. Before planting in the soil, calla seeds are kept for about 6 hours in a solution that stimulates growth. Then they are taken out and laid out on a damp cloth and placed in a warm place for about a week. During this time, shoots should appear in the seeds. After that, they can be planted in a flower pot with soil.It is not recommended to immediately plant seeds in open soil, as they often die there. The seeds are buried in the soil by 1 cm. Immediately after planting, watering should be minimal - this will help prevent decay of the planting material. The planted calla lily seeds are best fed with moisture through a small hole located at the bottom of the pot.

How is a calla lily transplant performed?
The first transplant is performed after the seedlings have been strengthened. To do this, a wide and high pot is selected, drainage is made from sand at the bottom, and nutritious soil is poured there. Then holes are made in the soil and a sprout with roots is placed there. During transplantation, it is recommended to treat the seedling roots with a growth biostimulator. This must be done with great care so as not to harm the fragile calla lilies.
When the sprout is transplanted, it is watered with a small amount of distilled water (you can also add a little peat-humic fertilizer to it to help the plant adapt to new conditions faster).
If the calla is bought in a store, then immediately after delivery home it is transplanted into a larger pot. The flower feels good in slightly acidic soil, which can be prepared at home on your own. This will require deciduous soil, peat and some sand. It is recommended to transplant adult flowers in late autumn, in November.
Top dressing and fertilization of domestic calla lilies
When growing a flower at home, one must remember the need for periodic feeding.
- If you want to achieve year-round flowering, then the amount of dressings must be increased. However, you need to make sure that the flower does not get too much. For example, a large amount of nitrogen in the soil negatively affects the leaves - they turn black at the edges.
- Top dressing is best done from January to March. For full flowering, it will be enough to apply fertilizers once a week.
- Fertilizers that stimulate growth and flowering (superphosphate and potassium nitrate) are suitable for callas, and in flower shops you can even find special dressings that contain the optimal amount of trace elements and nutrients.
In addition to fertilizing with mineral fertilizers, calla lilies must be fed with organic fertilizers at least once a year. 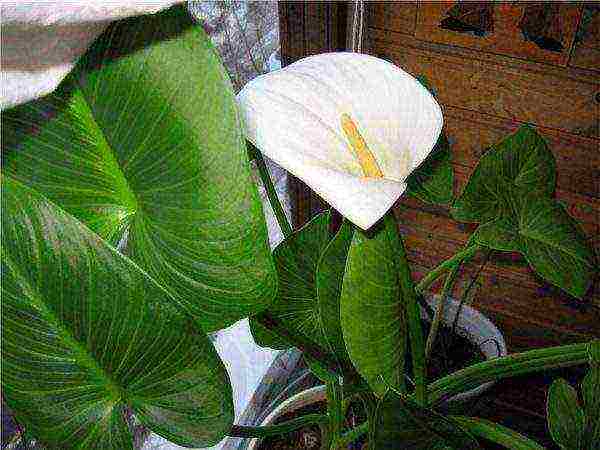
Callas need regular fertilization, especially when there is a lack of sunlight.Top dressing is carried outevery 2-3 weeks, alternating complex mineral and organic fertilizers.
Before flowering do not use nitrogen, so that the intensive growth of leaves does not drown out the formation of buds, after the formation of inflorescences, urea and crushed eggshells can be added to the ground.
Growing seeds for seedlings
Usually breeders are engaged in such reproduction of calla lilies. But if you grow it at home, the seeds are pre-soaked for 6 hours in a natural plant biostimulator - potassium humate. Then they are laid out on a pallet with a damp towel. Cover the top with the same towel and put in a warm place for a week. Make sure that the seeds do not dry out. The towel should be exactly damp, not wet. When the seeds germinate, they need to be sown in trays with soil, and left in a warm place until shoots appear. Discard the seeds that have not sprouted. Then you can transplant the seedlings into a pot.
Completion of the growing season
The culture continues to grow while it is in moist soil. The growing season ends in September - October. The leaves begin to die off gradually. With the onset of yellowness, watering should be reduced. After 2-3 weeks, it should be completely stopped. The leaves should dry on their own, allowing the remaining trace elements in them to get into the tubers.
If the calla grows in a pot, you do not need to dig it up. Move the plant to a cool place (balcony, veranda). It is important that the rest period is at least 3 months. Otherwise, the calla is at risk of not blooming.
Notes for flower growers
Why calla lilies don't bloom - this question cannot always be answered with confidence. There may be several factors that can cause such a problem. The presence of many bulbs that have not been transplanted for a long time, frequent transplants, changes in flowerpot locations, improper care. All this weakens the mother plant, and the calla does not bloom.
Why do calla lilies turn yellow and dry leaves?
There are many reasons for the yellowing and drying of calla leaves:
- freezing of tubers;
- lack or, conversely, excess watering;
- deficiency of important micronutrients;
- insufficiently humid air in the room.

Calla has faded what to do?
If, after flowering, the leaves are still green, then you need to continue watering and wait for them to dry. You need to water less and less each time. After the leaves die off, you can send the plant to rest.
Why calla is called the "flower of death"
Many legends are associated with this flower. It looks like a blanket that wraps around a yellow ear, similar to a candle. This is probably why calla is called the flower of death. Indeed, in some European countries, death is associated with white. Calla lilies can often be seen there at funerals.
Now, few people remember this superstition. The myth of why calla lilies are the flowers of death has not been confirmed, although some continue to scare away from buying this flower.
Caring for calla lilies at home is quite affordable and not very laborious. Observing simple growing rules, you can achieve regular flowering, healthy greenery, and as a result, additional decoration of any interior. And in the end, we recommend watching the video on this flower, we wish you a pleasant viewing.
Calla is an exquisite and incredibly beautiful flower. Most often it can be seen in a sophisticated and romantic house. This flower is a representative of the aroid family, which came to us from distant South Africa.
The main feature of calla lilies is its unpretentious attitude to the place of its growth. She feels equally well in the wild and at home.
Flowers of death
It is very common to hear that calla lilies are the flowers of death. The sources of this opinion are unknown. According to one of the versions of its origin, calla lilies are very often brought to funerals in some countries. Therefore, they began to be called the flowers of death.
But in real life, they have nothing to do with death. In many states, these flowers are a symbol of love.They are often used in the preparation of wedding bouquets in European countries.
Varieties of calla lilies
In the modern world, there are more than a hundred varieties of calla lilies, which differ from each other in the color of the buds and their shape. All these flowers have been divided into two types by professional florists: terrestrial and wetland.
The care that calla lilies require at home (photos of the plant are posted in this article) is not particularly difficult. It must be planted in a wide, small container. In order for it to grow well, it is necessary to build drainage in the pot, provide the plant with regular watering and timely fertilization.
Breeding features
Reproduction of calla lilies at home can be done in three ways:
- tuberous;
- shoots;
- seeds.
The first method of how to grow calla lilies at home and propagate them involves separating minor tubers from the mother's root. This planting material can be seen in almost every flower shop. Daughter nodules are small (5-15 millimeters), so they should be grown before planting. To do this, they must be buried in the nutrient soil.
To carry out reproduction with the help of shoots, it is required to separate them from the main stem and root them in the nutrient soil. And only after that they are transplanted into a pot filled with fertile and drained soil.
Seed propagation
The most troublesome is the propagation of calla lilies from seeds at home. This is due to the low level of their germination. Therefore, sprouts very rarely appear even in experienced professionals.
Before propagating calla lilies at home by planting seeds in the soil, they must be kept for about six hours in a growth stimulant solution. After that, they are placed on a damp cloth in a warm place for about seven days. After this period, the seeds should sprout. Only then can they be planted in the ground.
Open soil is not the best option for growing calla flowers at home, as they most often die in it. To prevent decay of planting material, watering should be reduced to a minimum. The best way to replenish calla seeds with moisture is through a small hole at the bottom of the pot.
Air temperature and humidity
When growing calla lilies at home, you need to pay attention to some of the characteristic features of this process. This flower is a light-loving plant, so it is necessary to provide the place of its growth with good lighting both in summer and in winter. In addition, in the spring, it is necessary to gradually accustom the plant to the fact that the length of daylight hours increases.
These flowers are lovers of warmth. Therefore, they develop very poorly in cold conditions. The temperature regime in the room where they grow should be in the range of 18-23 degrees Celsius. Airing the room must be done very carefully, excluding the formation of drafts.
The air in the room must be humid. To do this, you can plant plants in pots with pallets, which will eventually function as water tanks. As the moisture evaporates, it will saturate the air while simultaneously increasing the humidity in the room.
How to transplant calla lilies at home?
The first transplant should be done only after the seedlings have hardened. A tall and wide pot is suitable for this. Sand drainage is placed at its bottom and filled with nutrient soil. After that, holes must be made in the soil, into which sprouts with roots are laid.
During this operation, it is advisable to process seedling roots with a growth biostimulator. But this must be done very carefully in order to avoid harming the immature flower sprouts. After transplanting, the plant is carefully watered with distilled water.
If the calla was purchased in a store, it should be immediately transplanted into a larger pot at home. The most optimal for this flower is a slightly acidic soil. You can do it yourself using deciduous soil, peat, and a small amount of sand. Mature plants are best replanted in late autumn, in November.
Watering and spraying
Calla has fairly wide leaves that require regular maintenance. Dust must be especially carefully removed from them with a damp, soft piece of cloth. In addition, they need to be sprayed regularly.
An important condition for good growth and development of calla lilies at home is watering. It was already mentioned above that these flowers love moisture. Therefore, watering them should be carried out regularly and often. If the soil in their pot dries up, a variety of diseases can develop, which often lead to the death of the plant. Particular attention should be paid to watering during the hot summer months.
It is especially important to keep the soil moisture in the container at the correct level during the growing season of the plant. After the flowers have ripened, watering can be reduced. They should be carried out only after the topsoil has dried.
Top dressing and fertilization
Many people are interested in how to make calla lilies bloom at home. When growing these flowers, one should not forget about periodic feeding. In order for these plants to please you with their flowering year-round, you need to significantly increase the amount of dressings. But too much will not do him any good. For example, nitrogen in large quantities can provoke the appearance of blackening along the edges of the leaves.
The best time to feed calla lilies at home is January - March. In order to ensure full flowering, fertilization should be carried out once every 5-7 days.
For these plants, those types of fertilizers are suitable that stimulate growth and flowering. These include superphosphate and potassium nitrate. In the assortment of flower shops there is a large number of special dressings containing the optimal amount of trace elements and nutrients.
Also, calla lilies should be fed with organic fertilizers at least once a year.
Houseplant diseases
The main pathogens of domestic calla lilies are fungi and bacteria. However, you will never come across them if you know how to care for calla lilies at home. The best way to fight disease is prevention.
It is necessary to very carefully monitor the condition of the soil in the pot, excluding its drying out or waterlogging. You also need to protect the flower from direct sunlight and drafts.
The key to a successful fight against emerging ailments is knowledge of their features and symptoms. The most common diseases of this indoor flower include:
- anthracnose, accompanied by the appearance of brown spots on the leaves. Over time, they crack and dry out;
- gray rot that forms on all parts of the plant due to improper care, high humidity or soil;
- bacterial rot, which is very difficult to treat and quite often requires immediate destruction of the infected flower to prevent spread to other plants;
- root rot, which contributes to the gradual wilting of the plant and appears as a result of abundant watering and waterlogging of the soil;
- lack of flowering as a result of frequent rearrangements or transplants of calla lilies, poor lighting or insufficient fertilization, and so on.
How to care for calla lilies at home is not a very difficult process. But do not forget that the varieties of these plants require different care. For example, white calla lilies at home require more moisture. But at the same time, they do not stop growing during dormancy or lack of flowering.
Calla lilies "mix" at home are unpretentious to the humidity of the air and soil. But at the same time, good lighting is required for their good development. In addition, during the dormant period, such a flower sheds its foliage. Therefore, you should not panic - the plant is just sleeping. And with the onset of summer, its leaves will grow back again.