Content [show]

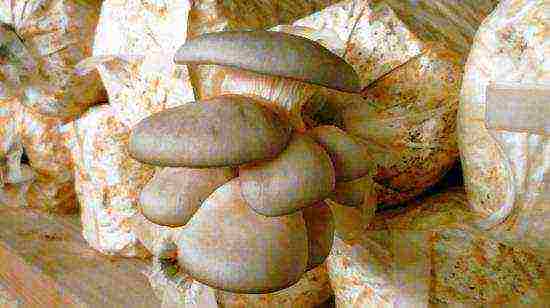
Until recently, oyster mushrooms were considered a delicacy, but today you can enjoy them all year round.
Everything you need: a room free from human habitation, material for growing and full care, observing which, in a few weeks you can harvest the first harvest of oyster mushrooms.
After reading our article, you will learn how to grow oyster mushrooms with your own hands, what nuances of care are important for breeding them, what is the best way to harvest and where to store it.
Where to grow oyster mushrooms
Oyster mushrooms are usually grown in cellars, basements, in greenhouses, at home - in principle, any non-residential premises are suitable for this, although many mushroom pickers claim that growing oyster mushrooms in an apartment is dangerous to health.
For the growth of mushrooms, high humidity is necessary, creating which, you risk not only your own health (allergic cough, high body temperature), but also damage your own home (mold on the walls).
An ideal place for sowing and growing oyster mushrooms is a greenhouse. But, even there, the production of mushrooms is a daily painstaking work and control over the process.
If you decide to grow oyster mushrooms on your own in artificial conditions at home, remember to thoroughly disinfect the room. To do this: treat the walls and floor with a 4% bleach solution, and after two days, ventilate it.
The main stages of breeding oyster mushrooms
The process of breeding oyster mushrooms includes several stages:
Preparation and processing of the substrate
The substrate is a breeding ground for the growth of fungi, a kind of soil. As a raw material for the substrate, you can use, for example, sunflower husks, fresh straw, buckwheat husks. The main condition for cooking is clean material.
It is better to grind the substrate. To avoid the ingress of harmful microorganisms and foreign particles into it, the substrate is treated with steam (heat treatment). For this: the substrate (for example, take 10 kg) is placed in a container and heated.
Cook the substrate for two hours in a row. Next, drain the water and cool the substrate to a temperature of 25 ° C. The most common technology for processing a substrate today is xerothermal technology.
The essence of this process is that the substrate under the influence of steam is heated to 100 ° C and kept for a certain amount of time (1.5 hours in the case of using straw). After the specified period, the substrate is moistened with water.
Formation of mushroom blocks
Mushroom blocks are polyethylene bags with a size of 350x800 mm, filled with a substrate. For their formation, the substrate and the mycelium (mycelium) are placed in layers in the packages pre-treated with steam, alternating between them. You can easily buy mycelium on the Internet.
The top layer is a substrate. After filling, the bag is tied. Next, we make small holes (1-2 mm) in the bag, leaving a distance of 10 cm between them.
Seedling care
After the formation of mushroom blocks, the incubation period begins (the period of oyster mushroom maturation). At this stage, it is important to create proper oyster mushroom care. Monitor the temperature in the bags (the optimum temperature is + 20 ° C). In addition, the room must be ventilated.
Incubation lasts 2-3 weeks, after which the overgrown mycelium is transferred to another room (growing room) for growing.
Fruiting
On 7-10 day after transferring the mycelium to a new room, the first rudiments of fungi appear. At this stage, it is important to increase the air humidity to 100%... For this, the floor and walls of the room are sprayed with water. You need to ventilate the room even more often.
And also, mushrooms need lighting before 10 hours a day. Additional lighting can be created using ordinary fluorescent lamps.
Harvesting
It is believed that the correct harvest is the twisting of oyster mushrooms from the substrate. The fact is that when cutting them with a knife, there is a risk getting into the mycelium of microorganisms.
In one room you can spend 4-5 rotations (continuous cultivation) for a year.
Note! After harvesting, the premises are washed with water, disinfected and thoroughly ventilated.
Growing methods
We examined the technology of growing oyster mushrooms, now we will dwell on its methods in more detail. Consider two of the most popular and, as practice shows, effective methods of artificial cultivation of oyster mushrooms:
- Extensive method - in natural conditions;
- Intensive method - growing in a special room using a substrate.
Extensive cultivation methods
Oyster mushrooms can be grown in this way on sawdust, shavings, on stumps left in the forest, after tree felling, as well as on fruit-bearing garden trees.
Instructions for the extensive method of growing oyster mushrooms on stumps:
- Preparing the stump for planting oyster mushrooms. The diameter of the stump is 20-40 cm, the length is 30-40 cm. It is best to use a freshly cut stump;
- We set the stump in a small depression, on the bottom of which we lay the substrate (for example, wheat). We also add mycelium (seed) there;
- Place the prepared stump in the recess and cover it with soil.
From time to time, the stump needs to be watered. No other maintenance work is required. The crop can be obtained in the same season when planting was carried out. It is best to plant mushrooms in the spring.
You can also grow oyster mushrooms using wooden blocks. For this:
- We prepare the bars. To do this, we cut them off from a freshly cut hardwood tree. We soak them in water for a week;
- We put the bars on top of each other, and on the end of each we pour the mycelium (mycelium) about 100-150 g. Another way of introducing the mycelium is to drill small holes (10-12 mm) in the bar;
Recommendation! The diameter of the finished bars should be 20-40 cm. The length of each bar can be up to half a meter.
- We wrap the bars with cellophane wrap to prevent the mycelium from drying out;
- On the sides of the bar we make holes with a diameter of 10-12 mm for the mycelium. We cover them with moss, wet sawdust or straw. 10 holes should be enough.
Instructions for growing oyster mushrooms on sawdust:
- We fill up the substrate (nutrient medium) with a layer of 10-15 cm in a previously prepared trench and spray it with a suspension of "mushroom spores" for better reproduction of oyster mushrooms. The depth of the trench should be 15-20 cm. Width - 40-60 cm;
- We prepare the wells for the introduction of the mycelium. The depth of the holes is 5-7 cm. We put 10-20 grams of mycelium in them;
- We cover the holes with branches, cover with polyethylene film and pour a small layer of earth on top.
The first harvest can be expected after 2-3 months.
Intensive cultivation methods
For growing oyster mushrooms in an intensive way, the substrate is important. As a substrate, sawdust from trees, cereal straw or sunflower husks can act.
Let's consider the most common technology for artificial cultivation of oyster mushrooms in bags.
This process consists of the following steps:
- Chopped straw is poured into a large tank and filled with water;
- Then a fire is made under the tank. While the straw is "boiled" at a temperature of 70-80 degrees for 8-12 hours, purchased plastic bags are prepared or made from a plastic sleeve. Bags are used in sizes 40 by 60 cm or 50 by 100 cm;
- The water is drained from the tank. The straw is placed in bags and stacked in layers, alternating each layer of straw with a layer of mycelium. At this stage, you can add 10% bran. An obligatory component of the substrate is a 1-2% bioactivator (slaked lime);
- Small holes are made in bags with mycelium (diameter 2 cm). The bag itself is filled with a substrate for 2/3 of the volume;
- The necks of the bags are tied with a rope and set in an upright position;
- Watering the bags is carried out. Moreover, the first 5 days, watering is carried out with extreme caution - it is important not to allow water drops to fall on the bags. Further - using a hose at least twice a day.
Important! The air humidity in the room where the oyster mushrooms grow should be 90-100%.
General growing conditions exist for the normal growth of mycelium. Pay attention to them:
- The mycelium can be sown when the substrate cools down to a temperature of +22 degrees, it easily crumbles and does not stick to the hands;
- The mycelium is introduced at the rate of 150-180 grams of mycelium per one mushroom block (6-8 kg of substrate).
Oyster mushroom care rules
To effectively grow oyster mushrooms at home and get a harvest, you must follow the generally accepted rules:
- The room temperature should be + 22-25 degrees;
- The temperature of the contents of the bag itself should be +28 degrees;
- Air humidity in the room - 90-95%. For this, several cans of water can be installed in the room;
- There must be good ventilation between the bags. They can be stacked on specially made racks or hung from the ceiling;
- Growing temperature should be reduced to + 12-18 degrees;
- For half a day, the room should be illuminated with fluorescent lamps;
- Good air flow is the key to an excellent harvest. If the room is small, you can install ordinary fans and open windows and doors more often. But for rooms with large areas, ventilation with special equipment is needed;
- In rooms where oyster mushrooms are grown, it is advisable to wear protective masks. The mask will help prevent allergies and the associated suffocating cough;
- An irrigation system is indispensable. Oyster mushrooms are moisture-loving mushrooms. Remember to water them twice a day.
Oyster mushrooms are delicious, nutritious and natural. But their main advantage is profitability, i.e. ease of growing. By the way, you can cultivate these mushrooms both for yourself and for sale. The main thing is to master the cultivation technique and put a little effort into it.
You will learn more about how to grow oyster mushrooms at home from this video.:
Rate the article
(
estimates, average:
out of 5)
Mushrooms are a popular and healthy product that our housewives know well.Growing oyster mushrooms at home will allow you not only to cook delicious meals for the whole family, but also to get a stable source of income. This type of business is highly profitable.
Technologies for growing oyster mushrooms at home
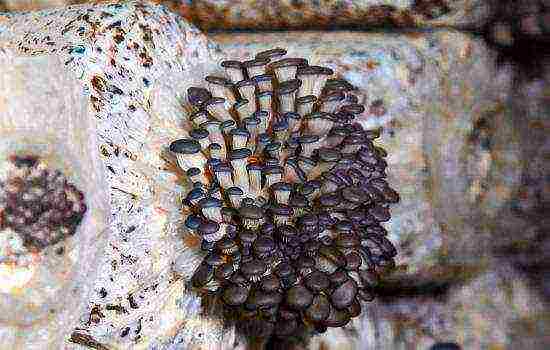
Growing mushrooms is a rewarding hobby and a profitable business
Oyster mushrooms give a high yield. With 1 kg of these mushrooms, you can get 3 kg of mycelium in a short time. They are unpretentious to the place of growth and feel good in a small area. Such conditions will not affect the amount of the crop.
Growing oyster mushrooms can be a profitable business. To engage in this type of business, it is enough to have a garage or basement at your disposal. You can also grow mushrooms for your own consumption. An ordinary window sill is suitable for this purpose.
There are two growing technologies:
- intense;
- extensive.
The first option involves the growth of mushrooms in artificial conditions. Intensive technology allows you to get an equal amount of crops throughout the year. But in this case, you will need to purchase special equipment to maintain the microclimate necessary for the growth of the mycelium. This will entail financial costs.
The extensive method consists in growing mycelium in natural conditions. This technology does not require significant investment. But the yield depends on the season and climatic conditions.
How to grow mushrooms in an intensive way
Site preparation
Oyster mushrooms are always grown in a sterile room. For this, pre-treatment is carried out with 1% chlorine solution or lime. The temperature must be kept at +18 ° C .. + 26 ° C. If there are ventilation systems in the room, they should be turned off for the period of laying. Doors must be tightly closed.
Selection and processing of the substrate
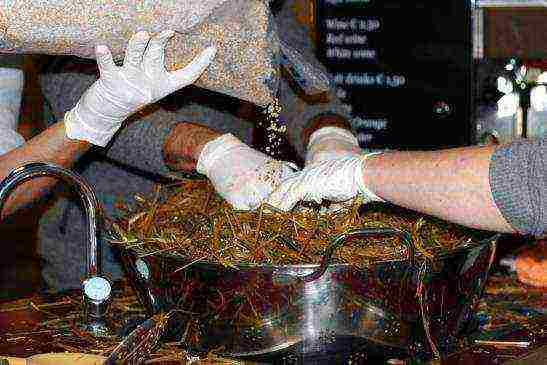
Any dry organic matter is suitable as a substrate for growing oyster mushrooms.
For oyster mushrooms, you can use various plant residues. It can be:
- stalks and stalks of corn;
- sawdust of non-coniferous wood;
- vine;
- reed;
- sunflower husk;
- wheat and rye straw.
Any material available will do. If straw is used as a substrate, it must be chopped up. This can be done with an ax or knife. Crushed straw to 5-10 cm. This procedure will help to avoid the formation of voids, the presence of which negatively affects the harvest.
Important! You can only use fresh straw that does not have a moldy smell.
The next stage of preparation is heat treatment. Under natural conditions, oyster mushrooms do not grow on the substrate, since their development is hindered by various microorganisms, including mold. Heat treatment eliminates these competing mycelium. This can be done in two ways:
- using pasteurization;
- by sterilization method.
When grown at home, the first method is used. The substrate is placed in a metal container, poured with boiling water, tightly closed with a lid and left for 2-4 hours. Note that it needs to be chilled before being placed in the bags.
Sterilization involves the use of autoclaves and is applied in a production environment.
Video: practical tips for processing the substrate
Formation and installation of blocks with mycelium

Mycelium blocks for oyster mushrooms are formed from bags or boxes
- For growing oyster mushrooms, you can use plastic bags or boxes. It is necessary to pay special attention to the size of the container so that the substrate does not dry out and does not overheat. The size of the bags should correspond to the indicators of 50x100 cm, boxes - 20x40x60 cm.
- For planting, a substrate is used, the temperature of which is +20 ° C ... + 30 ° C. Mycelium should not be added to a hotter mass, this can lead to the death of the mycelium.
- If the oyster mushrooms were in the refrigerator, they must be kept for 24 hours at room temperature before planting.
- Then they are placed in a container and crushed by hand until the grains are separated.
- Observe the sterility of the planting material. Work with rubber gloves disinfected with 1% sodium hydrochloride.
There are two ways to add mycelium:
- In accordance with the first method, the mass is formed in several layers, alternating the substrate with the planting material.
- The second method involves uniform mixing of the components:
- when using bags, shake them after filling;
- then the top is wrapped around the neck to achieve a snug fit of the substrate to the surface;
- 12 holes must be made on both sides, each with a diameter of 10 mm. Cover the neck with tape;
- the amount of mycelium should be 3-5% of the weight of the substrate. An increase in the mass of oyster mushrooms up to 7% is allowed;
- after packaging, the containers are placed in a place for germination.
Important! The number of fungi relative to the substrate must be at least 3%, otherwise there is a possibility of mold.
Video: Forming Mushroom Blocks
Mycelium care
To ensure a good harvest, it is necessary to observe temperature conditions, as well as maintain the required level of humidity.
Oyster mushroom growth is carried out in two stages:
- incubation;
- fruiting.
The first one lasts 14-18 days. During this time, the room must be kept at a temperature of + 24 ° C, humidity - 75–90%. There is no need for lighting and ventilation. After a few days, a white bloom can be seen on the surface of the substrate mass.
Important! Avoid overheating as this can cause mycelial scabs to develop. The presence of such a formation will lead to a decrease in yield. A crust can also appear due to planting an excessive amount of oyster mushrooms.
If an unpleasant odor emanates from the substrate mass with mycelium, moisture is released and the appearance of black, orange or green spots, then this indicates an infection with mold or bacteria. Such bags or boxes must be removed from the premises immediately.
The second stage of cultivation is fruiting. During this time, the temperature regime in the room is changed, ventilation and lighting are provided to the mushrooms. There are two strains of oyster mushrooms:
- shockless;
- shock.
For mushrooms of the first category, a temperature level of +20 ° C must be ensured. After 5 days, the indicator begins to decrease to + 15 ° C. This process is carried out gradually and lasts 5-6 days. Oyster mushrooms with a shock strain need a more significant decrease in temperature. During the first 2-3 days of fruiting, they should be within 4-5 ° C. Then the temperature is raised to + 12 ° C .. + 16 ° C and maintained at this level throughout the entire period.
At this time, the mushrooms need ventilation. They give off carbon dioxide, which must be removed. As a result of oxygen deficiency, the bodies of the fruits are deformed and lose their presentation. But excessive ventilation should also be avoided, dry air is especially harmful to fungi. Under its influence, small fruits dry out, caps of large oyster mushrooms are deformed.
When creating lighting, you need to focus on the size of the room. A 100 W light bulb is used in an area of 15–20 square meters. Lack of light leads to intensive development of the stem, while the fruiting body does not grow to the required size.
The humidity level should not fall below 70%. When growing a small amount of oyster mushrooms, they can be sprayed with a spray bottle. Direct moisture to fruiting bodies.
Extensive breeding of oyster mushrooms
Preparing stumps or logs
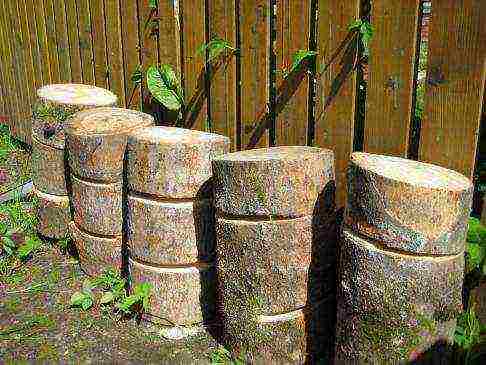
Stumps for growing oyster mushrooms
To implement the extensive method, wood species are used on which oyster mushrooms grow in nature: poplar, birch, aspen, beech, oak, hornbeam. The length of the logs should be 25-30 cm.
Important! Do not use wood with a diameter of less than 15 cm. This will negatively affect the yield.
The logs are placed in water, where they are soaked for a week. The wood should have a moisture content of 80–90%. Freshly cut logs do not need to be subjected to this procedure.
Sowing mycelium
Sowing is started at the end of winter or with the onset of spring. The logs are used to form vertical columns up to two meters high. A layer of grain mycelium 1–2 cm thick is applied to the upper end of each wood segment. The next log is placed on it, which is subjected to a similar treatment. One piece of wood will require 70-100 g of mycelium.
Video: instructions for sowing mycelium
Planting hemp in the ground
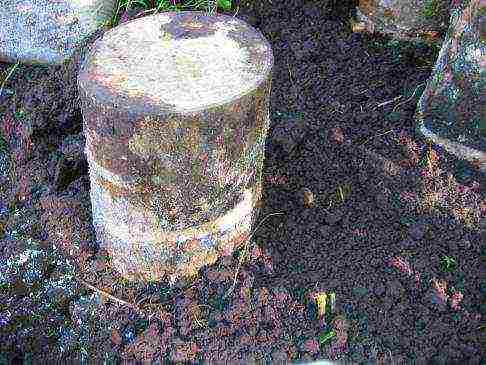
Planting an oyster mushroom stump in the ground
- In May, logs that have already been overgrown with mushrooms are placed in the soil. To do this, choose shaded places near the trees. If there is no suitable site, it can be created using awnings.
- Each log is buried 10-15 cm.
- The segments are arranged in rows. You need to keep a space of 50 cm between them.
Mushroom colony care
During the incubation period, the columns are covered with burlap or straw to maintain the required moisture level. For this purpose, it is not recommended to use a film material - it prevents the penetration of air, which is necessary for the development of fungi.
The wood will be overgrown with mushrooms within two months. In the room where the oyster mushroom logs are installed, the temperature should be at +10 ° C .. + 15 ° C. The air should be humidified, but water should be avoided on the wood. During fruiting, care involves moderate watering of the soil in dry weather.
Video: practical recommendations for caring for oyster mushrooms
Harvesting and storage
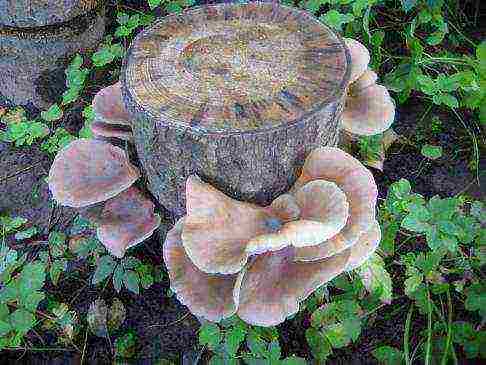
When using stumps, the yield is less abundant than when planting in bags
Oyster mushrooms bear fruit several times. With intensive cultivation, the first harvest is obtained in 10-14 days, it is 70% of the total amount. During the second fruiting, 20-25% are harvested, during the third - 5-10%. Oyster mushrooms can continue to yield crops, but their amount will be insignificant.
Important! In economic terms, it is advisable to collect mushrooms only during the first two fruiting.
Extensively grown mushrooms begin to harvest in August or early September. In the first year, approximately 600 g of oyster mushrooms are obtained from one log. Cuts of wood for the winter period are left in the same place. After a year, the number of mushrooms increases. One log gives 2–2.5 kg of oyster mushrooms. The most abundant harvest is obtained during the second and third years of cultivation.
Oyster mushrooms bear fruit in clusters. In the process of collecting, you need to cut them off completely, without leaving even small mushrooms. If the splice is damaged, they will not develop. For storage, use boxes, boxes or baskets.
Important! It is not recommended to repeatedly transfer mushrooms from one container to another, this will ruin their appearance.
Video: harvesting from tree stumps
The storage time depends on the temperature. At +2 ° C .. + 4 ° C oyster mushrooms will not lose their appearance and taste for two months. When you are in a room where the temperature reaches +7 ° C, this period is reduced to 1 week. And at room temperature, mushrooms are stored for no more than a day.
If you decide to grow oyster mushrooms not only for your own consumption, but also for organizing a business, you need to think about ways of implementation. You can sell products in several directions:
- One possible option is vegetable markets. Use a display stand to grab the attention of potential buyers.
- Another area of sale is catering establishments.Offer free product samples first. If the quality of the mushrooms meets the required level, you will not have to look for other marketing options.
- You can also sell oyster mushrooms to supermarkets and grocery stores. But be prepared to face significant competition here. You may have to lower prices for the product. But if the volume of sales is large, it will increase the profitability of the business, as well as justify the discounts.
Breeding oyster mushrooms does not require significant material costs and great efforts. Anyone can organize home production, even without experience in this area and special knowledge. By following the step-by-step instructions, you will get a high-quality harvest, which will allow you to organize a profitable business.
Oyster mushrooms are one of the most unpretentious mushrooms for breeding in the household, and in the west, for their delicate and sophisticated taste, they are called "oyster mushrooms".
The cultivation of the oyster mushroom artificially began for the first time in Germany, even under Hitler, and on his initiative - he loved this mushroom very much and wanted to have it on his table all year round. Gradually, the technology passed to the people and since then many enthusiasts are actively breeding them on their own, we will talk about how to do it correctly and what is needed to grow oyster mushrooms in the article.
Where is the best place to grow oyster mushrooms
Unlike honey agarics, oyster mushrooms cannot be grown in a residential area. Fungi require constant very high humidity and moderate air temperatures. It is harmful for the human body to constantly contact with the environment that these mushrooms need. Damp air and substances that secrete myceliums can provoke respiratory diseases, allergies, and coughs.
The most ideal conditions for growing oyster mushrooms at home are basements, cellars, sheds. Less commonly, people grow mushrooms on the streets under greenhouses, but this is a more time-consuming process.
Oyster mushroom growing technology
The method of breeding oyster mushrooms in artificial conditions is called intensive. There is also an extensive technology when mushrooms are grown in natural, natural conditions, but we will not talk about it, since the article is devoted specifically to home breeding.
In addition, the extensive method yields a crop only once a year and is more suitable as a mushroom hobby.
Growing oyster mushrooms: room preparation
The territory allotted for the mycelium does not need windows, although their presence will not hurt. Indoors, you will need to create uniform soft lighting.
Since mold and other microorganisms often appear in dampness, the area must be pre-treated. For this, a 4-5% solution of bleach is used, and with the help of a spray bottle they cover all the walls, floor, ceiling with it, having previously removed all dust and dirt. The room should be kept closed for 2 days, after which it is ventilated.
For convenience, it is best to use racks on which briquettes with myceliums will be located.
 Growing oyster mushrooms at home
Microclimate
Oyster mushrooms can exist at temperatures not higher than + 22ºC and not lower than +10 ºC.
It will withstand short-term temperature fluctuations that go beyond the specified limits. But if the level of heat does not correspond to these indicators for a long time, then you can not count on the harvest.
The required air humidity for growing oyster mushrooms at home is 85-95%.
There should also be good ventilation in the room. In the basement or shed set aside for the cultivation of this mushroom, no other plants should be kept and it is advisable that no things be stored there.
At the slightest detection of mold or pests in the room, disinfection must be done. To do this, you can call special services or process the affected areas yourself.
If the room does not initially meet the listed conditions, then you will have to take care of creating an ideal microclimate: insulate, dry or, conversely, humidify the area, install ventilation, light. This, of course, will entail investment.
Many people wonder how to grow oyster mushrooms in the basement? In fact, there is no difference in the conditions for a basement, cellar or barn. Everything should be observed exactly as described above for any type of room.
Seed material
The mycelium is used as a seed for oyster mushroom withdrawal. You can prepare it yourself (it is quite laborious), below we will describe the technology. Many people prefer not to bother and buy ready-made material: it is sold by large enterprises engaged in large-scale cultivation of oyster mushrooms and the production of mushroom products.
How to properly grow oyster mushroom mycelium
Often, professional mushroom pickers are already engaged in the preparation of the mycelium with their own hands. Beginners may not be able to seed the first time. The technology requires not only skill, but also certain materials and conditions.
You will need from tools:
- Tweezers.
- Test tubes.
- Alcohol lamp.
- Thermometer.
- Cotton wool.
Ingredients:
- Hydrogen peroxide.
- Agar-agar.
- Carrots, oats or potatoes (per 1 kg).
How to cook:
- Before starting the procedure, all instruments are sterilized over an alcohol lamp.
- The caps of mature oyster mushrooms are prepared in advance, which will serve as the uterine mycelium. All caps must be rinsed in peroxide solution and broken into small pieces, folded into sterile dishes.
- Potatoes, oats or carrots should be finely chopped.
- Add 20 g of agar-agar powder and water (half a liter) to the resulting mass.
- The mass is put on a slow fire and boiled until desolation, about an hour.
- After that, the mixture must be filtered from small pieces.
- The resulting liquid is poured into test tubes and set in an inclined position.
- As soon as the mass in the test tubes has cooled to + 10ºC (a thermometer is used here), pieces of mushroom caps are laid out in them.
- The cork is tightly closed with a piece of cotton wool (you can use corks after disinfecting them over an alcohol lamp).
The tubes are removed in a dark place, where a constant temperature of + 22-24 ºC is maintained. After 14 days, a small mycelium forms inside the containers, all that remains to be done is to transplant it into the substrate.
As it becomes clear, growing mushrooms on your own in this way is a very laborious business, requiring absolutely sterile conditions. If even one microbe gets into the test tube, everything can go down the drain. Therefore, it is much easier to buy ready-made mycelium, it is not so expensive.
 Oyster mushroom mycelium
If in your environment someone is already breeding oyster mushrooms, then you can ask for seedlings from them.
The mycelium can be stored for up to six months if it is kept in the refrigerator or in any other cool place at a temperature of + 4-5ºC.
Preparing a substrate for growing oyster mushrooms
You can also buy or assemble the substrate yourself.
To compose a substrate at home, it is used in a mixture:
- Hay.
- Sunflower husk (buckwheat) or chopped dry corn cobs.
It is better not to use sawdust for growing oyster mushrooms. The substrate must be clean, free from rot, mold and other damage. In any case, it must be processed.
Substrate disinfection
In industrial plants, the substrate is treated with steam, but at home it is difficult to create a high temperature steam pressure and maintain it for 2 hours.
For disinfection at home, proceed as follows:
- The substrate is placed in a large container.
- Pour in water.
- Simmer for an hour.
- The water is drained, the mass is allowed to cool, it is squeezed out and slightly dried.
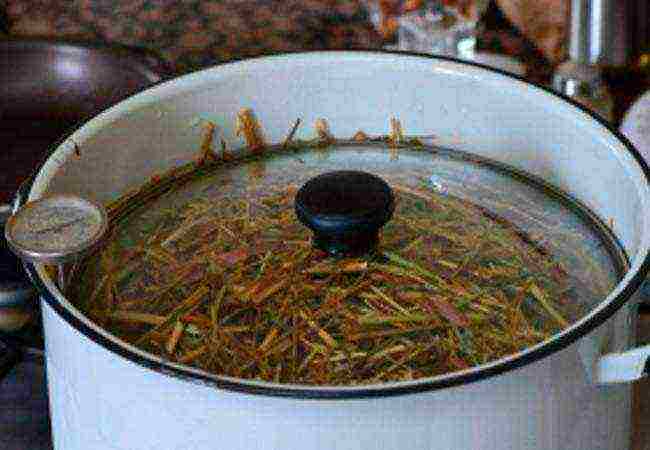 Preparing a substrate for growing oyster mushrooms
It is simply necessary to process the material, otherwise the microorganisms that are necessarily present in it, in conditions of heat and moisture, will begin to multiply and destroy the delicate mushroom.
Oyster mushrooms are grown in artificial conditions in dense polyethylene bags with a capacity of 5-6 kg. This will be discussed further.
How to grow bagged oyster mushrooms
For mycelium seedlings, the substrate must be moist. The bags should also be pre-treated (rinsed in alcohol or chlorinated solution).
When everything is ready, they begin to lay the substrate and mycelium into the bag, alternating them in layers. The bottom and last top layers should be made up of the substrate. The neck of the bags is tightly tied.
The bags are stacked on racks at a short distance from each other. If there are no shelves, then you can stack the packages one on top of the other.
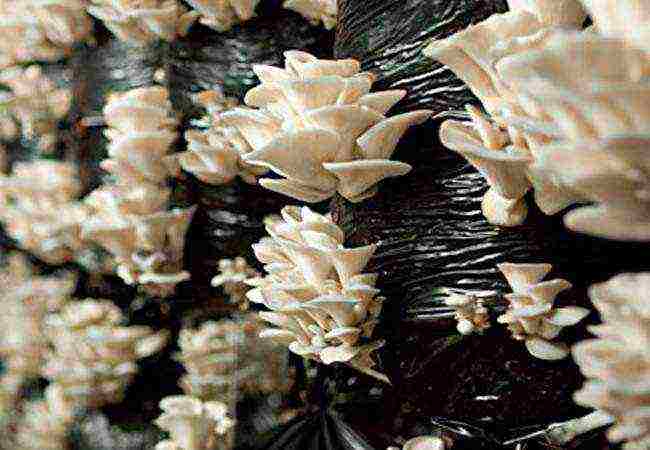 How to grow bagged oyster mushrooms
On the sides, where the bags do not come into contact with anything, small slots (up to 12 holes per 1 bag) are desired with a clean, processed blade or knife, it is most convenient to make them in the form of a cross.
Incubation
During the incubation period, it is very important to create the right conditions for the briquettes.
The room temperature should be within + 24-28 ºC, and the humidity should be about 80%.
The incubation period averages 18-21 days. By this time, the strings (hyphae) of the mushrooms should already come out of the holes and form a dense mass. All this time, the room does not need to be illuminated, and it is also not recommended to ventilate it. To avoid the formation of mold in a stuffy room, it must be cleaned every day with bleach.
Fruiting oyster mushrooms at home
As soon as the incubation period is over, the conditions change: the temperature in the basement decreases, the humidity increases to 90-100%, and the lamps are turned on daily (at least 5 W per sq. M.) For 8-10 hours. At this stage, it is time to start watering the mushrooms (1-2 times a day), for this they use irrigation systems or conventional spray guns, spraying water over the mushroom caps by hand. In no case should the water be cold, room temperature is ideal. The room is well ventilated every day.
After about a week, fleshy fruits will appear on the bags. Once the mushrooms have reached a large size (usually the ripening period is 2 weeks), you can harvest.
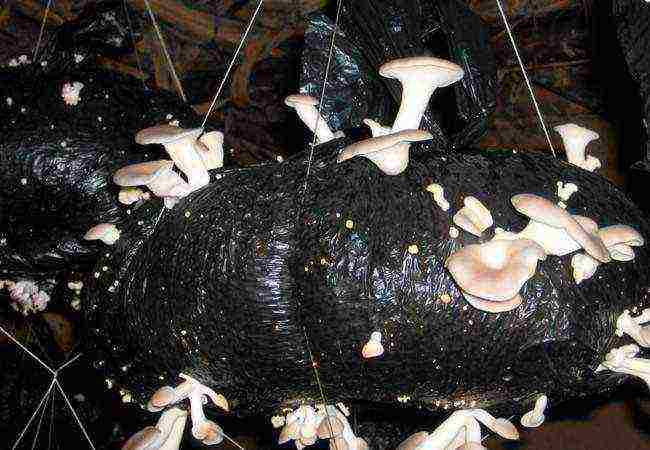 Fruiting oyster mushrooms at home
The higher the room temperature, the lighter the mushroom cap will be. Its color also depends on the light intensity. The mushroom turns brown under bright light. The taste of oyster mushrooms does not change in any way.
It is recommended not to cut off the mushroom legs, but simply twist them so as not to introduce infection into the substrate. Hands should be in sterile gloves. If you intend to cut the fruit with a knife, then treat it with any disinfectant.
After the first harvest, the bags continue to be treated in the same way. After a couple of weeks, you can wait for the second shoot. Up to 4 harvests are obtained from just one substrate bookmark. Then a new laying of the substrate and mycelium is made.
That, perhaps, is the whole technology of how to grow oyster mushrooms at home in basements, sheds or cellars. As you can see, this process is not so simple. For the lazier mushroom pickers, there is an easier option - to buy ready-made sown blocks at the enterprise, they are also given full care instructions. But in any case, you will have to create rooms with the right microclimate.
Finally
Not everyone will be able to master the cultivation of oyster mushrooms in artificial conditions. Although the mushrooms themselves are not at all capricious, but only on condition that they grow in the necessary conditions. Nevertheless, it is an excellent product for making pickles, salads, delicious dishes. And if you grow oyster mushrooms for sale, then you can earn some good money. If you are new to this business and are just planning to create a mycelium, be sure to study all the subtleties so that the first harvest is successful.
It will be about tasty, healthy, unpretentious mushrooms, how to grow oyster mushrooms at home, about all stages of this process. After all, we all eat mushrooms with pleasure, we love to wander through the forest, collecting them, but if there are suitable conditions, interest, a great desire, then it is quite possible to grow mushrooms ourselves. It is worth noting the amazing adaptability of oyster mushrooms: they can grow on stumps, on tyrsa (sawdust), even on paper. They don't need soil. They are characterized by fast fruiting - 1-1.5 months.
Choosing a room and preparing a substrate
To grow oyster mushrooms, it is necessary to equip a non-residential place in advance. For these purposes, basements, garages (in which there are no cars), cellars, sheds or rooms specially equipped for these purposes are excellent. Before starting any preparatory work, it is necessary to decontaminate the place where we will grow oyster mushrooms.
A lime solution (4%) will do this well. Floor, walls, ceiling - all existing surfaces must be thoroughly disinfected, and then the room must be closed for a couple of days. After the specified time has elapsed, you need to open the doors wide open and thoroughly ventilate this place until the smell of lime completely disappears.
The technology of growing oyster mushrooms at home implies the choice of the material most suitable for these purposes. The substrate creates optimal conditions for growth: it can be wood chips, corn stalks, buckwheat or sunflower husks, and cereal stalks. Large fragments of the substrate on which we will grow oyster mushrooms should be finely chopped.
Any material you choose needs processing - pasteurization:
- Fill the substrate with warm water, not hotter +23 .. + 25 ° С, holding time - 20-30 minutes. At the same time, stir the mixture in a container, as if washing it from dirt.
- We drain the dirty water, squeeze out the material and re-fill it with hot water (+80 .. + 90 ° С) and press it down with a heavy object (under oppression). We leave the substrate like this for 6-7 hours, after which we drain the water and finally squeeze it out.
- To increase the productivity of the material and subsequent fruiting, it is necessary to saturate the substrate with active elements. Superphosphate, gypsum, limestone and urea are taken in a proportion of 0.5%: 2%: 2%: 0.5%.
- During the "fertilization" of the substrate with additives, its moisture content should be about 70% - this will allow the chemical elements to stay inside the mixture, not to leak out with water.
After the room is prepared and disinfected, and the substrate is pasteurized, it is the turn of laying the mycelium into the mixture. You can buy oyster mushroom mycelium in the mycological laboratory. You can choose the best quality product from the wide selection of commercial varieties of mushrooms. Specialized online stores are also at your service.
Pre-calculate the volumes - for sowing a 10-kilogram block, you will need 200-250 g of oyster mushroom mycelium (if it is of imported origin) or 100 g more if the raw material is domestic.
↑ to the table of contents ↑ How to grow oyster mushrooms at home step by step
The mycelium is added to the substrate at the rate of 300-500 g per 10 kg of the mixture. In this case, it is necessary to ensure that the temperature of the material at the time of adding the mycelium does not exceed + 30 ° C (so as not to ruin the raw material).
This is followed by the preparation of bags for laying the mixture and oyster mushroom mycelium. For these purposes, it is very convenient to use dense plastic bags and bags. Sizes 40 × 60 cm and 50 × 100 cm are the most optimal. We lay out the resulting composition in bags and carefully twist them, while there should be no air inside.
We make holes in the blocks with a knife. The incisions should be located arbitrarily - at a distance of 10-15 cm from one another. After the performed manipulations, the bags are stacked on top of each other (2-4 pieces each) or suspended on special hooks pre-installed in the ceiling or walls.There should be a distance between the bags to ensure comfortable air circulation.
Also, for growing oyster mushrooms, it is very convenient to use special wooden stakes on a stable basis - blocks with a substrate are simply strung on them in several pieces.
Growing oyster mushrooms at home in bags involves maintaining a certain temperature and light conditions. Thus, for full germination, mushrooms require a temperature level of about +18 .. + 24 ° С along with high humidity (90-95%).
Sometimes, for additional humidification, buckets of water are placed between the rows of bags, and the necessary air exchange is maintained with the help of fans. Ventilation is important in this case - the excessive release of carbon dioxide inhibits the growth of oyster mushrooms. No light is needed during the incubation period. Make sure that flies do not enter the room at all stages of growing and fruiting.
Growing oyster mushrooms at home includes an incubation period of approximately 14-17 days.
In the first days, the temperature inside the blocks rises, make sure that it does not exceed the level of + 30 ° С. If the temperature is about to reach a critical level, direct the running fan towards the bags. As mentioned above, such an indicator (elevated temperature) is detrimental to the mycelium. At the end of the incubation period, the blocks are covered with a white bloom - this is the beginning of germination of oyster mushrooms.
Growing at this stage involves maintaining certain conditions indoors:
- humidity of air - at least 80%, and preferably up to 90-95%;
- air temperature at the level of +12 .. + 17 ° С;
- the required 8-hour lighting is 100-170 lux (as on a cloudy day), ordinary day lamps will do;
- frequent ventilation.
It is possible to maintain humidity by sprinkling the walls and floor with a spray bottle, but the water should not get onto the blocks. This fruiting period lasts about 2 weeks; by the end of the term, the caps of the oyster mushrooms become quite large.
It's harvest time. In this case, you do not need to cut off the myceliums with a knife, but carefully twist them out of the bag with the substrate. After the first removal of the oyster mushroom, you should thoroughly ventilate the room and wait for the second round of fruiting.
The first harvest is the largest, the second is slightly smaller, the third is less than the second - that is, the yield waves follow each other in decreasing order.
The rest period between the "waves" is 8-10 days, and the "waves" themselves can be 4 or even 6.
The substrate, which has already served its term, becomes an excellent fertilizer for summer cottages.
↑ to the content ↑ How to grow oyster mushrooms at home on stumps
An excellent option for owners of summer cottages is the method of growing oyster mushrooms on stumps - this method does not require excessive efforts. For these purposes, it is better to choose freshly cut hemp, but you can also prepare it in advance. They should be placed in shaded areas where there is no access to sunlight, for example, under spreading tree crowns or under vineyards.
Stumps need to be soaked in water and kept for about 3-4 days, older specimens - a week. Then, using a drill (20-25 mm), you need to drill 8-10 holes 7-10 cm deep. These depressions are then filled with oyster mushroom mycelium, the top is covered with clay or clogged with moss.
The stumps must be constantly wet, for this they can be covered with cling film and placed in the basement for a month and a half. When the stumps become overgrown with mycelium (in appearance something like a white film), they can be taken out into the air, placed in shady places.
Studying the possibilities and options for ways to grow oyster mushroom at home, it should be recognized that this method does not require excessive efforts, it is ideal for the owners of summer cottages.
Important information - a prerequisite is the use of respirators and protective masks when working with mycelium, as well as during fruiting! If it enters the respiratory tract, fungal spores can seriously harm your health.
This will require commitment and patience from you. Mushroom growing is truly a fun and rewarding activity. The topic of how to grow oyster mushrooms at home finds more and more fans among summer residents and enthusiastic gardeners. In addition to the presence of this tasty and rich product on the dinner table, the cultivation of oyster mushrooms is an interesting and profitable business. Try and grow oyster mushroom at home - a rich harvest for six months will undoubtedly please you.
